SteamVR/Environments/Advanced Interaction
Advanced VR Interaction’s Using the point_value_remapper Entity
In this tutorial we will cover how to use the Source 2 entity point_value_remapper to add an interactable lever to your map.
The tutorial will aim to show you how to make a functioning lever that can be grabbed with your VR controller and give you the knowledge to design your own types of interactions by making use of this entity.
The point_value_remapper entity however, isn't restricted to levers, it can be used to create many different types of interactions and interactable objects.
The point value remapper is a versatile and complex entity. In its most basic setup, it tracks the position of your VR controller in world-space, uses your controllers movement between two points and remaps this to a linear value. This value is used to control the playback of an animation on a specified output entity such as a prop_dynamic.
point_value_remapper to control interactables and sync animations on props, you are not limited to use this entity in just this way. You could use the remapper to control any other type of movement you wish to track and remap.
Repairing Robots
The point_value_remapper entity is used extensively in Valve’s Robot Repair VR experience included as part of “The Lab”.
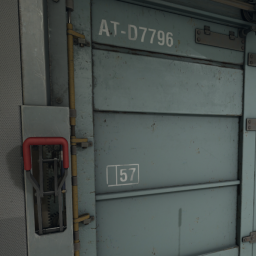
During Robot Repair when the player is asked to open the door and let Atlas through, the player has to interact with and pull down a big red lever. This lever’s functionality is created through the use of a point_value_remapper entity.
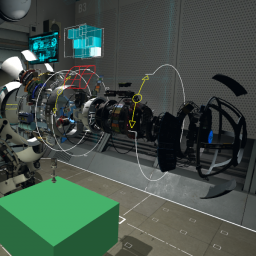
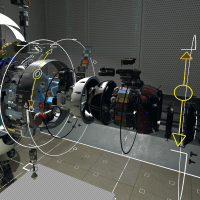
Another example of this entity in use during Robot Repair is when the player receives instructions to expose Atlas’s innards by removing his faceplate.
This motion of pulling away his faceplate uses the point_value_remapper to track the players hand moving away from Atlas’s face.
Other examples of the point_value_remapper in Robot Repair are;
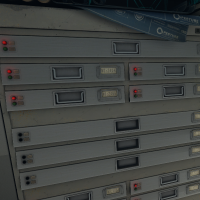
- The Pocket Universe drawers that contain Bendies
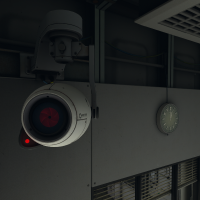
- The Aperture Science CCTV camera
- The rotation of Atlas’s exposed innards
Types of Tracked Motion
To simplify explaining this entity, we are discussing its functionality as two separate types of tracked motion.
- Linear Motion
The simplest application of this entity is to control linear motion. Linear motion is the movement of an object between two defined points. An easy way to understand this concept is to imagine the motion involved when pressing down a button. A typical mechanical (non touchscreen) button goes from fully unpressed to fully pressed.
As previously mentioned, this linear movement consists of two points. The first point we would want to track motion from is the location of the button fully unpressed. The second position would be the resting place of the button when it is fully pressed. The physical point to point movement your hand makes when performing this motion is captured and remapped by the entity to a percentage 0 - 1, the entity will then use this percentage to sync an animation’s playback to the movement of your controller. As your controller moves from the point representing the unpressed button to the point representing the fully pressed button, the entity will in parallel control the playback of animation on a specified prop. This makes the prop’s animation visually match your physical pressing of the button.
point_value_remapper entity to “Player Shoot Position”.
- Circular Motion
This entity also has the ability to simulate circular motion. Circular motion is the movement of one point around the axis of another. One way of visualising this is to imagine the circular motion you would make to turn the handle of a music box. The central point (or axis) is stationary and your circular hand action enables the handle to rotate around it.
To setup the point value remapper to track circular type motion, an axis must be defined that you wish to orbit around. To do this you first create a point at the objects desired center of rotation. Secondly to complete the creation of the axis, you place the second point away from the first to designate a direction. The vector you have just created will be the axis in which rotational motion is tracked.
point_value_remapper entity to “Player Shoot Position around Axis”.
Getting Started
Follow these instructions to setup the entities required to make a functional point value remapper: The first thing we need to do is create a prop whos animations will be controlled by the point_value_remapper entity. Its useful to place this prop first as its position will be useful when positioning the following entities.
- Place a
prop_dynamicin your level - Name the prop door_prop
- Set the prop_dynamic’s world model to aperture/models/door_robot_entrance.vmdl
- Set the default animation to door_open_combined
- Tick the box hold animation so that the animation doesn't auto loop
Placing the Interaction Targets
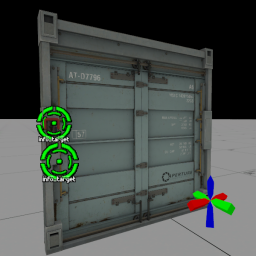
Info_target entities are used to represent the location of the two points our point_value_remapper will track.
We need to create one point for where controller tracking will start and one for where we want it to end.
In this case we want our points to be at the start and finish of the levers animation, the lever animates at a 90 degrees right angle.
- Place one
Info_targetat the top point of our doors lever (the position the lever is in by default) - Name this point lever_start_position
- Place the second
Info_targetwhere the lever will end up once the animation finishes. - Name this point lever_end_position
Info_target you can preview the animation in Hammer by pressing the animation in editor toggle……… this will play the animation making it easier to position the info_target at the correct location.
Creating the Point Value Remapper
Now we need to create the actual point_value_remapper entity that will control our interaction and sync our props animation.
- Place a
point_value_remapperentity in your map. - Input Position should be set to Player Shoot Position ( for linear motion )
- Change remap line start to the name of our first info_target
- Change remap line end to the name of our second info_target
- Set Mat Interp Change Per Second to 2.0
- Set Disengage Max Distance to 20.0
- Set Engage Distance to 15.0
- Set Require Use Key to yes
- Output Type should be set to Animation Cycle
- Set Output Entity to the name of our door prop
- Set Momentum Type to Spring Toward Snap Value
- Set Momentum Modifier to 0.2
- If you wish you can also assign your own engage and Disengage sounds
- Make sure the animations playback rate is set to 0 fps
Compile and test your map, you should now be able to successfully open the door.
Additional Parameters
Below is a description of the different options that are available to edit in the point_value_remapper entities object properties.
- Haptics Type
- Currently this option only allows you to enable haptic pulses or disable haptics completely.
- Momentum Type
- 1 : Friction
- [Todo]
- 2 : Spring Toward Snap Value
- Once you’ve started the interaction the animation will continue to move towards the specified Snap Value, even once input has been disengaged.
- 3 : Spring Away From Snap Value
- The opposite of Spring towards Snap Value, this momentum type will start to move your animation backwards away from the Snap Value.
- Momentum Modifier
How much additional momentum to add to existing momentum.
- Snap Value
- A snap value can be set to snap the animation to a desired point whilst in motion, a momentum type that supports snapping must be enabled.
- Ratchet Type
- Absolute
- [Todo]
- Each Engauge
- [Todo]
- Input Offset
- [Todo]
