Normal Map Creation in Photoshop or Paint Shop Pro
Photoshop (built-in)
Newer versions of ![]() Adobe Photoshop (up to 22.4) includes Generate Normal Map feature. It is located in "Filters > 3D > Generate Normal Map...".
Adobe Photoshop (up to 22.4) includes Generate Normal Map feature. It is located in "Filters > 3D > Generate Normal Map...".
When clicking on it, a window will pop-up. Fiddle with the settings until you get something that you feel will be bumpy enough for your texture. The greater the range of colors, the greater the range of angles on the surface. A very flat surface will look that medium blue color all over.
In some cases, you may also need to invert height to make sure the normal mapping looks correct.
Once you are done, click OK.
NVIDIA Texture Tools
.DDS file. First, go to "Save As...", then save the file as "DDS - NVIDIA Texture Tools Exporter". After that, a NVIDIA texture tools exporter window will open. Select Image Type and set it to Normal Map (Tangent or Object Space), then made some adjustments below.Once you are done, click "OK". You can either drop the .DDS file to VTFEdit or convert
.DDS file back to .TGA or .PNG.Alternatively, you can also create normal map on Adobe Photoshop or Paint Shop Pro, using NVIDIA's normal map tools, available here (requires Photoshop CC 14.0/2013 or newer). For previous version of NVIDIA normal map plugin (Photoshop 5 to CS6), click here.
To use them, open a copy of the texture and apply the Normal Map filter.
Fiddle with the settings until you get something that you feel will be bumpy enough for your texture. The greater the range of colors, the greater the range of angles on the surface. A very flat surface will look that medium blue color all over.
If you want to have more control over it, change the image to grayscale and fiddle with brightness and contrast to make certain details stand out before applying the filter. Be sure to change the texture back to RGB mode, or else the normal map tool will not work.
Do this step multiple times to get different details to stand out, and then put the images together in layers with the blend mode set to overlay.
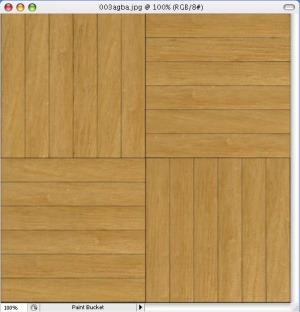
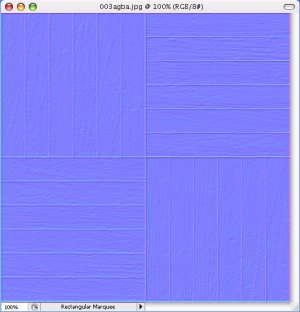
Note that due to the way the normal map is generated, adjustments may be needed to the actual normal map image. For instance, the above normal map includes the grain of the wood. While this would be great for an old, rugged wood material, the image (apparently) being used looks more like it is a smooth, new wood floor. Since a the wood strips in a real wood floor would be glossed over, the in-game material wouldn't accurately represent the desired flooring because the grain would stand out too much.
For this particular texture and map, merely adjusting the main surface of each strip into a smooth, flat surface would solve this problem nicely. This could be done just by painting or blending the color 128,128,255 (#8080ff) into the "interior" of each wood strip. You may still wish to leave a few minor "defects" in the surface to provide visual interest. When finished, the normal map will show up in-game as a very clean and smooth wood floor, with obvious grooves between each piece that makes up the wood floor overall.


