Left 4 Dead 2/Scripting/Expanded Mutation System/GnomeHunter tutorial 3
Creating the Gnome Entity Group and Spawn Point
Now we have players spawning at their start positions- But we need a gnome in order to have a gnome hunt! To achieve this we must create the gnome object itself and a spawn point to indicate where the gnome should be placed at the beginning of the game.
First, a word about how entities and entity groups are handled in Mutations:
The first thing you need to do is create the gnome spawn point. You will use the Entity Placement Tool to add an info_item_position entity at the location you wish to spawn the gnome.
We have already used the Entity Placement Tool to place four alternative spawn points for the Survivors in C5M2_Park. We want to keep those four entities and add our Gnome spawn point, so instead of selecting File->New in the Entity Placement Tool, you should select File->Open... and select the file \left4dead2\maps\c5m2_park_entities_gnomehunter.txt.
For the purposes of this tutorial put the gnome info_item_position entity somewhere near the start of the c5m2_park map. Name the entity 'gnome_spawn' . (the _spawn suffix on your entity will come in handy later when we spawn the gnome - more on this naming convention later). No need to worry about the Entity Group field, and make sure that Auto-Unique Targetname is NOT checked.
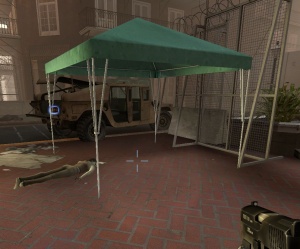
This looks like a good gnome spawn spot! The coordinates under the crosshair are -3730 -2370 -371.
We want the gnome object to be an entity group that we spawn from VScript. An entity group is a file generated from a hammer .vmf that can be loaded and spawned by VScript.
Before we can create the entity group we need to create the gnome source vmf:
- Launch the Hammer World Editor from the Left 4 Dead 2 Authoring Tools
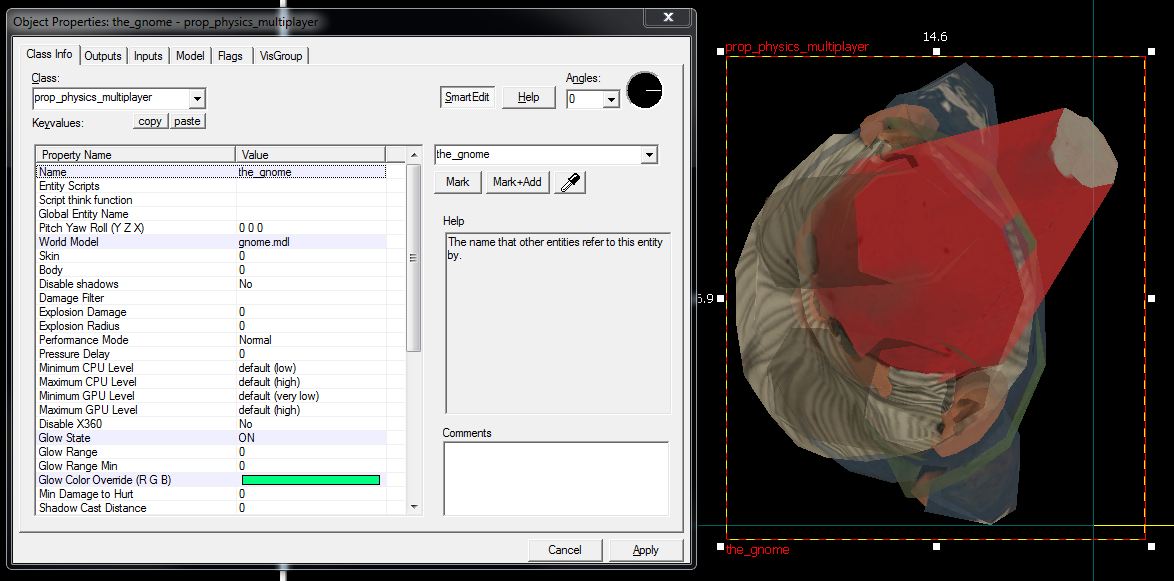
- Create a new map in Hammer and place a prop_physics_multiplayer entity at the origin. This will become our gnome! To set the gnome up the way we want, configure the entity in Hammer as follows:
- Ensure that the prop's Name is "the_gnome"
- Ensure that the prop's World Model is the gnome (props_junk\gnome.mdl)
- Find the Glow State field and choose ON
- Select the Glow Color Override and pick a nice, toothpasty green color
- Click the Flags tab and un-check the Generate Output on +USE flag.
- After applying the changes, position the gnome so the "feet" of the gnome model is on the ground plane.
- Save the file as gnomehunter_gnome.vmf into the content\left4dead2\maps\instance\entitygroups folder.
- Configure Hammer to compile entity groups
- Press F9 to bring up the Hammer compile options menu and select and run the configuration Export Entity Group on your map. That configuration will run the 'export_entity_group.pl' perl script in the bin folder on your .vmf.
This should create a gnomehunter_gnome_group.nut entity group file in:
<Your Steam folder>\steamapps\common\Left 4 Dead2\left4dead2\scripts\vscripts\entitygroups
Now that we have the Gnome entity group file we can spawn the actual Gnome entity from VScript. We do this in two steps. Firstly we provide a table containing information about the entity groups we wish to spawn. Secondly, we pick an appropriate time in our script code to actually spawn the entities described in the table.
The Mutation System will automatically look for a table titled ModeSpawns on startup so add one to your gnomehunter.nut file and add an entry for your gnome entity group:
ModeSpawns<-
[
     ["GnomehunterGnome", "gnome_spawn", "gnomehunter_gnome_group", SPAWN_FLAGS.SPAWN]
]
The entries in the ModeSpawns table are used to tell your game mode four things:
- group name - "GnomehunterGnome" is the name of the entity group exported from hammer (as it appears in the group.nut file). This name is automatically synthesized from the .vmf filename, which is "gnomehunter_gnome".
- spawn location - "gnome_spawn" is the the name of the info_item_position to spawn your object
- file to include - "gnomehunter_gnome_group" is the name of the .nut file on disk
- spawn flags - SPAWN_FLAGS.SPAWN indicates that the object is to be spawned on map load
Spawning Your Gnome
Now that we have the Gnome entity group described in our ModeSpawns table, there are several ways we could spawn it into the world. However, one advantage of naming our table ModeSpawns (or, if we're working on a Map, MapSpawns) is that the entries in the table are automatically precached as part of the Precache phase, and then automatically spawned when OnGameplayStart() is called.
ProTip: If you rather not work that way - you can create your own Spawn Table (MySpawns or FancyStuff or whatever) - and then write a "function Precache()" where you EntSpawn_DoIncludes( MySpawns ) and then in a "function OnGameplayStart()" you can go ahead and EntSpawn_DoTheSpawns( MySpawns ). You also can get individual EntityGroups of your table and specifically spawn them, which we will briefly cover in the appendix.
We only have one object in the table at the moment (the gnome) so spawning the entire table means just spawning the gnome. As we add objects to the table they'll automatically spawn and start showing up on their spawn positions.
And that's it - load your Mutation and you should now see your gnome spawned in the map!

