Left 4 Dead 2/Scripting/Expanded Mutation System/Creating a Simple Mutation PlayerSpawns
Using the Entity Placement Tool
In this tutorial you will learn how to place entities into a map using a tool called the Entity Placement Tool. This tool will allow you to navigate a map within the game engine and place entities in the world that will be used by your Mutation.
In this particular example we will be working in the map c3m3_shantytown. We'll add some entities to mark positions that we will teleport the Survivors to when the map loads. Using this method we can have the Survivors start the game located someplace other than the safe room.
- NOTE - If you prefer, you can always create and/or edit the entity text file by hand. It's just text! Editing the file allows you to quickly iterate by always being in the game engine and a simple map load will let you see your changes.
While the tool is not required, it will make your life easier when picking these locations. Alternatively, you could navigate to the points in the map where you would like to spawn and use the console command getpos_exact which will print your player XYZ position to the console. Then you can copy the coordinates out of the console and manually add them to an entity block in your .txt file.
If you are adding a small number of entities you may find that hand creating and editing the txt file is easier than using the Entity Placement Tool. In cases where you want to drop dozens of entities in a map the Entity Placement Tool might make the job easier. Feel free to use whichever method you prefer.
The results of this tutorial can be found in: Steam\steamapps\common\left 4 dead 2\left4dead2\maps\c3m3_shantytown_entities_simple.txt. It's up to you if you'd like to paste the entity definitions into your txt file or use the entity placement tool to create them.
"entity"
{
	"classname" "info_item_position"
	"targetname" "playerstart_001"
	"filename" ""
	"origin" "-456.917388916 -3760.1437988281 93.4595184326"
	"group" 0
	"rarity" 0
	"nameindex" 1
}
"entity"
{
	"classname" "info_item_position"
	"targetname" "playerstart_002"
	"filename" ""
	"origin" "-553.5638427734 -3763.0249023438 92.03125"
	"group" 0
	"rarity" 0
	"nameindex" 2
}
"entity"
{
	"classname" "info_item_position"
	"targetname" "playerstart_003"
	"filename" ""
	"origin" "-546.7163696289 -3667.244140625 92.03125"
	"group" 0
	"rarity" 0
	"nameindex" 3
}
"entity"
{
	"classname" "info_item_position"
	"targetname" "playerstart_004"
	"filename" ""
	"origin" "-437.9277954102 -3599.2248535156 68.6520996094"
	"group" 0
	"rarity" 0
	"nameindex" 4
}
NOTE: The entity definitions above contain a key called "nameindex". Providing that key is optional - feel free to leave it out if you are hand creating your entity definitions.
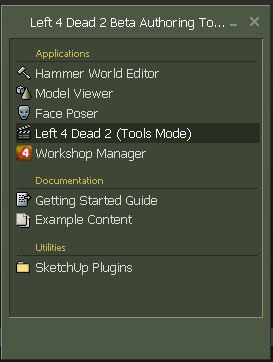
To proceed with using the Entity Placement Tool you'll need to launch the game using the Left4Dead2 Authoring Tools which you should have downloaded earlier. You'll find these in your Steam Library under TOOLS. Find and launch Left4Dead2 Authoring Tools. A little window will pop up with some options:
Double-click Left 4 Dead 2 (Tools Mode) to launch the game with tools enabled.
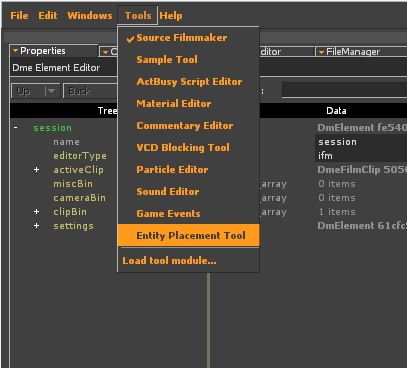
After the game loads, select the Entity Placement Tool from the Tools menu:
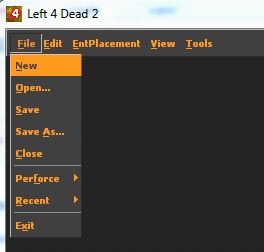
Once you are in the Placement Tool select File -> New
Browse to the BSP for our game mode: C3M3_shantytown

After the BSP loads, the Placement Tool will create a default working file named C3M3_shantytown_entities.txt. We do not want to work in the default file but one for the Mutation we're building. In the File menu, select Save As and save the file in the same folder that the BSP was loaded from. As for filename, use the format <map name> + <mutation name>.txt:
C3M3_shantytown_entities_simple.txt
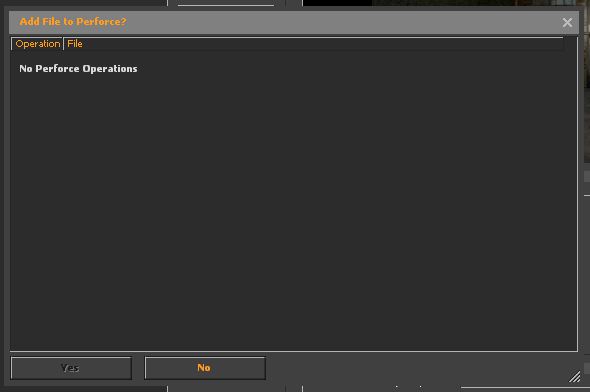
After the file saves, the tool may ask you "Add File To Perforce?"
Click No.
Placing player start entities
For this tutorial we're going to place the player start entities in the shanty town area near the crescendo event. Press F10 to switch to the engine viewport. It may be useful to remove the other survivors during editing. You can do so with this command (NOTE: in order to execute that command you must have sv_cheats 1 set):
nb_delete_all
You may also want to stop the director from spawning new infected with this command:
director_stop
Navigate to the area. Or you can set your player position directly with this command:
setpos -449.762451 -3591.355713 112.209015;setang 13.397890 -101.499969 -0.000109
Next, switch back to tool mode [f10] and create a template for the new entities you are about to create. For this you'll be working in the Template Properties dialog in the lower right of the tools screen. You'll need to check the Use Template flag in the template properties, check Auto-Unique Targetnames (this will add a unique number to newly created entity names), name your target entity playerstart, and finally ensure the box for Snap To Surface is checked. This way the tool will make sure that the entities you place are actually placed on the ground.
Entities that are created will now use the properties in the template. Click on Create Nodes in the Entity Report dialog, which is near the top-left of the tool window:
You will now be able to place entities in the world. You can move using your usual keyboard commands and use the mouse to look around.
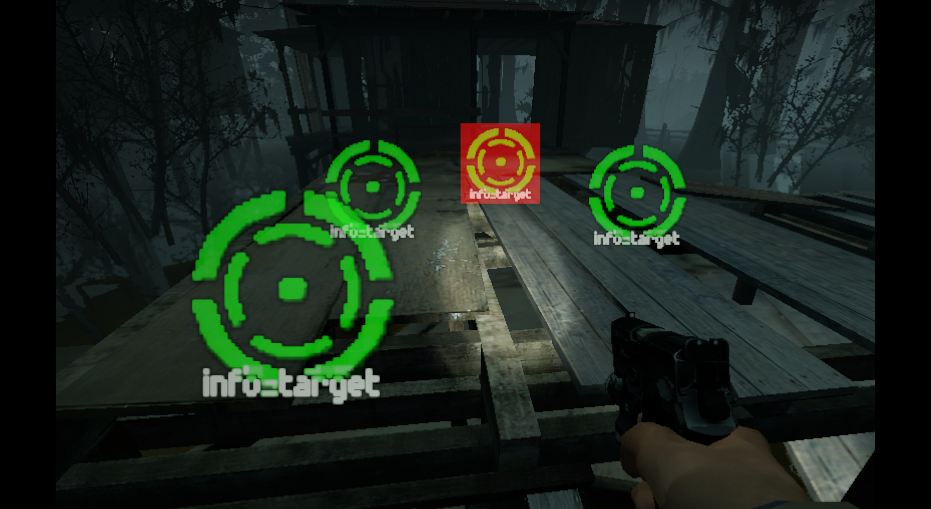
Place four player start entities (Left click to place - but make sure to space them out a bit!) and then hit the ESC key. You should now see four entities listed in your entity report dialog, all with unique names:
Save your file and you're done! You may have to click No on the Add File To Perforce dialog after your file is saved.
Now when your Mutation is loaded these info_item_position entities will automatically be spawned in your map. You can verify this by loading your Mutation in C3M3_shantytown.bsp (by entering map c3m3_shantytown simple) and typing find_ent info_item_position into the console to see if you find your player start entities:
NOTE: You cannot test your Mutation in tools mode. To test your Mutation, exit the game engine and launch the game Left4Dead2 without using the Authoring Tools to launch the game.
Now you're ready to change your Mutation to use these entities to teleport players to their start positions.
Modifying your Mutation to use new spawn points
Now that you have created your spawn points you can write VScript code to use them.
sm_utilities.nut contains a function called TeleportPlayersToStartPoints( spawnpointName ) which you can call from your Mutation's script to teleport players to new positions.
When the map finishes loading the Mutation system will look in your Mutation script for a function named OnGameplayStart(). If you provide a function with this name it will be called automatically. So let's put the teleportation script code there so it will be called before the mutation starts. OnGameplayStart will be a very useful function for almost any Mutation. You'll definitely be using more of it.
function OnGameplayStart()
{
	// gameplay start code goes here!
	// Teleport players out of the start room to their start positions
	TeleportPlayersToStartPoints( "playerstart_*")
}
And that's it! When you play your Mutation in the c3m3_shantytown map, Survivors should no longer spawn in the safe room but out in the dangerous land of shantytown instead.
So we have zombies coming at us and some text on the screen saying we won! It is a mutation, but we can make it better. Let's make some gameplay changes.
