Half-Life: Alyx Workshop Tools/Level Design/Whiteboard
Introduction
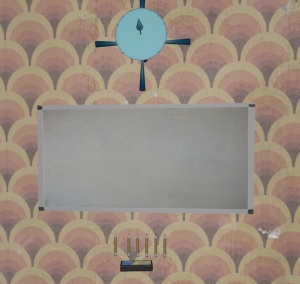
This tutorial will teach you to create whiteboards that can be drawn on for Half Life: Alyx mods.
Prefab Download: Whiteboard (v1.0) This includes all the necessary pieces to have a functioning whiteboard, along with several pens which you can edit. Please open the readme.txt
Requirements
This requires you to have a hlvr.fgd that has the following entities, these can be found on the repo https://github.com/gvarados1/Half-Life-Alyx-FGD
- func_dry_erase_board
- prop_dry_erase_marker
Manual Setup
Whiteboard Brush
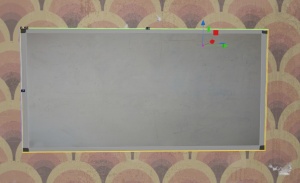
Create a brush the size you would like the whiteboard to be, in my example I am using 25 wide, 50 high and 0.25 deep. Next press Ctrl + T with the brush selected to bind it to an entity, and set the type to func_dry_erase_board.
Whilst still on the brush, apply the texture models/props/alyx_hideout/materials/whiteboard_markable.vmat. You can use the Fast Texture Tool to align the front texture as necessary.
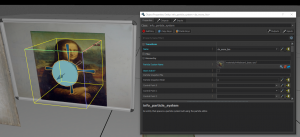
Next, create an info_particle_system, give it a name in my example, its drawing_particle. Make sure the Start Active? is disabled, as this will render the sprite visible.
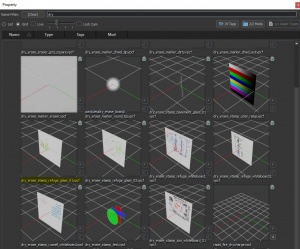
Optional - if you would like to load a pre-existing drawing created by Valve, on the Particle System Name, click on the magnifying glass and use the search term “Dry”, this will show several drawings you can use, such as dry_erase_stamp_refuge_glass_01.vpcf.
Go back to your func_dry_erase_board and under the Stamp Name property, give it the name you just defined for your info_particle_system, for me it’s drawing_particle.
Stamping custom overlays onto drawable surfaces
As an easy example, please download this sample map, which contains a pre-built custom whiteboard overlay, as well as a sample map which you can use a base for your own map. If you copy the complete contents of the "materials"-folder, you will be able to insert this into any other map. Additionally, you can replace the image inside with an image of your own choosing.
NOTE: The image size MUST be a power of 2 (e.g. 128x128, 256x256, 512x512, 1024x1024, etc...), otherwise the vtex-file will not properly refer to the image!
Please note that white will be rendered as completely translucent, as alpha is directly correlated with the "whiteness" of the overlay. This also means that the alpha of any pixel is equal to the inverse of the lowest value in an RGB-vector. As an example, this means that a pixel with an RGB-value of (255,102,93) will display a translucent red with an alpha of 255-93=162, rather than a salmon-colored red. As another example, (255,255,0) will show a bright yellow with and alpha of 255, as the lowest value is 0, i.e. 255-0=255.
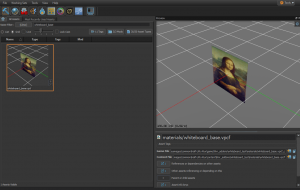
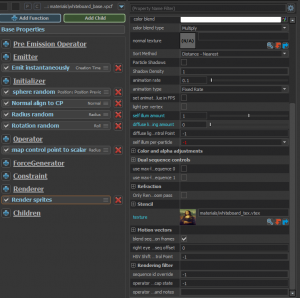
To overlay custom images onto drawable surfaces, you need to create a particle emitter which renders the image you would like to overlay. In the sample file, a pre-built particle system is provided with the name "whiteboard-base.vpcf". Make sure to turn off "start active", as leaving it active will permanently render a sprite
Now, align the image with your drawable surface of choice, and assign a name to the particle system. Note: The rotation of the image does not impact the layout of the stamp in-game, only the absolute position of the stamp
If you would like to create multiple overlays, you must create multiple particle systems and refer to different vtex-files that refer to the images you would like to overlay.
To create a new vtex-file, it is recommended to either copy the "whiteboard_tex.vtex"-file provided in the sample addon, or use source2viewer to decompile an existing particle system.
Inside the .vtex-file, you should change the parameter "m_fileName" to refer to the absolute location of your image.
Note: If referring to images in the same folder as .vtex-file, you must include a ./ in front of the filename to indicate that they are located in the same folder.
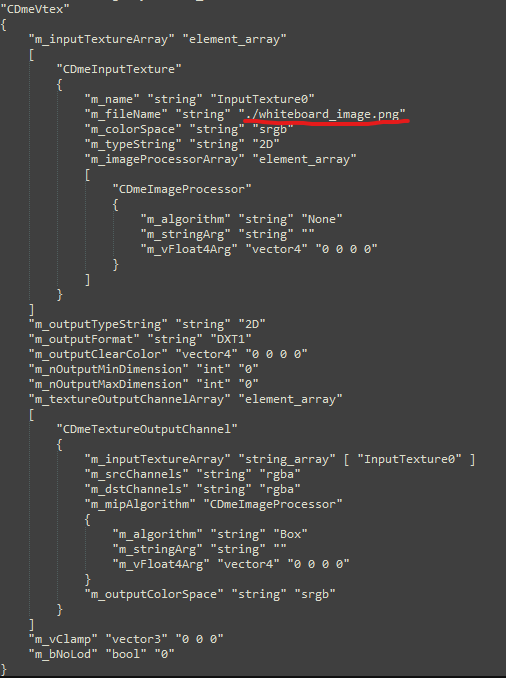
Using the above -vtex.file as an example, this is the location of the image-file that is referred to.
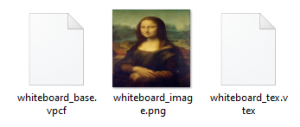
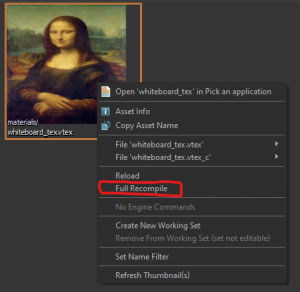
Now that you have a .vtex-file ready, you can compile it and move on to the particle system.
It is highly recommended to use a prebuilt particle system to create stamps, as the particle editor is extremely complex and the whiteboard stamps require very specific settings to create custom stamps. You can find prebuilt particle systems by either using the provided .vpcf-file provided in the sample map, or by decompiling any of the aforementioned valve-created drawings.
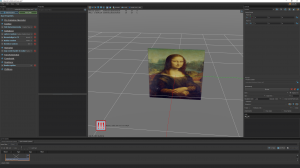
Once you have a pre-built system ready, open the Particle Editor-tool, go to File -> Open and find the pre-built particle system. This should show you a particle system that displays a static image in the middle of the grid:
On the very left side, under the "Renderer"-section, click on the "Render sprites"-node and scroll down to "texture":
From here, you can select the custom texture that you have made and apply it to your stamp. This stamp can now be used to apply any image onto a drawable surface!
You may encounter a missing texture when selecting a custom texture in the particle system. If this happens, check the following:
- Your image is a square with a length of a power of 2
- The image location is referred to locally compared to the .vtex-file
- You have compiled the .vtex-file
Pens!
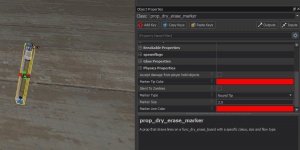
Now the fun, here you will create a pen marker that is used to draw on the board. To create a new marker insert a new entity called prop_dry_erase_marker. The default settings will create a red marker. If you want to change the colour, you will want to change both the Marker Tip Color and Marker Line Color.
Colour settings
- Marker Tip Color - This defines the visual representation of the marker, both in hammer and to the player in game.
- Marker Line Color - This is the line color that is drawn on the whiteboard.
Note: Although it is set by default, ensure your Skin render property is set to Tintable, this allows the game to change the colour of use the marker tip to easily represent to the player what colour the pen will draw as.
There are six types of marker:
| Round Tip | Drying Out | Dirty - Rough edges | Dried Out - No Color | Erase | Chisel |
 |
 |
 |
 |
N/A | 
|
Each of these types are rendered differently in game so have a play. If you want a standard marker use Round Tip.
| Name | Value |
|---|---|
| Model | models/props/alyx_hideout/dry_erase_marker_nocap.vmdl |
| Skin | Tintable |
| Marker Tip Color | Red |
| Marker Line Color | Red |
| Marker Type | Round Tip |
| Marker Size | 2.0 |
Eraser
To create the eraser that removes drawings on a whiteboard, create a new prop_dry_erase_marker, set the Model to models/props/interior_deco/dry_erase_eraser.vmdl. Make sure the Marker Type is set to Erase and I recommend using a Marker Size of 45.
| Name | Value |
|---|---|
| Marker Type | Erase |
| Marker Size | 45 |
Note: You can use your hand and fingers as an eraser
Create several different pens and an eraser if you like and put them near the board.
Finish
You are now done, go in-game and have a doodle.
