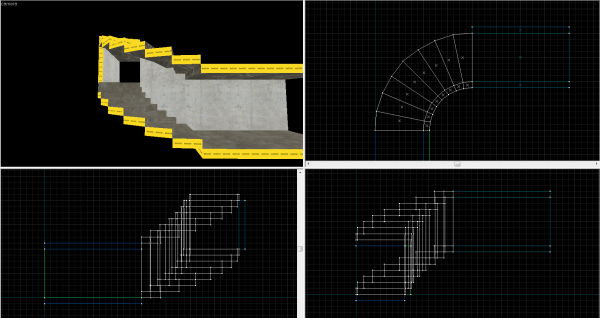
Creating a Curved Hallway
Jump to navigation
Jump to search
 Note:It is recommended that you familiarize yourself with the Hammer Arch Properties page before continuing.
The Hammer Arch tool can create smooth room transitions and break up an otherwise "blocky" design. This tutorial will cover an easy curved hallway.
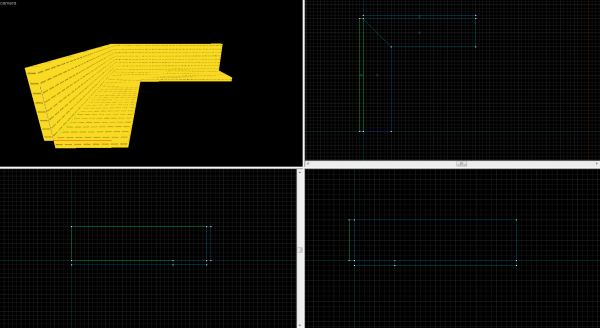
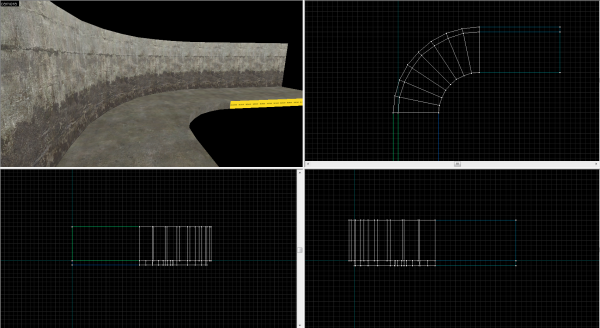
- In this example, there are two sets of brushes. Two 16-unit wide walls measuring 512 units in length meet at a corner (irrelevant; the corner is clipped to retain the brush length.) The floor matches the length and is 128 units wide.
Standard curve
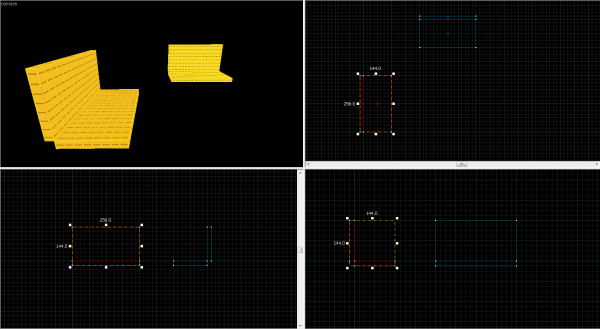
- Clip both brushes in half at their central point using their helpers (X) and remove the corners. This will leave the brushes measuring 256 units in length.
- Press ⇧ Shift+B or select the Block tool
 , and select arch from the Objects drop-down box in the Objects bar.
 - While one of the walls are selected, begin dragging from one outermost corner to the other outermost corner.
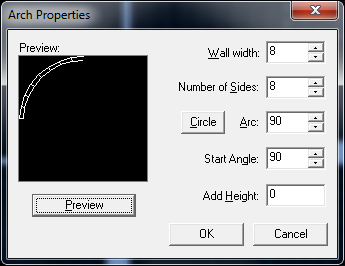
- Press ↵ Enter to open the Arch Properties window.
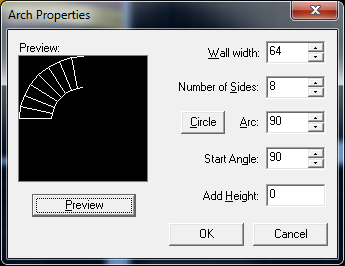
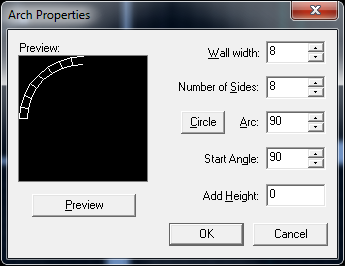
- Change Wall Width to half the width of the walls (if the walls are 16 units wide, enter 8). Change Number of Sides accordingly: large numbers = smoother, yet many brushes; smaller numbers = blocky, yet fewer brushes. Change Arc to 90, as this is only a 90 degree hallway. Change Start Angle to 90. This determines where the arch will begin. Leave Add Height alone for now. Click Preview to see the result of the input.
- Press ↵ Enter to create the wall. It will be created nearby, so click and drag the curved wall and place it into position.
- Now move on to the floor. Follow the same steps as above, selecting a floor with ⇧ Shift+S or selecting the Selection tool
 , then the block tool. Click and drag starting at the outermost corners
 - Press ↵ Enter to open the Arch Properties window again.
- Change Wall Width to half the width of the floor (128 units wide: 128 / 2 = 64).
- Press ↵ Enter to create the floor and drag it into position.
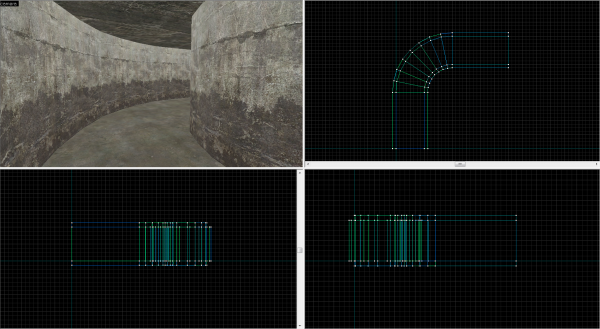
- Now move on to the inner curved wall. To make it easier, select one wall and, while holding ⇧ Shift, drag and drop it on the other side of the floor to create a new wall. Then follow the same steps as above.
- Press ↵ Enter to create the inner wall and drag it into position.
- To make things easier, select the curved floor and, while holding ⇧ Shift, move it up to and drop it to create the curved ceiling.
Elevated curve
- Begin with step 1 of the Standard curve tutorial above. Halve the brushes at 256 units in length. In this tutorial, the top right set of brushes will be elevated (Z-axis) 128 units.
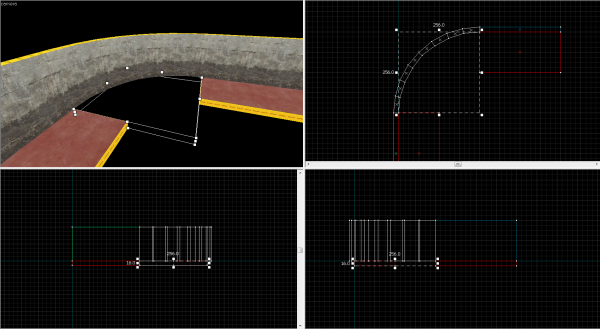
- Select the outer wall of the top right set of brushes and, same as before--yet opposite direction, drag from the outermost corner of the upper wall to the outermost corner of the lower wall.
- Press ↵ Enter to open the Arch Properties window.
- Change Wall Width to 8 and Add Height should be -16. Using a negative value tells the Arch tool to go in a downward direction.
