Portal BTS - Tutorial - Cat Walks
Introduction
This guide will show you how to create Cat Walks seen in testchmb_a_15 and escape_02.
Hanging Catwalks
These Cat Walks are carried by ropes.
Cat Walk Texturing
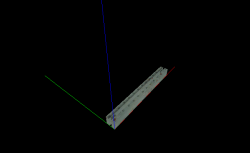
Most of the catwalk will be 64w*384l*4h.
Set the bottom and top texture to metal/metalfloor_bts_001b
Set the side textures to metal/metalbeam_bts_001a.
Enter the following properties with the Face Edit Sheet:
Texture Scale:
- X: 0.13
- Y: 0.13
Texture Shift:
- X: 71
- Rotation: 90
Make sure to tie each Cat Walk brush to a func_detail.
Entrance and Exit setup
Path Type 1
If the beginning or end of the path is a 128 unit tall and wide walk way, create a 128w*128l*4h brush on the entrance/exit.
If your Cat Walk has multiple directions it can go, create another brush on the side of the corner brush.
Path Type 2
If the beginning or end of the path is a 128 unit tall and 64 unit wide walk way, just use the 64w*384l*4h brush.
Hand Rails
Create prop_static and set their model to models/props_c17/handrail04_long.mdl. Sometimes it may be necessary to use handrail04_medium.mdl and handrail04_short.mdl
Place the Cat Walks' feet in between the air and the Cat Walk it self.
Support Ropes
Make sure that all textures are Aligned to Face.
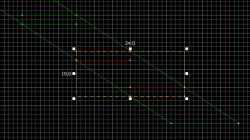
Create 2 80w*3l*8h brushes with the metal/metalbeam_bts_001a texture and create 2 4w*2l*6h brushes with the metal/metalbeam_bts_001a texture.
Enter the following properties with the Face Edit Sheet for all faces:
Texture Scale:
- X: 0.13
- Y: 0.13
- Rotation: 90.00
For all of the side faces and left brush's top and bottom faces, enter the following properties with the Face Edit Sheet:
Texture Shift:
- X: -95
- Y: 460
For the right brush's top and bottom faces, enter the following properties with the Face Edit Sheet:
Texture Shift:
- X: 95
- Y: 460
Select all the brushes and tie them to a func_detail
Create a move_rope entity and enter the following properties:
| Property Name | Value |
|---|---|
| Name | rope_prop_1 |
| Next KeyFrame | rope_prop_2 |
| Width | 1 |
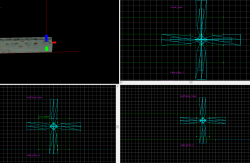
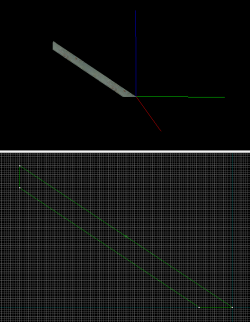
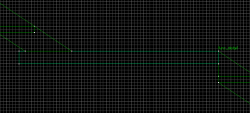
Create a keyframe_rope entity and set its name to rope_prop_2 and position it as seen in the image:
Position the move_rope entity so that it touches the ceiling, keep its X and Y coordinates the same as the keyframe_rope's
Lastly, put copy the rope to the other side and set one of the keyframe_ropes Next Keyframe value to the other keyframe_ropes.
Details
You can include details such as handrails falling off, broken flooring, floor pieces, etc...
Decorative Cat Walks
These cat walks are seen in escape_02 in the room containing the GLaDOS chamber and on the very top in the turret room. If they are very far away or very hard to see, they will not include the handrail props.
Stairs
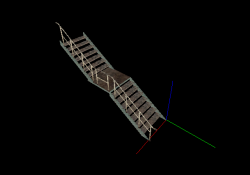
Some Cat Walks feature stairs.
Sides
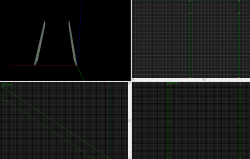
Create 2w*96l*64h with the nodraw texture. Use the Clipping Tool to cut this precise shape:
Tie this brush to a func_detail
Set the face alignment for the brush to World.
Texture all visible faces with metal/metalbeam_bts_001a.
Select the side faces and enter the following properties with the Face Edit Sheet:
Texture Scale:
- X: 0.13
- Y: 0.13
Texture Shift:
- X: 100
- Rotation: 56.33
Select the top and bottom slopes and enter the following properties with the <codeFace Edit Sheet:
Texture Scale:
- X: 0.13
- Y: 0.13
Texture Shift:
- X: -30
Copy and paste this brush 62 units to the right.
Stair Pieces
Create a 60w*12l*2h brush with the nodraw texture.
Tie this brush to a func_detail
Texture all visible faces with metal/metalstair004a.
Select the top and bottom faces and enter the following properties with the Face Edit Sheet:
- Rotation: 180
Texture Shift:
- Y: 96
Select all visible side faces and enter the following properties with the Face Edit Sheet:
Texture Shift:
- X: 16
Make sure Texture Lock is enabled, copy and paste the stair pieces 12 units horizontally away and 8 units higher and do this 7 times.
Taller Staircase
If you want your staircase to be taller, it's not as simple as increasing the frame size, increasing the amount of stair pieces, etc...
Create a 64w*64l*4h brush and use the Face Edit Sheet to apply the properties as you would with a normal cat walk brush.
Position the brush right at the exit of the stair.
Place a new Staircase, position it properly then move it 1 unit forward towards the exit stair.
Hand Rails
Create a prop_static and enter the following properties:
| Property Name | Value |
|---|---|
| model | models/props_c17/Handrail04_SingleRise.mdl |
| Pitch Yaw Roll | 0 180 0 |
For a Cat Walk on the extra brush for taller stairs, set the model to models/props_c17/handrail04_short.mdl instead.
Position the model right at the end of the stairs you would walk up to get to the Cat Walk brush.
You can place these handrails on the opposite side if needed.
Wall Attached Cat Walks
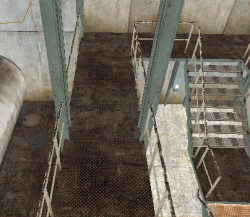
Cat Walks can sometimes be attached to the walls, in fact, most catwalks are. In these cases, there are usually Support Beams covering the other side of the Cat Walk.
Cat Walks attached to Support Beams
Cat Walks would look weird if that just "floated", so Support Beams are a good way to remove that confusion. Put the center of the Support Beam inside the edge of the Cat Walk. In addition, the center of the Support Beams are 192 units apart from each other.
