Counter-Strike 2 Workshop Tools/Level Design/Adding Water
January 2024
You can help by
January 2024
Introduction
It is assumed that you are familiar with Hammer for Source 2 and understand the basics of construction, mesh editing and texturing in Source 2 Hammer. If not, it is recommended that you read through HammerOverview and Basic Construction to get up to speed.
Water has been considerably upgraded in terms of visual quality for Source 2, however it's implementation within levels has changed very little compared to Source. For instance maps no longer need to be sealed from leaks to compile, this also means water and lighting will always compile correctly, even if there is a leak in your map. There is no longer 'cheap' and 'expensive' versions of water materials. Water is still defined by the material upon a surface rather than any mesh entities, however this does not mean that an entire mesh counts as a water volume
Adding Water to your Level
Creating the Mesh
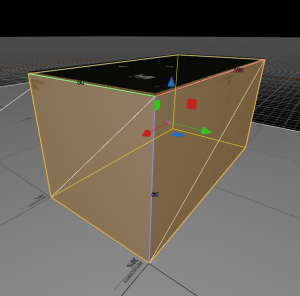
- Using the Block Tool ⇧ Shift + B, fill your desired location with water. You can create polygonal or complex meshes to define your water area but it is recommended that you keep your mesh as simple as possible and that the surface is flat.
- Navigate to the Active Material panel and select Browse. This will bring up the Hammer Active Material Window.
- Browse for a water material. In the search field type: "materials/liquids/". This is where all of the water materials are stored.
- Switch to Face selection mode by selecting it in the top tool bar - or press 3
 Click the face/s of your water surface. ⇧ Shift + T to apply the active material to the selected face/s.
- With the surface face/s still selected, Ctrl+I to invert the selction to the other faces in the mesh and Del. These faces are not required for water to function.
Blend Painting
In Source 2 there is now support for weight painting on water materials. This allows for opaque surface layers like algae(de_ancient), trash(de_overpass, de_inferno) or even foam(de_ancient, de_anubis, de_overpass) to be blended together on the water surface.
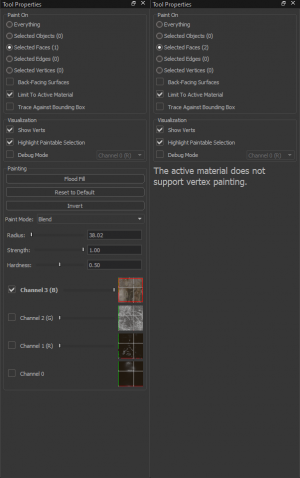
- ⇧ Shift+V to switch to the Blend Painting Tool. If you have a blending material active you will be able to select a layer to paint with at the bottom the Painting section of the Tool Properties panel. If not, the panel will instead say The active material does not support vertex painting.
- At the top of the Tool Properties panel select Paint On - Selected Faces.
- From here you can ⇧ Shift+
 to lift the material under the cursor. This sets the material as your active material and also selects the face for vertex painting - you can use this to select more than one face at a time.
 - Now you can select which layer you want to paint with.
 and drag on your selected faces - these will be outlined in yellow.
You will not be able to paint the using the same channel across two faces with different materials applied to each of them. If you are painting across two faces, they need to have the same material.
Additional
Notes
- Ensure players are able to walk out of the water volume. If the water level is too tall this will disable jumping for players partially/fully submerged.
January 2024

