Blend sequence

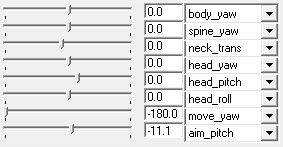
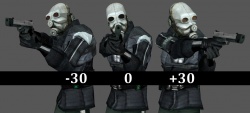
A Blend sequence is a $sequence that can move smoothly between $animations based on one or two sliding 'blend scale' values. This allows the animation's state to be easily controlled by code.
Walking and aiming direction are almost always determined by blend sequences.
Creating blend sequences
The ideal number of animations in a blend sequence depends on how precise the motion needs to be, and on how much variation there is to be along the blend scale(s). Valve use nine for their walking blends (see the example below). With blends that produce a still pose rather than an animation you can get away with one for each extreme, but may find it easier to work with a third, central animation for the zero position.
Once you have your animations, simply list them within the sequence's keyvalue block in the desired order. They will be evenly distributed along the blend scale.
blend <string name> <float min> <float max>- Defines a blend controller. If
blendwidthis defined the first controller moves up/down through the blend, and the second (if present) left/right. - You can have up to 8 unique blend controllers per sequence.
blendwidth <int width>- How many columns of animations the blend contains. The number of rows is determined automatically.
blendcenter <string sequence>- Defines the sequence to be used in the center of the blend. (0 0) This can be any sequence in the blend.
blendref <string sequence>- Defines the sequence to be used to align the blend. This can be any sequence in the blend.
blendcomp <string|name>- Todo: Documentation
calcblend <string name> <string attachment> <XR YR ZR>- Allows the compiler to determine the range of a blend based on the rotation of a predefined attachment point. The resulting angle ranges will be based on the attachment point's orientation rather than the bone its parented to.
Blend Example
This example creates a 9-way walking blend, suitable for use with CBasePlayerAnimState. Earlier Valve games use 8-way blends; check whether your game's existing models have move_x/move_y (9-way) or move_yaw (8-way) to determine which you should create. See the SDK sample HL2 models for an 8-way example.
// Define all nine walk_* $animations above this command (use walkframe!)

$sequence walk {
	walk_SW   walk_S   walk_SE
	walk_W    walk_C   walk_E
	walk_NW   walk_N   walk_NE // line breaks are for readability only

	blendwidth 3
 	blend move_x -1 1
 	blend move_y -1 1

	addlayer look // blends look/aim direction on top of walk direction
}
Calcblend Example
This example creates a 9-way look blend delta sequence. using the calcblend
// Define all nine look_* $animations above this command with subtract

$sequence look {
	lookDR	lookD   lookDL
	lookR    "anims\referencepose.smd"   lookL
	lookUR   lookU   lookUL

	blendwidth 3
 	calcblend head_yaw "anim_attachment_head" YR
 	calcblend head_pitch "anim_attachment_head" ZR
	delta

}
The output value for the blend slider ranges now should be based on the relative rotation of the defined attachment.
Animating for blend sequences
There is nothing particularly special about the individual animations which make up a blend sequence. However:
- It is important that each animation is the same length and plays at the same framerate
- Use
walkframeif the animation is intended for movement - In your modelling package, make sure that any root bone keyframes are set to linear interpolation (i.e. a straight line) to avoid velocity "wobble" when looping
- To ensure velocity matches animation 1:1 consider the total frames of an animation. For instance an 18 frame run cycle that moves 200 units will result in speed of 333.33
Macro examples
Games such as TF2 require numerous unique animation states for various weapons, items, poses, and characters. It would have been utterly impractical to have stated each and every unique blend sequence and the individual animation lines they require.
This is why Valve uses $definemacro to build their blend sequences, and you can too. Below are examples of both an aim matrix macro and a 9-way walkcycle macro that allows important parameters to be stated directly in the macro call. A few calls are listed to demonstrate use.
$pushd "aimmatrices" //Aim Matrix Macro
//-------------------------------------------------------------------------------------------------------XX
$definemacro aimmatrix           name   rfoot lfoot weight loc rot                                       \\
$animation a_$name$_neutral     $name$ frame 4 4                                                         \\
$animation a_$name$_down_right  $name$ frame 0 0 subtract a_$name$_neutral 0 weightlist $weight$         \\
$animation a_$name$_down_center $name$ frame 1 1 subtract a_$name$_neutral 0 weightlist $weight$         \\
$animation a_$name$_down_left   $name$ frame 2 2 subtract a_$name$_neutral 0 weightlist $weight$         \\
$animation a_$name$_mid_right   $name$ frame 3 3 subtract a_$name$_neutral 0 weightlist $weight$         \\
$animation a_$name$_mid_center  $name$ frame 4 4 subtract a_$name$_neutral 0 weightlist $weight$         \\
$animation a_$name$_mid_left    $name$ frame 5 5 subtract a_$name$_neutral 0 weightlist $weight$         \\
$animation a_$name$_up_right    $name$ frame 6 6 subtract a_$name$_neutral 0 weightlist $weight$         \\
$animation a_$name$_up_center   $name$ frame 7 7 subtract a_$name$_neutral 0 weightlist $weight$         \\
$animation a_$name$_up_left     $name$ frame 8 8 subtract a_$name$_neutral 0 weightlist $weight$         \\
$animation a_$name$_straight_up $name$ frame 9 9 subtract a_$name$_neutral 0 weightlist $weight$         \\
$sequence $name$ { \\ //---------------------------------------------------------------------------------XX
    a_$name$_straight_up    a_$name$_straight_up    a_$name$_straight_up                                 \\
    a_$name$_up_right       a_$name$_up_center      a_$name$_up_left                                     \\
    a_$name$_mid_right      a_$name$_mid_center     a_$name$_mid_left                                    \\
    a_$name$_down_right     a_$name$_down_center    a_$name$_down_left                                   \\
    blendref    a_$name$_neutral                                                                         \\
    blendcenter a_$name$_mid_center                                                                      \\
    blendwidth 3 blend body_yaw 45 -45 blend body_pitch 90 -45                                           \\
    delta hidden                                                                                         \\
    iklock $rfoot$ $loc$ $rot$ iklock $lfoot$ $loc$ $rot$ }                                              \\
//-------------------------------------------------------------------------------------------------------XX
$aimmatrix  AimMatrix       rfoot lfoot upper 1 0
$aimmatrix 	AimMatrixAir 	rfoot lfoot air	  0 1  //iklock is disabled
$aimmatrix  AimMatrixWait   rfoot lfoot all   1 0
//-------------------------------------------------------------------------------------------------------XX
$popd
$pushd "walkcycles" //Walk Cycle Macro
//-------------------------------------------------------------------------------------------------------XX
$definemacro walkcycle  name center file idle weight upper fps fpsC rC rS rSE rE rNE rN rNW rW rSW       \\
$animation a_$name$Center   ../$idle$         fps $fpsC$ loop weightlist $weight$ rotate $rC$            \\
$animation a_$name$S        a_$file$S   LX LY fps $fps$  loop weightlist $weight$ rotate $rS$            \\
$animation a_$name$SE       a_$file$SE  LX LY fps $fps$  loop weightlist $weight$ rotate $rSE$           \\
$animation a_$name$E        a_$file$E   LX LY fps $fps$  loop weightlist $weight$ rotate $rE$            \\
$animation a_$name$NE       a_$file$NE  LX LY fps $fps$  loop weightlist $weight$ rotate $rNE$           \\
$animation a_$name$N        a_$file$N   LX LY fps $fps$  loop weightlist $weight$ rotate $rN$            \\
$animation a_$name$NW       a_$file$NW  LX LY fps $fps$  loop weightlist $weight$ rotate $rNW$           \\
$animation a_$name$W        a_$file$W   LX LY fps $fps$  loop weightlist $weight$ rotate $rW$            \\
$animation a_$name$SW       a_$file$SW  LX LY fps $fps$  loop weightlist $weight$ rotate $rSW$           \\
$sequence $name$ { \\ //---------------------------------------------------------------------------------XX
    a_$name$SW      a_$name$S           a_$name$SE                                                       \\
    a_$name$W        $center$           a_$name$E                                                        \\
    a_$name$NW      a_$name$N           a_$name$NE                                                       \\
    blendwidth 3 blend move_y -1 1 blend move_x -1 1                                                     \\
    addlayer $upper$ fadein 0.5 fadeout 0.5 fps $fps$ }                                                  \\
//-------------------------------------------------------------------------------------------------------XX
$walkcycle  Walk_Wait      a_Walk_WaitCenter    Walk Wait1    upper Wait1_upper     30 56   0 0 0 0 0 0 0 0 0
$walkcycle  Walk_Aim       a_Walk_AimCenter     Walk AimStand upper AimStand_upper  30 56   0 0 -20 -5 -5 -4 -5 -5 -2
$walkcycle  Walk_Caution   a_Walk_CautionCenter Walk Wait2    upMid Caution_upper   25 25   0 0 0 0 0 0 0 0 0
$walkcycle  Run            a_Run_Center         Run  Wait1    run   Wait1_upper     30 20   0 0 0 0 0 0 0 0 0
//-------------------------------------------------------------------------------------------------------XX
$popd
