Creating a Material
![]() This tutorial is a step-by-step process you can go through to create a great-looking material. Currently, it doesn't cover refractive materials, animations, water, terrain, or skyboxes.
This tutorial is a step-by-step process you can go through to create a great-looking material. Currently, it doesn't cover refractive materials, animations, water, terrain, or skyboxes.
Making the textures
1. Choose your material dimensions, and work on your texture at twice that. Dimensions must be in powers of two but do not have to be square. For textures that appear on large surfaces a good scale is 512 pixels for 10 feet (3.0 meters) in the game. For models which have more detail, try to match the resolution of models you’ve seen in HL2. If your resolution is too high, it will actually look worse because of mipmapping. When it’s done, scale it down to the appropriate dimensions and save it as an uncompressed TGA file in this folder:
C:\Program Files\Valve\Steam\SteamApps\Username\sourcesdk_content\gameshortname\materialsrc
2. Convert the TGA to VTF by dragging it onto vtex.exe. The VTF will be in this folder:
C:\Program Files\Valve\Steam\SteamApps\Username\gamename\gameshortname\materials
3. Move your textures to a directory within their current folder (materials). As an example, let's say are creating a texture called brickwall.vtf for Half-Life 2 and want to categorize it under walls. It would go here:
C:\Program Files\Valve\Steam\SteamApps\Username\half-life 2\hl2\materials\walls\brickwall.vtf
Creating the material file
A VMT file is necessary for the material to appear in the game and in Hammer. Use Notepad to create the VMT, and save it in the same directory as your VTF. (To prevent Notepad from adding .txt to your file name, choose All Files in the dropdown box for file type.)
This is the content of the VMT:
"shader type"
{
    "$basetexture" "__"
    "$surfaceprop" "__"
}
Replace "shader type" with one of the following:
- LightmappedGeneric
- This is the most common and is used for surfaces you want to be lit normally.
- UnlitGeneric
- This is used for surfaces that are always fully lit like a computer screen or lit lightbulb.
- VertexLitGeneric
- This is used for models.
After "$basetexture" fill in the name of your texture along with its path from the materials folder in quotes.
After "$surfaceprop" fill in the surface type in quotes. (This affects the sound of impacts and look of bullet holes.) Choose one of these surfaces: metal, paper, wood, concrete, glass, brick, tile. For more choices, see Material properties.
Here’s what the VMT for the example brick wall texture would look like:
"LightmappedGeneric"
{
    "$basetexture" "walls/brickwall"
    "$surfaceprop" "brick"
}
Adding a normal map (aka bump map)
If your texture is supposed to have depth to it, adding a normal map will make the lighting on it far more realistic. (This is perhaps the main reason Doom3, FarCry, and HL2 are able to look so much better than previous games.) The normal map tells the game what direction each pixel would be facing if your texture were in 3D instead of being a flat image. A normal map is kind of useless for really flat surfaces like smooth concrete or metal. But even rough concrete sometimes has enough depth to it to make a normal map worthwhile. This is an old article but explains the concept well: Normal Maps
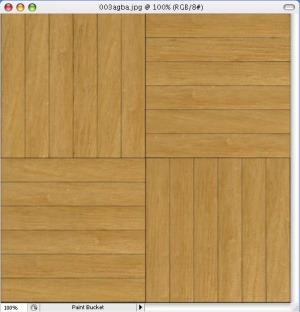
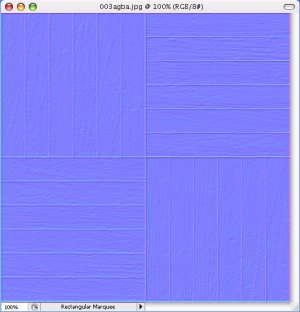
1. First, create the normal map. If you have Photoshop or PaintShop Pro, you can use Nvidia's normal map tools, available here. There are also tools for those who use the GIMP here, but we will focus on the Photoshop tools. To use them, open a copy of the texture and apply the Normal Map filter. Fiddle with the settings until you get something that you feel will be bumpy enough for your texture. The greater the range of colors, the greater the range of angles on the surface. A very flat surface will look that medium blue color all over. If you want to have more control over it, change the image to grayscale and fiddle with brightness and contrast to make certain details stand out before applying the filter. Do this step multiple times to get different details to stand out, and then put the images together in layers with the blend mode set to overlay.
2. Save your normal map as a TGA in the same resolution as the original texture. Give it a name that ends in _normal. Then convert it to a VTF the same way as before. The _normal at the end of the name will affect how VTEX converts it. For the brick wall example, we would name the file brickwall_normal.tga. Place the new VTF in the same place as your original texture.
3. Add this line to the VMT somewhere between the braces:
"$bumpmap" "__"
and fill in the path and name of your normal map VTF. The VMT for the example brick texture now looks like this:
"LightmappedGeneric"
{
    "$basetexture" "walls/brickwall"
    "$surfaceprop" "brick"
    "$bumpmap" " walls/brickwall_normal"
}
Also note that multiple materials can use the same normal map file.
Adding reflection (shininess) to a material
You can add a pseudo-3D reflection to your material. It makes normal mapped materials look far more three-dimensional, because the reflection will bend appropriately according to the normal map. These reflections will be based on the nearest env_cubemap entity.
1. Add this line to your VMT somewhere between the braces:
"$envmap" "env_cubemap"
2. You will probably want to tone your reflection down by adding this line:
"$envmaptint" "[1 1 1]"
Change the three ones to make your reflection dimmer. The three numbers scale red, green, and blue individually, but usually, you will want to change all three to the same number. The numbers you put in here will be multiplied by the opacity of the reflection.
This will require some testing to get just right for each material. If your material has different levels of shininess, then adjust for the most reflective part of the material and then refer to the section on masking below. Here are some values to start you off closer to what you need:
- [ 1 1 1 ]
- This is the highest level you would probably ever use. It might be used on a polished metal and will look almost as reflective as a mirror.
- [ .3 .3 .3 ]
- This is a good value for gloss paint.
- [ .07 .07 .07 ]
- This is a good value for concrete and sand. Shininess is just barely noticeable. Don’t use a reflection on concrete or sand if it doesn’t have a normal map, though. (Looks weird.)
3. You may want to adjust your reflection’s contrast with this line:
"$envmapcontrast" 0.5
The number should be between zero and one. Higher values will make the reflection look shinier without looking more reflective, if that makes sense. This might be useful for glass, which has more glaring reflections than other materials.
Note: For the reflection to work correctly in the game, your map must have at least one env_cubemap in it, and after you open the map in the game, open the console and type buildcubemaps.
The VMT for the example brick wall texture now might look like this:
"LightmappedGeneric"
{
    "$basetexture" "walls/brickwall"
    "$surfaceprop" "brick"
    "$bumpmap" " walls/brickwall_normal"
    "$envmap" "env_cubemap"
    "$envmaptint" "[.5 .5 .5]"
}
Masking the reflection
Some materials will have varying amounts of shininess. For example, a metal texture would not be very shiny wherever it's rusty. A mask will allow you to determine the reflectivity of each pixel of your texture.
1. Start by making the mask in grayscale at the same resolution as your original texture. The brightness of the mask will be multiplied by the opacity of the envmap, on top of the envmaptint. The rest of the steps depend on whether your material has a normal map:
2a. Masking a material with a normal map
Save the mask into the alpha channel of your normal map. Convert this new normal map to a VTF and replace the original normal map. Now add this line to your VMF:
"$normalmapalphaenvmapmask" 1
2b. Masking a material without a normal map
Save the mask as a new TGA file (no alpha channel) with _mask at the end of the name. Convert it to a VTF and put it in the same directory as your texture. Add this line to your VMF:
"$envmapmask" "__"
and fill in the path and name of your mask.
For the example, perhaps we would want to make the bricks shinier than the plaster. Since we already have a normalmap, we'd just embed the mask into the alpha channel of the normal map, as described in step 2a. The VMT would now look like this:
"LightmappedGeneric"
{
    "$basetexture" "walls/brickwall"
    "$surfaceprop" "brick"
    "$bumpmap" " walls/brickwall_normal"
    "$envmap" "env_cubemap"
    "$envmaptint" "[.5 .5 .5]"
    "$normalmapalphaenvmapmask" 1
}
Adding a parallax map (aka displacement map or height map)
A parallax map will cause your flat material to look 3D. When you look at a parallax mapped material at an angle, the high points will obscure the low points behind them. This is only worthwhile for textures that have depth ranging at least a few centimeters, like deep-set bricks or stone. If you're not sure about using one, then don't bother.
1. Imagine your texture in 3D and create a new texture in grayscale where white corresponds to the pixels closest to you and black corresponds to pixels farthest from you. Save this as a TGA with _height at the end of the name and convert it to a VTF. Put it in the same directory as your texture.
2. Add these two lines to your VMF:
"$parallaxmap" "__"
"$parallaxmapscale" __
and fill in the path and name of your parallax map on the first line and a number between zero and one on the second line. This number affects how deep the texture will look. 0.05 is an appropriate value for bricks.
If the bricks in the example brick wall texture were really thick and stuck out from the plaster, a parallax map might be appropriate. We would create a VTF as described above named brickwall_height.vtf and place it with the other texture files. The VMT would now look like this:
"LightmappedGeneric"
{
    "$basetexture" "walls/brickwall"
    "$surfaceprop" "brick"
    "$bumpmap" " walls/brickwall_normal"
    "$parallaxmap" "walls/brickwall_height"
    "$parallaxmapscale" 0.05
    "$envmap" "env_cubemap"
    "$envmaptint" "[.5 .5 .5]"
    "$normalmapalphaenvmapmask" 1
}
Additional options
- "$model" 1
- This line is necessary for model skins. Also note that the TGA should also be included in the same directory with the VTF and VMT for the modeler to skin with. Try to keep the skin for each model entirely in one texture—using multiple textures on a model is a resource hog. Remember that the shader type for models is always "VertexLitGeneric".
- "$decal" 1
- This is necessary for decals.
- "$selfillum" 1
- Adding this line will cause the texture to self-illuminate according to the alpha channel of your base texture. An example would be a Combine soldier’s helmet which is lit normally except for the eyes, which glow even in the dark.
- "$nocull" 1
- Add this line if you want your texture to be visible from both sides. This is only applicable for flat objects like glass or wire fences.
- "$alpha" 0.5
- Adding this line will make the texture translucent. The number can be anything between zero and one.
- "$color" "[1 1 1]"
- This will scale the color of the red, green, and blue components of your texture. You might use it if you wanted to use the same texture for multiple materials, such as various colors of the same looking glass.
Note: Everything in your VMT is going to be in quotes except for numbers that appear alone.
See also

