Intermediate Lighting: Difference between revisions
mNo edit summary |
Tharawdeal (talk | contribs) mNo edit summary |
||
| Line 9: | Line 9: | ||
[[Image:adv_light_omni.jpg|thumb|300px|right|<code>light</code> entity (omni light), brightness 200]] | [[Image:adv_light_omni.jpg|thumb|300px|right|<code>light</code> entity (omni light), brightness 200]] | ||
The [[light]] entity is the most basic lighting entity in Source. It spreads an equal amount of light in every direction from the entity origin. | The point-based [[light]] entity is the most basic lighting entity in Source. It spreads an equal amount of light in every direction from the entity's origin. Since it's omni-directional, it looks best when used to produce light from a single source, such as a bare light bulb or a fire. However, it can be used for ambient lighting as well. | ||
{{todo|Add more stuff}} | {{todo|Add more stuff}} | ||
Revision as of 16:48, 11 May 2006
This tutorial will cover the more advanced lighting techniques used in Source maps. If you are new to lighting in Hammer, you may want to read the basic light tutorial first.
Entities of interest
light
light entity (omni light), brightness 200The point-based light entity is the most basic lighting entity in Source. It spreads an equal amount of light in every direction from the entity's origin. Since it's omni-directional, it looks best when used to produce light from a single source, such as a bare light bulb or a fire. However, it can be used for ambient lighting as well.
light_spot
The light_spot entity creates a spotlight which can be pointed at a direction of the mapper's choice.
light_dynamic
A light_dynamic entity should be used in moderation, as it renders real-time in-game. Therefore it can cause a lot of slow-down on lower end computers.
light_environment
A light_environment is a skybox light controller, it controls how much light comes from the skybox. You also don't have to make-up your own configurations for your light_environment, as Valve supplied all the keyvalues they used for their maps here.
env_lightglow
The env_lightglow entity creates a glowing light, it can also be used to replace light_dynamic entities if done correctly, and will not slow down the players computer as much as a light_dynamic.
Lightmaps
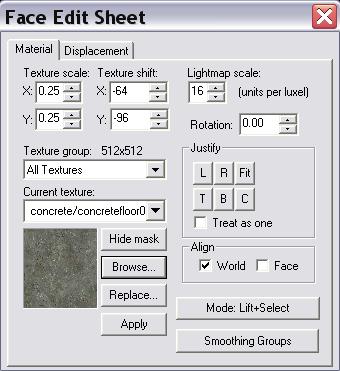
Lightmaps are variable in terms of density. This is set with the texture applicator, while you are in lightmap grid view mode.
Lower numbers will result in a more dense lightmap. Light effects and shadows will show up much better on a surface that has a lower lightmap density. The opposite is true, as well - Shadows are less quality if you increase the number. The default value is 16 units per luminosity pixel, or luxel.
Likewise, this can be used to smooth out certain surfaces. You don't always want 20 sided quarter-cylinders, and you can get an equally good smooth if you utilize lightmaps in conjunction with 3-sided curves - Just apply a 4 density to them and you'll notice a smoother appearance on them.
Each little point on the lightmap will count as a patch and, for performance reasons, you don't want to run over that limit. Subsequently, it makes your compiles take ages. So, use this sparingly on surfaces which require detailed shadow.
