Infodecal: Difference between revisions
Jump to navigation
Jump to search
 Note:
Note:  If you place this entity infodecal in your map with targetname,
m (Added link to the actual decal page.) |
|||
| Line 6: | Line 6: | ||
It is the entity created when the [[Hammer Decal Tool|Decal tool]] is used. It places a texture on any surface, with transparency if the texture being applied supports transparency. In Half-Life 1, these textures were indicated with a <nowiki>{</nowiki>, in Half-Life 2 they are placed in the decals/ texture folder. When needed, an [[info overlay | overlay]] can be used for more control over the applied texture. For example, an infodecal cannot be applied to a displacement, resized or rotated, while an overlay can. | It is the entity created when the [[Hammer Decal Tool|Decal tool]] is used. It places a texture on any surface, with transparency if the texture being applied supports transparency. In Half-Life 1, these textures were indicated with a <nowiki>{</nowiki>, in Half-Life 2 they are placed in the decals/ texture folder. When needed, an [[info overlay | overlay]] can be used for more control over the applied texture. For example, an infodecal cannot be applied to a displacement, resized or rotated, while an overlay can. | ||
{{Note| {{css}} If you place this entity '''infodecal''' in your map with '''targetname''',<br> | |||
it keep ''<small>image</small>'' hidden at the beginning of map start, also entity itself not get destroyed (yet).<br> | |||
Using entity input '''Activate''' show hidden ''<small>image</small>'' and destroy entity as well. This work once on map load.<br /> | |||
*To show image instantly on map, clear '''targetname''' . | |||
--[[User:Bacardi|Bacardi]] ([[User talk:Bacardi|talk]]) 22:03, 29 September 2017 (UTC) | |||
}} | |||
== Keyvalues == | == Keyvalues == | ||
Revision as of 15:03, 29 September 2017
Template:Base point It is used to place a decal in a map.
Entity description
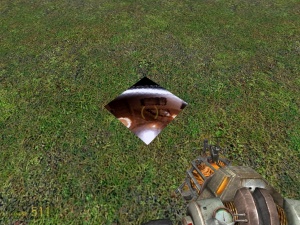
It is the entity created when the Decal tool is used. It places a texture on any surface, with transparency if the texture being applied supports transparency. In Half-Life 1, these textures were indicated with a {, in Half-Life 2 they are placed in the decals/ texture folder. When needed, an overlay can be used for more control over the applied texture. For example, an infodecal cannot be applied to a displacement, resized or rotated, while an overlay can.
it keep image hidden at the beginning of map start, also entity itself not get destroyed (yet).
Using entity input Activate show hidden image and destroy entity as well. This work once on map load.
- To show image instantly on map, clear targetname .
Keyvalues
- Low Priority (can be replaced) ([todo internal name (i)]) <boolean>
- If true, allows the decal to be removed to accommodate newly-placed decals. Default behavior is false (high priority), meaning it is always present.
- Name (targetname) <string>[ Edit ]
- The name that other entities refer to this entity by, via Inputs/Outputs or other keyvalues (e.g.
parentnameortarget).
Also displayed in Hammer's 2D views and Entity Report.See also: Generic Keyvalues, Inputs and Outputs available to all entities
Inputs
- Activate
- Force the decal to apply itself to the world.
