WiseWindmill: Difference between revisions
Plykkegaard (talk | contribs) m (→Credits: removed "--") |
Plykkegaard (talk | contribs) m (Added link to sample map) |
||
| Line 65: | Line 65: | ||
== Wrap up == | == Wrap up == | ||
There’s a lot more you can do, hopefully this article have stimulated your imagination. | There’s a lot more you can do, hopefully this article have stimulated your imagination. | ||
* [ | * [http://type3studios.com/downloads/tutorials/SdkNutsTutorials/WiseWinmill.zip The example used in this tutorial.] | ||
* If you need further help please use the [http://forums.steampowered.com/forums/forumdisplay.php?f=193 forum for Source level Design] | * If you need further help please use the [http://forums.steampowered.com/forums/forumdisplay.php?f=193 forum for Source level Design] | ||
<H2> Credits </H2> | <H2> Credits </H2> | ||
The tutorial is originally created by [[User:Mark WiseCarver|wisemx]], it is ported from sdknuts.net/wiseWindmill to the VDC by [[User:Plykkegaard|Peter [AGHL]]] 14:57, 6 Feb 2008 (PST) | * The tutorial is originally created by [[User:Mark WiseCarver|wisemx]], it is ported from sdknuts.net/wiseWindmill to the VDC by [[User:Plykkegaard|Peter [AGHL]]] 14:57, 6 Feb 2008 (PST) | ||
* Sample maps hosted by [http://type3studios.com http://type3studios.com] | |||
Revision as of 14:31, 11 February 2008
HL2 Windmill
This tutorial is moderately advanced so I’m not going to get into the basic information about using the individual entities. If you have any questions at all please use the contact page or the forums.
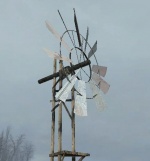
Take a look at the screenshot of a windmill from HL2 in D2_Coast_09 to the right (Looks like they might have rushed this one, notice the rear vertical support goes through the rotating shaft for the windmill.)
The first thing we’re going to do is insert the model for our windmill.
- Class prop_physics
- Name: windmill
- Pitch Yaw Roll: Change the middle number for the angle you want, i.e. 0 270 0
- World Model: models/props_citizen_tech/windmill_blade002a.mdl
Once it’s in place our physics entities can be created.
The sound:
- ambient_generic
- Name: windmillSound
- Sound Name: coast.windmill
- Volume: 8.5
- SourceEntityName: windmill
The Motor:
- phys_motor
- Name: windmill_motor
- Rotation Speed: -90
- Spin up time: 1
- System Inertia Scale: 3.0
- Attached Object: windmill
The Hinge:
- phys_hinge
- Name: windmill_hinge
- Entity 1: windmill
- Play Sound on Break: physics/plastic/plastic_box_break1.wav
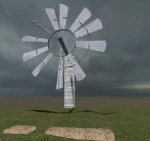
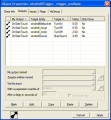
The next entity isn’t normally needed but for this example I’m using a phys_ballsocket for effect. There are two triggers that I created for this tutorial, one of which will stop the motor, sound and break the hinge so when that happens I turn on our phys_ballsocket to hold the windmill in place at the most obvious end joint. It will appear to break, the sound will stop and it will drop at one end. The second trigger will reinstate everything and turn off our phys_ballsocket. This works very well and once you play around with it you should be able to come up with some very interesting scenarios.
(For example take the Horse from HL2 and create a ballerina stand for it, spin the horse and when a force hits it the horse falls over and then ropes can be seen under the horse. The ropes stretch with the horse and give the appearance of puppet strings. Eventually another trigger is used to snap the horse back into place and once in place it will begin to spin again.)
- phys_ballsocket
- Entity 1: windmill
Now place and setup each of these. Use the Helpers to create the handles/direction for each. (This part may take some time to get the felling for but it’s really very simple.)
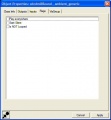
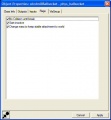
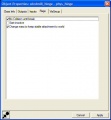
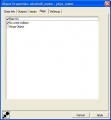
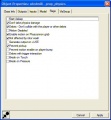
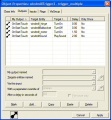
Here are screen shots for the flags I’ve set for each entity and shots of the trigger outputs.
Wrap up
There’s a lot more you can do, hopefully this article have stimulated your imagination.
- The example used in this tutorial.
- If you need further help please use the forum for Source level Design
Credits
- The tutorial is originally created by wisemx, it is ported from sdknuts.net/wiseWindmill to the VDC by Peter [AGHL] 14:57, 6 Feb 2008 (PST)
- Sample maps hosted by http://type3studios.com
