Template:Chapters/Left 4 Dead 2: Difference between revisions
No edit summary |
(Strings Update) |
||
| Line 9: | Line 9: | ||
{{td|width = 25%|font-size = 0.95em | {{td|width = 25%|font-size = 0.95em | ||
| [[File:C1_deadcenter.png|224px|Dead Center|link=https://left4dead.fandom.com/wiki/Dead_Center]]<br>'''{{l4dwiki|{{Chapters/strings| | | [[File:C1_deadcenter.png|224px|Dead Center|link=https://left4dead.fandom.com/wiki/Dead_Center]]<br>'''{{l4dwiki|{{Chapters/strings|L4D2 Dead Center}}|icon=hide}}''' | ||
}} | }} | ||
{{td|width = 25%|font-size = 0.95em | {{td|width = 25%|font-size = 0.95em | ||
| [[File:C6_thepassing.png|224px|The Passing|link=https://left4dead.fandom.com/wiki/The_Passing]]<br>'''{{l4dwiki|{{Chapters/strings| | | [[File:C6_thepassing.png|224px|The Passing|link=https://left4dead.fandom.com/wiki/The_Passing]]<br>'''{{l4dwiki|{{Chapters/strings|L4D2 The Passing}}|icon=hide}}''' | ||
}} | }} | ||
{{td|width = 25%|font-size = 0.95em | {{td|width = 25%|font-size = 0.95em | ||
| [[File:C2_darkcanival.png|224px|Dark Carnival|link=https://left4dead.fandom.com/wiki/Dark_Carnival]]<br>'''{{l4dwiki|{{Chapters/strings| | | [[File:C2_darkcanival.png|224px|Dark Carnival|link=https://left4dead.fandom.com/wiki/Dark_Carnival]]<br>'''{{l4dwiki|{{Chapters/strings|L4D2 Dark Carnival}}|icon=hide}}''' | ||
}} | }} | ||
{{td|width = 25%|font-size = 0.95em | {{td|width = 25%|font-size = 0.95em | ||
| [[File:C3_swampfever.png|224px|Swamp Fever|link=https://left4dead.fandom.com/wiki/Swamp_Fever]]<br>'''{{l4dwiki|{{Chapters/strings| | | [[File:C3_swampfever.png|224px|Swamp Fever|link=https://left4dead.fandom.com/wiki/Swamp_Fever]]<br>'''{{l4dwiki|{{Chapters/strings|L4D2 Swamp Fever}}|icon=hide}}''' | ||
}} | }} | ||
| Line 29: | Line 29: | ||
{{td|width = 25%|font-size = 0.95em | {{td|width = 25%|font-size = 0.95em | ||
|{{Chapters/strings| | |{{Chapters/strings|L4D2 Dead Center maps}} | ||
}} | }} | ||
{{td|width = 25%|font-size = 0.95em | {{td|width = 25%|font-size = 0.95em | ||
| {{Chapters/strings| | | {{Chapters/strings|L4D2 The Passing maps}} | ||
}} | }} | ||
{{td|width = 25%|font-size = 0.95em | {{td|width = 25%|font-size = 0.95em | ||
| {{Chapters/strings| | | {{Chapters/strings|L4D2 Dark Carnival maps}} | ||
}} | }} | ||
{{td|width = 25%|font-size = 0.95em | {{td|width = 25%|font-size = 0.95em | ||
| {{Chapters/strings| | | {{Chapters/strings|L4D2 Swamp Fever maps}} | ||
}} | }} | ||
| Line 49: | Line 49: | ||
{{td|width = 25%|font-size = 0.95em | {{td|width = 25%|font-size = 0.95em | ||
| [[File:C4_hardrain.png|224px|Hard Rain|link=https://left4dead.fandom.com/wiki/Hard_Rain]]<br>'''{{l4dwiki|{{Chapters/strings| | | [[File:C4_hardrain.png|224px|Hard Rain|link=https://left4dead.fandom.com/wiki/Hard_Rain]]<br>'''{{l4dwiki|{{Chapters/strings|L4D2 Hard Rain}}|icon=hide}}''' | ||
}} | }} | ||
{{td|width = 25%|font-size = 0.95em | {{td|width = 25%|font-size = 0.95em | ||
| [[File:C5_theparish.png|224px|The Parish|link=https://left4dead.fandom.com/wiki/The_Parish]]<br>'''{{l4dwiki|{{Chapters/strings| | | [[File:C5_theparish.png|224px|The Parish|link=https://left4dead.fandom.com/wiki/The_Parish]]<br>'''{{l4dwiki|{{Chapters/strings|L4D2 The Parish}}|icon=hide}}''' | ||
}} | }} | ||
{{td|width = 25%|font-size = 0.95em | {{td|width = 25%|font-size = 0.95em | ||
| [[File:C13_coldstream.png|224px|Cold Stream|link=https://left4dead.fandom.com/wiki/Cold_Stream]]<br>'''{{l4dwiki|{{Chapters/strings| | | [[File:C13_coldstream.png|224px|Cold Stream|link=https://left4dead.fandom.com/wiki/Cold_Stream]]<br>'''{{l4dwiki|{{Chapters/strings|L4D2 Cold Stream}}|icon=hide}}''' | ||
}} | }} | ||
| Line 65: | Line 65: | ||
{{td|width = 25%|font-size = 0.95em | {{td|width = 25%|font-size = 0.95em | ||
| {{Chapters/strings| | | {{Chapters/strings|L4D2 Hard Rain maps}} | ||
}} | }} | ||
{{td|width = 25%|font-size = 0.95em | {{td|width = 25%|font-size = 0.95em | ||
| {{Chapters/strings| | | {{Chapters/strings|L4D2 The Passing maps}} | ||
}} | }} | ||
{{td|width = 25%|font-size = 0.95em | {{td|width = 25%|font-size = 0.95em | ||
| {{Chapters/strings| | | {{Chapters/strings|L4D2 Cold Stream maps}} | ||
}} | }} | ||
| Line 85: | Line 85: | ||
{{td|width = 25%|font-size = 0.95em | {{td|width = 25%|font-size = 0.95em | ||
| [[File:C8_nomercy.png|224px|No Mercy|link=https://left4dead.fandom.com/wiki/No_Mercy]]<br>'''{{l4dwiki|{{Chapters/strings| | | [[File:C8_nomercy.png|224px|No Mercy|link=https://left4dead.fandom.com/wiki/No_Mercy]]<br>'''{{l4dwiki|{{Chapters/strings|L4D1 No Mercy}}|icon=hide}}''' | ||
}} | }} | ||
{{td|width = 25%|font-size = 0.95em | {{td|width = 25%|font-size = 0.95em | ||
| [[File:C9_crashcourse.png|224px|Crash Course|link=https://left4dead.fandom.com/wiki/Crash_Course]]<br>'''{{l4dwiki|{{Chapters/strings| | | [[File:C9_crashcourse.png|224px|Crash Course|link=https://left4dead.fandom.com/wiki/Crash_Course]]<br>'''{{l4dwiki|{{Chapters/strings|L4D1 Crash Course}}|icon=hide}}''' | ||
}} | }} | ||
{{td|width = 25%|font-size = 0.95em | {{td|width = 25%|font-size = 0.95em | ||
| [[File:C10_deadtoll.png|224px|Death Toll|link=https://left4dead.fandom.com/wiki/Death_Toll]]<br>'''{{l4dwiki|{{Chapters/strings| | | [[File:C10_deadtoll.png|224px|Death Toll|link=https://left4dead.fandom.com/wiki/Death_Toll]]<br>'''{{l4dwiki|{{Chapters/strings|L4D1 Death Toll}}|icon=hide}}''' | ||
}} | }} | ||
{{td|width = 25%|font-size = 0.95em | {{td|width = 25%|font-size = 0.95em | ||
| [[File:C11_deadair.png|224px|Dead Air|link=https://left4dead.fandom.com/wiki/Dead_Air]]<br>'''{{l4dwiki|{{Chapters/strings| | | [[File:C11_deadair.png|224px|Dead Air|link=https://left4dead.fandom.com/wiki/Dead_Air]]<br>'''{{l4dwiki|{{Chapters/strings|L4D1 Dead Air}}|icon=hide}}''' | ||
}} | }} | ||
| Line 105: | Line 105: | ||
{{td|width = 25%|font-size = 0.95em | {{td|width = 25%|font-size = 0.95em | ||
| {{Chapters/strings| | | {{Chapters/strings|L4D1 No Mercy maps}} | ||
}} | }} | ||
{{td|width = 25%|font-size = 0.95em | {{td|width = 25%|font-size = 0.95em | ||
| {{Chapters/strings| | | {{Chapters/strings|L4D1 Crash Course maps}} | ||
}} | }} | ||
{{td|width = 25%|font-size = 0.95em | {{td|width = 25%|font-size = 0.95em | ||
| {{Chapters/strings| | | {{Chapters/strings|L4D1 Death Toll maps}} | ||
}} | }} | ||
{{td|width = 25%|font-size = 0.95em | {{td|width = 25%|font-size = 0.95em | ||
| {{Chapters/strings| | | {{Chapters/strings|L4D1 Dead Air maps}} | ||
}} | }} | ||
| Line 125: | Line 125: | ||
{{td|width = 25%|font-size = 0.95em | {{td|width = 25%|font-size = 0.95em | ||
| [[File:C12_bloodharvest.png|224px|Blood Harvest|link=https://left4dead.fandom.com/wiki/Blood_Harvest]]<br>'''{{l4dwiki|{{Chapters/strings| | | [[File:C12_bloodharvest.png|224px|Blood Harvest|link=https://left4dead.fandom.com/wiki/Blood_Harvest]]<br>'''{{l4dwiki|{{Chapters/strings|L4D1 Blood Harvest}}|icon=hide}}''' | ||
}} | }} | ||
{{td|width = 25%|font-size = 0.95em | {{td|width = 25%|font-size = 0.95em | ||
| [[File:C7_thesacrifice.png|224px|The Sacrifice|link=The Sacrifice]]<br>'''[[The Sacrifice|{{Chapters/strings| | | [[File:C7_thesacrifice.png|224px|The Sacrifice|link=The Sacrifice]]<br>'''[[The Sacrifice|{{Chapters/strings|L4D1 The Sacrifice}}]]''' | ||
}} | }} | ||
{{td|width = 25%|font-size = 0.95em | {{td|width = 25%|font-size = 0.95em | ||
| [[File:C14_thelaststand.png|224px|{{Chapters/strings|TLS2 popup}}|link=https://left4dead.fandom.com/wiki/The_Last_Stand_(Left_4_Dead_2)]]<br>'''{{l4dwiki|The Last Stand (Left_4_Dead_2)|{{Chapters/strings| | | [[File:C14_thelaststand.png|224px|{{Chapters/strings|TLS2 popup}}|link=https://left4dead.fandom.com/wiki/The_Last_Stand_(Left_4_Dead_2)]]<br>'''{{l4dwiki|The Last Stand (Left_4_Dead_2)|{{Chapters/strings|L4D2 The Last Stand}}|icon=hide}}''' | ||
}} <!-- Col 4 | }} <!-- Col 4 End --> | ||
{{tr|align = left|bgcolor = rgba(0,0,0,.4)| <!-- Map list --> | {{tr|align = left|bgcolor = rgba(0,0,0,.4) | <!-- Map list --> | ||
{{td|width = 25%|font-size = 0.95em | {{td|width = 25%|font-size = 0.95em | ||
| {{Chapters/strings| | | {{Chapters/strings|L4D1 Blood Harvest maps}} | ||
}} | }} | ||
{{td|width = 25%|font-size = 0.95em | {{td|width = 25%|font-size = 0.95em | ||
| {{Chapters/strings| | | {{Chapters/strings|L4D1 The Sacrifice maps}} | ||
}} | }} | ||
{{td|width = 25%|font-size = 0.95em | {{td|width = 25%|font-size = 0.95em | ||
| {{Chapters/strings| | | {{Chapters/strings|L4D1 The Last Stand maps}} | ||
}} | }} | ||
}} <!-- Map list end --></onlyinclude> | }} <!-- Map list end --></onlyinclude> | ||
<noinclude>}}</noinclude> | <noinclude>}}</noinclude> | ||
Revision as of 14:31, 4 May 2025
{{Table| align = center |
Dead Center
The Passing
Dark Carnival

Swamp Fever
1. The Hotel - {{{2}}}
2. The Streets - {{{3}}}
3. The Mall - {{{4}}}
4. The Atrium - {{{5}}}
1. The Riverbank - {{{2}}}
2. Underground - {{{3}}}
3. The Port - {{{4}}}
1. The Highway - {{{2}}}
2. The Fairground - {{{3}}}
3. The Coaster - {{{4}}}
4. The Barns - {{{5}}}
5. The Concert - {{{6}}}
1. Plank Country - {{{2}}}
2. The Swamp - {{{3}}}
3. Shanty Town - {{{4}}}
4. The Plantation - {{{5}}}

Hard Rain
The Parish
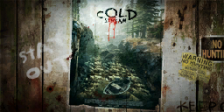
Cold Stream
1. The Milltown - {{{2}}}
2. The Sugar Mill - {{{3}}}
3. Mill Escape - {{{4}}}
4. Return To Town - {{{5}}}
5. Town Escape - {{{6}}}
1. The Riverbank - {{{2}}}
2. Underground - {{{3}}}
3. The Port - {{{4}}}
1. Alpine Creek - {{{2}}}
2. South Pine Stream - {{{3}}}
3. Memorial Bridge - {{{4}}}
4. Cut-throat Creek - {{{5}}}
Campaigns originally from ![]() Left 4 Dead + The Last Stand Community Update
Left 4 Dead + The Last Stand Community Update
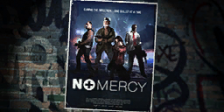
No Mercy
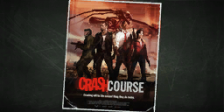
Crash Course
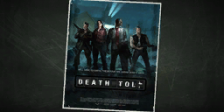
Death Toll
Dead Air
1. The Apartments - {{{2}}}
2. The Subway - {{{3}}}
3. The Sewer - {{{4}}}
4. The Hospital - {{{5}}}
5. Rooftop Finale - {{{6}}}
1. The Alleys - {{{2}}}
2. The Truck Depot Finale - {{{3}}}
1. The Turnpike - {{{2}}}
2. The Drains - {{{3}}}
3. The Church - {{{4}}}
4. The Town - {{{5}}}
5. Boathouse Finale - {{{6}}}
1. The Greenhouse - {{{2}}}
2. The Crane - {{{3}}}
3. The Construction Site - {{{4}}}
4. The Terminal - {{{5}}}
5. Runway Finale - {{{6}}}
Blood Harvest
The Sacrifice
The Last Stand (Campaign)
1. The Woods - {{{2}}}
2. The Tunnel - {{{3}}}
3. The Bridge - {{{4}}}
4. The Train Station - {{{5}}}
5. Farmhouse Finale - {{{6}}}
1. The Docks - {{{2}}}
2. The Barge - {{{3}}}
3. Port Finale - {{{4}}}
The Lighthouse