Ricochet Level Creation/Bouncer: Difference between revisions
Jump to navigation
Jump to search
No edit summary |
No edit summary |
||
| Line 4: | Line 4: | ||
This tutorial explains creation of one of [[Ricochet]] gameplay elements, the bouncer. | This tutorial explains creation of one of [[Ricochet]] gameplay elements, the bouncer. | ||
First, create a 16 units tall, 8 units thick long [[brush]]. Place it 32 units above a pad. | First, create a 16 units tall, 8 units thick long [[brush]] and make it <code>[[func_wall]]</code> entity. Place it 32 units above a pad. | ||
Apply <code>TRIM_YELLOW1</code> texture to its horizontal sides, with Y scale being 0.5, and <code>STRIP1A</code> to the vertical sides, 7.5 or 10 times stretched by Y axis. | Apply <code>TRIM_YELLOW1</code> texture to its horizontal sides, with Y scale being 0.5, and <code>STRIP1A</code> to the vertical sides, 7.5 or 10 times stretched by Y axis. | ||
Revision as of 08:35, 4 April 2012
This tutorial explains creation of one of Ricochet gameplay elements, the bouncer.
First, create a 16 units tall, 8 units thick long brush and make it func_wall entity. Place it 32 units above a pad.
Apply TRIM_YELLOW1 texture to its horizontal sides, with Y scale being 0.5, and STRIP1A to the vertical sides, 7.5 or 10 times stretched by Y axis.
Then, create a brush with the same dimensions, but with the height of 8 units, and put it above the brush you made before. Cover it with AAATRIGGER texture, and make it trigger_push entity with speed of push being 0.
After doing that, select both brushes and turn them 15-45° vertically while holding down ⇧ Shift. Do not rotate the textures.
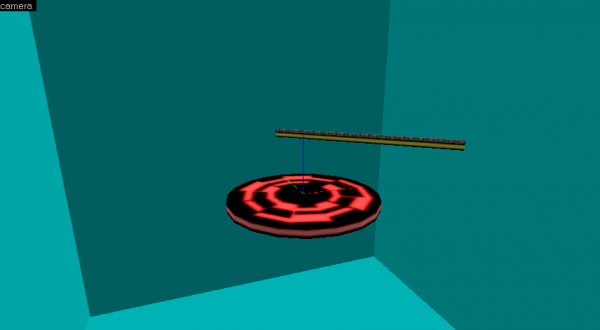
After all, you should get something like in this picture:

Bouncer. Download this map.