LOD Models: Difference between revisions
m (Setting bug notice hidetested=1 param on page where the bug might not need tested in param specified) |
|||
| (20 intermediate revisions by 14 users not shown) | |||
| Line 1: | Line 1: | ||
{{LanguageBar}} | |||
[[Category:Modeling]][[Category:Tutorials]] | |||
This tutorial will help you create [[LOD| '''L'''evel '''o'''f '''D'''etail]] Models in an efficient way. "Efficient" means that we want to increase the performance noticeably, spend as little time as possible, and still keep our model visually appealing at all stages. | |||
Before you begin you should | ==Planning Stage== | ||
Before you begin, you should ask if your model actually needs an LOD model—will it achieve a noticeable performance increase or just be a waste of time? | |||
===When to | ===When to Use LOD Models=== | ||
It may be worth creating one or more LOD models if your model has: | |||
*Small details which increase the polycount but cannot be seen at a distance | |||
*Rounded or organic areas using a lot of polygons to suggest "soft" edges | |||
*Physic props—you never know where the player is going to carry them | |||
*Expensive shaders (e.g., [[bump map]]s, [[Reflective Materials|reflective materials]], or [[EyeRefract|the eye shader]].) | |||
Some cases in which an LOD model is unlikely to provide any noticeable performance increase: | |||
*Your model already has a small polycount or is low-detail | |||
*You don't think you can reduce the polycount by at least 30% (the model has no round/organic features) | |||
*Your model is static and is only going to be used in areas with a good performance | |||
Choosing where to draw the line is your decision, but it may be helpful to look at the HL2 models to see when Valve has created LOD models and when they thought it was unnecessary. | |||
==Modeling LODs== | ==Modeling LODs== | ||
===Tips=== | ===Tips=== | ||
The work in the model editor should be kept to a minimum. You don't want to spend as much time on your LOD models as you did on the original model! Our goal is to make a few modifications on the model that will reduce the polycount within a few minutes. We don't want to make a whole new model, redo our UV map, or do something else that consumes a lot of time. | |||
The work in the model editor should be kept to a minimum. You don't want to | |||
Get used to the fact that a LOD model can only be seen from a large distance. If a player wants to see details, he'll step closer. Since the player does not focus on the details, we can remove them without him noticing if it is done in a subtle way. Things you don't want to do: | Get used to the fact that a LOD model can only be seen from a large distance. If a player wants to see details, he'll step closer. Since the player does not focus on the details, we can remove them without him noticing if it is done in a subtle way. Things you don't want to do: | ||
* | *Change the outline of the model or anything that gives cover. You can remove the seats within a car, but don't remove the roof. | ||
*Moving details on the UV map. The texture will most likely get stretched during the process, | *Moving details on the UV map. The texture will most likely get stretched during the process regardless; however, if specific details move from one place to another, it'll be more noticeable. | ||
*Smoothing groups changing in a way that one large area turns from shadowed into brightened or similar. | *Smoothing groups changing in a way that one large area turns from shadowed into brightened or similar. | ||
===Techniques=== | ===Techniques=== | ||
;Removing small details:Often, details are too small to be seen from a distance—they simply won't be drawn with the resolution of modern-day hardware or can't be noticed. | |||
;Reducing polys of complex surfaces:This can be done by using the tools your modeling package offers. It'll weld vertices without destroying the UV map. | |||
;Rebuilding complex geometry to be simpler:This is only recommended if the automatic tools fail, as it is rather time-consuming and needs a new UV map (use the same skin in any case). Rebuild the basic shape of the model (or a part of it) as low-poly as possible. | |||
;Use QC commands to simplify the model:By using preexisting [[:Category:QC Commands|QC commands]], you can automatically remove or replace parts of your models mesh during compile without having to edit them yourself. | |||
;Use a low-polycount mesh for your model's shadow:Often overlooked, you should create or reuse an existing low-poly LOD mesh as the mesh used for dynamic shadow rendering.{{note|{{ent|prop_static}}s cast lightmap shadows, so this is useless there.}} | |||
;Replace an expensive texture/shader with a simpler one:If you're using an [[expensive]] shader on a model, such as {{ent|EyeRefract}} or a [[bump map]], you can replace the texture that uses it with a less expensive one for specific LOD levels. | |||
;Simplify your model's skeleton:More useful for character models, you can simplify the skeleton by replacing or collapsing bones when the model is a certain distance from the viewer. For example, you could simplify the hands by removing the finger bones, leaving just the hand bone. This will result in the fingers being out straight, but at the distance the model is, the viewer wouldn't notice this. | |||
;Disable facial animation:For character models, it's pointless having the face animated when it's in the distance and it can't be seen. | |||
===Example (Using [[3DS Max]])=== | |||
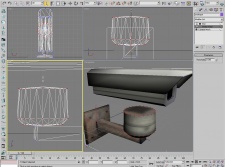
[[File:lodmodel1.jpg|thumb|225px|The example model]]This animated outdoor camera is highly detailed. Bolts, cables, and the rotating camera-holder are small details with lots of polys. The chassis of the motor is round and highly detailed as well. | |||
The mounting on the wall is pretty straight forward. Few polys are used here, so an optimization is unnecessary. | |||
The goal is to make two different LOD models: One for a distance of 25 units per pixel and one for 50 units per pixel. | |||
{{clr}} | |||
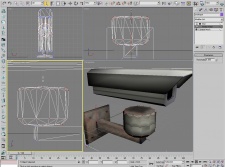
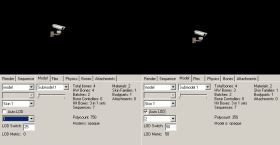
For the first one, some very small details (bolts, cable) are deleted. If we check the difference of the reference and the LOD model in the model viewer, the missing bolts cannot be noticed. The loss of the cable might seem a bit drastic, but in-game you'll most likely have a brighter background so the contrast between cable and wall will not be as big. Furthermore, the player doesn't focus on the cable—he will simply not notice it. | |||
[[File:lodmodel2.jpg|thumb|left|225px|Small details are deleted]] [[File:lodcomparison1.png|thumb|left|280px|Models compared in HLMV at 25 meter distance]] | |||
{{clr}} | |||
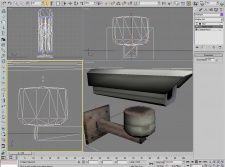
' | [[File:lodmodel3.jpg|thumb|225px|Vertex Weld selected]]In the second step, the camera-holder was deleted. Furthermore, we want to reduce the number of polygons used on the chassis of the motor. The polygons have been selected and the <code>vertex weld</code> tool is used. By increasing the threshold, vertices are weld together and max adjusts the UV map. Try to find a good value which removes as much polys as possible while retaining the shape of the model. | ||
{{clr}} | |||
[[File:lodmodel4.jpg|thumb|left|225px|A first reducement of the polys, but there are still too much polys.]] | |||
[[File:lodmodel5.jpg|thumb|left|225px|Messed up, don't trust the automatic tools blindly.]] | |||
[[File:lodmodel6.jpg|thumb|left|225px|The final setting. Polys drastically reduced.]] | |||
{{clr}} | |||
Checking in the model viewer once again, the difference is once again hardly noticeable, but the polygon count is significantly lowered. | |||
[[File:lodcomparison2.png|thumb|left|280px|Models compared in HLMV at 50 meter distance]] | |||
{{clr}} | |||
==Specific <tt>.qc</tt> File Techniques== | |||
To use LOD levels, you need to add some extra commands to your {{ent|.QC Commands|alt=.qc}} file. | |||
First of all, you need to specify the <code>$lod <[http://www.interlopers.net/forum/viewtopic.php?f=25&t=29954 units per pixel]> { ... }</code> command. This denotes that further commands between the braces should be applied to your model for that specific LOD level. | |||
===Replacing the Model=== | |||
The most common command is <tt>replacemodel (model name) (replacement model)</tt>. You can specify which model is to be replaced and which <tt>.smd</tt> is to be used for the replacement. | |||
===Replacing the | |||
The most common command is < | |||
<pre> | <pre> | ||
| Line 119: | Line 85: | ||
</pre> | </pre> | ||
Here our highest polycount model ( | Here our highest-polycount model (<tt>mymodelreference.smd</tt>) is being replaced with a simpler, lower-polycount version after 25 units per pixel and 50 units per pixel. | ||
{{note|For each LOD level definition, we are replacing the original mesh we defined with <code>$model</code> or < | {{note|For each LOD level definition, we are replacing the original mesh we defined with <code>$model</code> or <tt>$body</tt>. LOD commands don't replace the meshes of any previously-defined LOD level.}} | ||
===Using a | ===Using a Low-Poly Model for the Shadow=== | ||
There is also a <code>$shadowlod { ... }</code> command which contains instructions which specific model is to be used for rendering the model's shadow. | There is also a <code>$shadowlod { ... }</code> command, which contains instructions on which specific model is to be used for rendering the model's shadow. | ||
<pre> | <pre> | ||
| Line 134: | Line 100: | ||
</pre> | </pre> | ||
= | {{bug|hidetested=1|Placing the opening brace on the same line as the <tt>$shadowlod</tt> command will cause an unrecoverable error during compile. Always add a line break!}} | ||
===A Simple <tt>.qc</tt> Example=== | |||
<pre>$modelname mymodelfolder/mymodelcompiled.mdl | <pre>$modelname mymodelfolder/mymodelcompiled.mdl | ||
$cdmaterials modeltextures/mytexturefolder | $cdmaterials modeltextures/mytexturefolder | ||
| Line 162: | Line 129: | ||
The above gives a very simple example of using LOD levels. Two LOD models are used to reduce the polys at distance. The second LOD model was also used for the shadow LOD model. | The above gives a very simple example of using LOD levels. Two LOD models are used to reduce the polys at distance. The second LOD model was also used for the shadow LOD model. | ||
However there are are a number of additional | However, there are are a number of additional QC commands you can use within <code>$lod</code> groups to improve performance even more. | ||
The above example demonstrates the use of the [[ | ===Replacing or Removing a Specific Mesh=== | ||
The above example demonstrates the use of the [[:Category:QC Commands|QC command]] <tt>replacemodel</tt>, which replaces one [[SMD]] mesh with another. You can optionally choose to completely remove that mesh, either by using ''blank'' as the replacement mesh name or by using the <code>removemodel</code> command. | |||
The following example is for a fictional character model which comprises of two | The following example is for a fictional character model which comprises of two meshes—one for the body and one for the character's equipment packs. At a distance, we choose to remove the equipment mesh entirely. | ||
<pre> | <pre> | ||
| Line 192: | Line 158: | ||
</pre> | </pre> | ||
===Replacing a | ===Replacing a Texture or Using Different Shaders=== | ||
Expensive shaders often have a big performance impact as well. Disabling them after a certain distance is an easy way to increase the performance. | Expensive shaders often have a big performance impact as well. Disabling them after a certain distance is an easy way to increase the performance. | ||
To do this you use the <code>replacematerial</code> [[ | To do this you use the <code>replacematerial</code> [[:Category:QC Commands|QC command]], which replaces one [[VMT]] material with another. An example of this would be replacing the eye material/shader on a character model with something simpler, such as a {{ent|VertexLitGeneric}} texture. | ||
{{note|While it might seem odd to replace the eye textures with the face texture it's actually quite smart as the face texture is already loaded into memory and a new texture won't need to be fetched. Every little counts.}} | In the following example, the materials <tt>righteye.vmt</tt> and <tt>lefteye.vmt</tt> use the expensive {{ent|EyeRefract}} shader, so they're replaced at LOD level 30 with the material <tt>face.vmt</tt>. The result would look odd close up, but as the model will be sufficiently far away from the viewer, they are unlikely to notice.{{note|While it might seem odd to replace the eye textures with the face texture, it's actually quite smart as the face texture is already loaded into memory, and a new texture won't need to be fetched. Every little bit counts.}} | ||
<pre> | <pre> | ||
| Line 210: | Line 173: | ||
</pre> | </pre> | ||
Another technique is to simply remove the parts of the mesh that use a certain material or shader. For example, on a character model viewed at a great distance you would not be able to make out the eyes or mouth at all so it may be beneficial to simply just remove them. This can be achieved with the <code>removemesh</code> command which will remove any faces in the models mesh which use the specified texture, helping to reduce polycount. | Another technique is to simply remove the parts of the mesh that use a certain material or shader. For example, on a character model viewed at a great distance, you would not be able to make out the eyes or mouth at all, so it may be beneficial to simply just remove them. This can be achieved with the <code>removemesh</code> command, which will remove any faces in the models mesh which use the specified texture, helping to reduce polycount. | ||
<pre> | <pre> | ||
$lod 60 | $lod 60 | ||
{ | { | ||
removemesh "righteye | removemesh "righteye" | ||
removemesh "lefteye | removemesh "lefteye" | ||
} | } | ||
</pre> | </pre> | ||
===Simplify | ===Simplify Your Model's Skeleton=== | ||
Another way to improve performance on things like character models is to simplify the model's skeleton based on its distance. This can be done via the [[:Category:QC Commands|QC commands]] <code>bonetreecollapse</code> and <tt>replacebone</tt>. | |||
Another way to improve performance on things like character models is to | |||
<code>bonetreecollapse</code> will collapse | <code>bonetreecollapse</code> will collapse or remove all the bones which are a child of the one you specify. For example, collapsing <tt>ValveBiped.Bip01_L_Hand</tt> will remove all the finger bones. Any vertices weighted to those bones are reassigned to the hand bone and will move with it. This will mean that the fingers will no longer be animated, but as the model is in the distance, this won't be noticed. | ||
The following example removes the finger bones on the left and right hands of our character model at LOD level 30. | The following example removes the finger bones on the left and right hands of our character model at LOD level 30. | ||
| Line 236: | Line 198: | ||
</pre> | </pre> | ||
<code>replacebone</code> works in a similar way to < | <code>replacebone</code> works in a similar way to <tt>bonetreecollapse</tt>, but it merely replaces one bone with another. This can be useful for such things as removing helper bones (Ulna, Wrist, Elbow, etc.) and attaching the vertices that used them to another. | ||
The following example removes the helper bones from a character rig by | The following example removes the helper bones from a character rig by reassigning the vertices attached to them to other bones in the basic skeleton: | ||
<pre> | <pre> | ||
| Line 258: | Line 220: | ||
</pre> | </pre> | ||
===Disable | ===Disable Facial Animation=== | ||
Character models at a distance are often so small that the viewer would never make out any facial animation on them. When this is the case, you can use the [[:Category:QC Commands|QC Command]] <code>nofacial</code> to disable face animation for that LOD level. | |||
Character models at a distance are often so small that the viewer would never make out any facial animation on them. When this is the case, you can use the [[ | |||
<pre> | <pre> | ||
| Line 269: | Line 230: | ||
</pre> | </pre> | ||
===A | ===A Complete Character QC Example=== | ||
The following is an example of a complete <tt>.qc</tt> file for a humanoid character model. You'll see we define 5 LOD levels, a specific shadow LOD, and the texture and skeleton simplification methods. | |||
The following is an example of a complete . | |||
<pre> | <pre> | ||
| Line 462: | Line 422: | ||
} | } | ||
</pre> | </pre> | ||
Latest revision as of 06:12, 20 May 2025
This tutorial will help you create Level of Detail Models in an efficient way. "Efficient" means that we want to increase the performance noticeably, spend as little time as possible, and still keep our model visually appealing at all stages.
Planning Stage
Before you begin, you should ask if your model actually needs an LOD model—will it achieve a noticeable performance increase or just be a waste of time?
When to Use LOD Models
It may be worth creating one or more LOD models if your model has:
- Small details which increase the polycount but cannot be seen at a distance
- Rounded or organic areas using a lot of polygons to suggest "soft" edges
- Physic props—you never know where the player is going to carry them
- Expensive shaders (e.g., bump maps, reflective materials, or the eye shader.)
Some cases in which an LOD model is unlikely to provide any noticeable performance increase:
- Your model already has a small polycount or is low-detail
- You don't think you can reduce the polycount by at least 30% (the model has no round/organic features)
- Your model is static and is only going to be used in areas with a good performance
Choosing where to draw the line is your decision, but it may be helpful to look at the HL2 models to see when Valve has created LOD models and when they thought it was unnecessary.
Modeling LODs
Tips
The work in the model editor should be kept to a minimum. You don't want to spend as much time on your LOD models as you did on the original model! Our goal is to make a few modifications on the model that will reduce the polycount within a few minutes. We don't want to make a whole new model, redo our UV map, or do something else that consumes a lot of time.
Get used to the fact that a LOD model can only be seen from a large distance. If a player wants to see details, he'll step closer. Since the player does not focus on the details, we can remove them without him noticing if it is done in a subtle way. Things you don't want to do:
- Change the outline of the model or anything that gives cover. You can remove the seats within a car, but don't remove the roof.
- Moving details on the UV map. The texture will most likely get stretched during the process regardless; however, if specific details move from one place to another, it'll be more noticeable.
- Smoothing groups changing in a way that one large area turns from shadowed into brightened or similar.
Techniques
- Removing small details
- Often, details are too small to be seen from a distance—they simply won't be drawn with the resolution of modern-day hardware or can't be noticed.
- Reducing polys of complex surfaces
- This can be done by using the tools your modeling package offers. It'll weld vertices without destroying the UV map.
- Rebuilding complex geometry to be simpler
- This is only recommended if the automatic tools fail, as it is rather time-consuming and needs a new UV map (use the same skin in any case). Rebuild the basic shape of the model (or a part of it) as low-poly as possible.
- Use QC commands to simplify the model
- By using preexisting QC commands, you can automatically remove or replace parts of your models mesh during compile without having to edit them yourself.
- Use a low-polycount mesh for your model's shadow
- Often overlooked, you should create or reuse an existing low-poly LOD mesh as the mesh used for dynamic shadow rendering.
 Note:prop_statics cast lightmap shadows, so this is useless there.
 - Replace an expensive texture/shader with a simpler one
- If you're using an expensive shader on a model, such as EyeRefract or a bump map, you can replace the texture that uses it with a less expensive one for specific LOD levels.
- Simplify your model's skeleton
- More useful for character models, you can simplify the skeleton by replacing or collapsing bones when the model is a certain distance from the viewer. For example, you could simplify the hands by removing the finger bones, leaving just the hand bone. This will result in the fingers being out straight, but at the distance the model is, the viewer wouldn't notice this.
- Disable facial animation
- For character models, it's pointless having the face animated when it's in the distance and it can't be seen.
Example (Using 3DS Max)
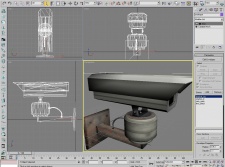
This animated outdoor camera is highly detailed. Bolts, cables, and the rotating camera-holder are small details with lots of polys. The chassis of the motor is round and highly detailed as well.
The mounting on the wall is pretty straight forward. Few polys are used here, so an optimization is unnecessary.
The goal is to make two different LOD models: One for a distance of 25 units per pixel and one for 50 units per pixel.
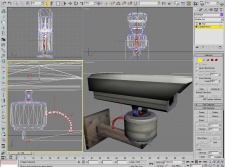
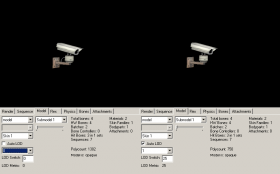
For the first one, some very small details (bolts, cable) are deleted. If we check the difference of the reference and the LOD model in the model viewer, the missing bolts cannot be noticed. The loss of the cable might seem a bit drastic, but in-game you'll most likely have a brighter background so the contrast between cable and wall will not be as big. Furthermore, the player doesn't focus on the cable—he will simply not notice it.
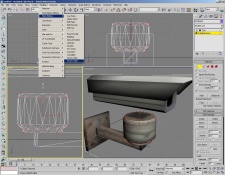
In the second step, the camera-holder was deleted. Furthermore, we want to reduce the number of polygons used on the chassis of the motor. The polygons have been selected and the vertex weld tool is used. By increasing the threshold, vertices are weld together and max adjusts the UV map. Try to find a good value which removes as much polys as possible while retaining the shape of the model.
Checking in the model viewer once again, the difference is once again hardly noticeable, but the polygon count is significantly lowered.
Specific .qc File Techniques
To use LOD levels, you need to add some extra commands to your .qc file.
First of all, you need to specify the $lod <units per pixel> { ... } command. This denotes that further commands between the braces should be applied to your model for that specific LOD level.
Replacing the Model
The most common command is replacemodel (model name) (replacement model). You can specify which model is to be replaced and which .smd is to be used for the replacement.
// LOD 1
$lod 25
{
      replacemodel "mymodelreference.smd" "mymodel_LOD1.smd"
}

// LOD 2
$lod 50
{
      replacemodel "mymodelreference.smd" "mymodel_LOD2.smd"
}
Here our highest-polycount model (mymodelreference.smd) is being replaced with a simpler, lower-polycount version after 25 units per pixel and 50 units per pixel.
$model or $body. LOD commands don't replace the meshes of any previously-defined LOD level.Using a Low-Poly Model for the Shadow
There is also a $shadowlod { ... } command, which contains instructions on which specific model is to be used for rendering the model's shadow.
// Shadow LOD
$shadowlod
{
      replacemodel "mymodelreference.smd" "mymodel_shadow.smd"
}
A Simple .qc Example
$modelname mymodelfolder/mymodelcompiled.mdl
$cdmaterials modeltextures/mytexturefolder
$surfaceprop metal
$body studio "mymodelreference.smd"
$sequence idle "mymodelreference.smd" loop fps 15
$collisionmodel "mymodel_phy.smd" {
      Mass 5
}

$lod 15
{
      replacemodel "mymodelreference" "mymodel_lod1"
}

$lod 40
{
      replacemodel "mymodelreference" "mymodel_lod2"
}

$shadowlod
{
      replacemodel "mymodelreference" "mymodel_lod2"
}
The above gives a very simple example of using LOD levels. Two LOD models are used to reduce the polys at distance. The second LOD model was also used for the shadow LOD model.
However, there are are a number of additional QC commands you can use within $lod groups to improve performance even more.
Replacing or Removing a Specific Mesh
The above example demonstrates the use of the QC command replacemodel, which replaces one SMD mesh with another. You can optionally choose to completely remove that mesh, either by using blank as the replacement mesh name or by using the removemodel command.
The following example is for a fictional character model which comprises of two meshes—one for the body and one for the character's equipment packs. At a distance, we choose to remove the equipment mesh entirely.
// LOD 0 - main models
$model soldier_body "body.smd"
$model soldier_kit  "kit.smd"

// LOD 1
$lod 25
{
      replacemodel "body.smd" "body_LOD1.smd"
      replacemodel "kit.smd"  "kit_LOD1.smd"
}

// LOD 2
$lod 50
{
      replacemodel "body.smd" "body_LOD2.smd"
      removemodel  "kit.smd"
      // alternate method
      // replacemodel "kit.smd" blank
}
Replacing a Texture or Using Different Shaders
Expensive shaders often have a big performance impact as well. Disabling them after a certain distance is an easy way to increase the performance.
To do this you use the replacematerial QC command, which replaces one VMT material with another. An example of this would be replacing the eye material/shader on a character model with something simpler, such as a VertexLitGeneric texture.
In the following example, the materials righteye.vmt and lefteye.vmt use the expensive EyeRefract shader, so they're replaced at LOD level 30 with the material face.vmt. The result would look odd close up, but as the model will be sufficiently far away from the viewer, they are unlikely to notice.
$lod 30
{
	replacematerial "righteye" "face"
	replacematerial "lefteye"  "face"
}
Another technique is to simply remove the parts of the mesh that use a certain material or shader. For example, on a character model viewed at a great distance, you would not be able to make out the eyes or mouth at all, so it may be beneficial to simply just remove them. This can be achieved with the removemesh command, which will remove any faces in the models mesh which use the specified texture, helping to reduce polycount.
$lod 60
{
	removemesh "righteye"
	removemesh "lefteye"
}
Simplify Your Model's Skeleton
Another way to improve performance on things like character models is to simplify the model's skeleton based on its distance. This can be done via the QC commands bonetreecollapse and replacebone.
bonetreecollapse will collapse or remove all the bones which are a child of the one you specify. For example, collapsing ValveBiped.Bip01_L_Hand will remove all the finger bones. Any vertices weighted to those bones are reassigned to the hand bone and will move with it. This will mean that the fingers will no longer be animated, but as the model is in the distance, this won't be noticed.
The following example removes the finger bones on the left and right hands of our character model at LOD level 30.
$lod 30
{
        bonetreecollapse "ValveBiped.Bip01_L_Hand"
        bonetreecollapse "ValveBiped.Bip01_R_Hand"
}
replacebone works in a similar way to bonetreecollapse, but it merely replaces one bone with another. This can be useful for such things as removing helper bones (Ulna, Wrist, Elbow, etc.) and attaching the vertices that used them to another.
The following example removes the helper bones from a character rig by reassigning the vertices attached to them to other bones in the basic skeleton:
$lod 30
{
	replacebone "ValveBiped.Bip01_L_Elbow" "ValveBiped.Bip01_L_upperarm"
	replacebone "ValveBiped.Bip01_R_Elbow" "ValveBiped.Bip01_R_upperarm"
	replacebone "ValveBiped.Bip01_L_Ulna" "ValveBiped.Bip01_L_Forearm"
	replacebone "ValveBiped.Bip01_R_Ulna" "ValveBiped.Bip01_R_Forearm"
	replacebone "ValveBiped.Bip01_L_Shoulder" "ValveBiped.Bip01_L_upperarm"
	replacebone "ValveBiped.Bip01_R_Shoulder" "ValveBiped.Bip01_R_upperarm"
	replacebone "ValveBiped.Bip01_L_Trapezius" "ValveBiped.Bip01_L_upperarm"
	replacebone "ValveBiped.Bip01_R_Trapezius" "ValveBiped.Bip01_R_upperarm"
	replacebone "ValveBiped.Bip01_L_Wrist" "ValveBiped.Bip01_L_Forearm"
	replacebone "ValveBiped.Bip01_R_Wrist" "ValveBiped.Bip01_R_Forearm"
	replacebone "ValveBiped.Bip01_L_Bicep" "ValveBiped.Bip01_L_upperarm"
	replacebone "ValveBiped.Bip01_R_Bicep" "ValveBiped.Bip01_R_upperarm"
}
Disable Facial Animation
Character models at a distance are often so small that the viewer would never make out any facial animation on them. When this is the case, you can use the QC Command nofacial to disable face animation for that LOD level.
$lod 30
{
	nofacial
}
A Complete Character QC Example
The following is an example of a complete .qc file for a humanoid character model. You'll see we define 5 LOD levels, a specific shadow LOD, and the texture and skeleton simplification methods.
// *** mode and material paths *** //
//
$cd .\
$modelname candy.mdl
$cdmaterials models\candy\
$cdmaterials models\human\female
$mostlyopaque

// *** start eye/face/body data *** //
//
$eyeposition 0.000 0.000 70.000
$illumposition 1.165 -0.000 34.196

// *** head controllers *** //
//
$attachment "eyes" "ValveBiped.Bip01_Head1" -0.0454 -3.2682 67.3843 absolute
$attachment "mouth" "ValveBiped.Bip01_Head1" 0.80 -5.50 0.10 rotate 0 -80 -90
$attachment "chest" "ValveBiped.Bip01_Spine2" 5.00 4.00 0.00 rotate 0 90 90

// *** include anims *** //
//
$includemodel humans/female_shared.mdl
$includemodel humans/female_ss.mdl
$includemodel humans/female_gestures.mdl
$includemodel humans/female_postures.mdl

// *** head mesh and rig body *** //
//
$model candy_body ".\shared\candy_body_ref.smd"
$model candy_head ".\shared\candy_face_ref.smd"

// *** set-up LOD *** //
//

// LOD 1
$lod 10
{
        // replace LOD 0 meshes with our lower poly ones
	replacemodel ".\shared\candy_face_ref.smd" ".\shared\candy_face_ref_LOD1.smd"
	replacemodel ".\shared\candy_body_ref.smd" ".\shared\candy_body_ref_LOD1.smd"
}

// LOD 2
$lod 20
{
	replacemodel ".\shared\candy_face_ref.smd" ".\shared\candy_face_ref_LOD2.smd"
	replacemodel ".\shared\candy_body_ref.smd" ".\shared\candy_body_ref_LOD2.smd"
}

// LOD 3
$lod 30
{
	replacemodel ".\shared\candy_face_ref.smd" ".\shared\candy_face_ref_LOD3.smd"
	replacemodel ".\shared\candy_body_ref.smd" ".\shared\candy_body_ref_LOD3.smd"

	// collapse the hands down to the hand bone, removing the fingers
        bonetreecollapse "ValveBiped.Bip01_L_Hand"
        bonetreecollapse "ValveBiped.Bip01_R_Hand"

	// remove our eye material/shader with something simpler
        replacematerial "candy_righteye" "candy_face"
	replacematerial "candy_lefteye" "candy_face"

        // turn off facial animation
	nofacial
}

// LOD 4
$lod 45
{
	replacemodel ".\shared\candy_face_ref.smd" ".\shared\candy_face_ref_LOD4.smd"
	replacemodel ".\shared\candy_body_ref.smd" ".\shared\candy_body_ref_LOD4.smd"

        // simplifiy our skeleton further by collapsing extremities
        bonetreecollapse "ValveBiped.Bip01_L_Forearm"
        bonetreecollapse "ValveBiped.Bip01_R_Forearm"
        bonetreecollapse "ValveBiped.Bip01_L_Calf"
        bonetreecollapse "ValveBiped.Bip01_R_Calf"
        bonetreecollapse "ValveBiped.Bip01_Neck1"

        // simplifiy the spine
        replacebone "ValveBiped.Bip01_Neck1" "ValveBiped.Bip01_Spine2"
        replacebone "ValveBiped.Bip01_Spine4" "ValveBiped.Bip01_Spine2"
        replacebone "ValveBiped.Bip01_Spine1" "ValveBiped.Bip01_Spine"
        replacebone "ValveBiped.Bip01_Spine" "ValveBiped.Bip01_Spine2"

	// simplifiy by removing the helper bones
     	replacebone "ValveBiped.Bip01_L_Elbow" "ValveBiped.Bip01_L_upperarm"
	replacebone "ValveBiped.Bip01_R_Elbow" "ValveBiped.Bip01_R_upperarm"
	replacebone "ValveBiped.Bip01_L_Ulna" "ValveBiped.Bip01_L_Forearm"
	replacebone "ValveBiped.Bip01_R_Ulna" "ValveBiped.Bip01_R_Forearm"
	replacebone "ValveBiped.Bip01_L_Shoulder" "ValveBiped.Bip01_L_upperarm"
	replacebone "ValveBiped.Bip01_R_Shoulder" "ValveBiped.Bip01_R_upperarm"
	replacebone "ValveBiped.Bip01_L_Trapezius" "ValveBiped.Bip01_L_upperarm"
	replacebone "ValveBiped.Bip01_R_Trapezius" "ValveBiped.Bip01_R_upperarm"
	replacebone "ValveBiped.Bip01_L_Wrist" "ValveBiped.Bip01_L_Forearm"
	replacebone "ValveBiped.Bip01_R_Wrist" "ValveBiped.Bip01_R_Forearm"
	replacebone "ValveBiped.Bip01_L_Bicep" "ValveBiped.Bip01_L_upperarm"
	replacebone "ValveBiped.Bip01_R_Bicep" "ValveBiped.Bip01_R_upperarm"

	replacematerial "candy_righteye" "candy_face"
	replacematerial "candy_lefteye" "candy_face"

        // remove any meshes covered by the eye textures
	removemesh "models\candy\candy_righteye"
	removemesh "models\candy\candy_lefteye"

	nofacial
}

// LOD 5
$lod 70
{
	replacemodel ".\shared\candy_face_ref.smd" ".\shared\candy_face_ref_LOD5.smd"
	replacemodel ".\shared\candy_body_ref.smd" ".\shared\candy_body_ref_LOD5.smd"

        bonetreecollapse "ValveBiped.Bip01_L_Forearm"
        bonetreecollapse "ValveBiped.Bip01_R_Forearm"
        bonetreecollapse "ValveBiped.Bip01_L_Calf"
        bonetreecollapse "ValveBiped.Bip01_R_Calf"
        bonetreecollapse "ValveBiped.Bip01_Neck1"
        replacebone "ValveBiped.Bip01_Neck1" "ValveBiped.Bip01_Spine2"
        replacebone "ValveBiped.Bip01_Spine4" "ValveBiped.Bip01_Spine2"
        replacebone "ValveBiped.Bip01_Spine1" "ValveBiped.Bip01_Spine"
        replacebone "ValveBiped.Bip01_Spine" "ValveBiped.Bip01_Spine2"

     	replacebone "ValveBiped.Bip01_L_Elbow" "ValveBiped.Bip01_L_upperarm"
	replacebone "ValveBiped.Bip01_R_Elbow" "ValveBiped.Bip01_R_upperarm"
	replacebone "ValveBiped.Bip01_L_Ulna" "ValveBiped.Bip01_L_Forearm"
	replacebone "ValveBiped.Bip01_R_Ulna" "ValveBiped.Bip01_R_Forearm"
	replacebone "ValveBiped.Bip01_L_Shoulder" "ValveBiped.Bip01_L_upperarm"
	replacebone "ValveBiped.Bip01_R_Shoulder" "ValveBiped.Bip01_R_upperarm"
	replacebone "ValveBiped.Bip01_L_Trapezius" "ValveBiped.Bip01_L_upperarm"
	replacebone "ValveBiped.Bip01_R_Trapezius" "ValveBiped.Bip01_R_upperarm"
	replacebone "ValveBiped.Bip01_L_Wrist" "ValveBiped.Bip01_L_Forearm"
	replacebone "ValveBiped.Bip01_R_Wrist" "ValveBiped.Bip01_R_Forearm"
	replacebone "ValveBiped.Bip01_L_Bicep" "ValveBiped.Bip01_L_upperarm"
	replacebone "ValveBiped.Bip01_R_Bicep" "ValveBiped.Bip01_R_upperarm"

	replacematerial "candy_righteye" "candy_face"
	replacematerial "candy_lefteye" "candy_face"

	removemesh "models\candy\candy_righteye"
	removemesh "models\candy\candy_lefteye"

	nofacial
}

// SHADOW
$shadowlod
{
        // use our existing LOD 4 mesh as a simpler mesh for rendering the models shadow
        //
	replacemodel ".\shared\candy_face_ref.smd" ".\shared\candy_face_ref_LOD4.smd"
	replacemodel ".\shared\candy_body_ref.smd" ".\shared\candy_body_ref_LOD4.smd"

        bonetreecollapse "ValveBiped.Bip01_L_Forearm"
        bonetreecollapse "ValveBiped.Bip01_R_Forearm"
        bonetreecollapse "ValveBiped.Bip01_L_Calf"
        bonetreecollapse "ValveBiped.Bip01_R_Calf"
        bonetreecollapse "ValveBiped.Bip01_Neck1"
        replacebone "ValveBiped.Bip01_Neck1" "ValveBiped.Bip01_Spine2"
        replacebone "ValveBiped.Bip01_Spine4" "ValveBiped.Bip01_Spine2"
        replacebone "ValveBiped.Bip01_Spine1" "ValveBiped.Bip01_Spine"
        replacebone "ValveBiped.Bip01_Spine" "ValveBiped.Bip01_Spine2"

     	replacebone "ValveBiped.Bip01_L_Elbow" "ValveBiped.Bip01_L_upperarm"
	replacebone "ValveBiped.Bip01_R_Elbow" "ValveBiped.Bip01_R_upperarm"
	replacebone "ValveBiped.Bip01_L_Ulna" "ValveBiped.Bip01_L_Forearm"
	replacebone "ValveBiped.Bip01_R_Ulna" "ValveBiped.Bip01_R_Forearm"
	replacebone "ValveBiped.Bip01_L_Shoulder" "ValveBiped.Bip01_L_upperarm"
	replacebone "ValveBiped.Bip01_R_Shoulder" "ValveBiped.Bip01_R_upperarm"
	replacebone "ValveBiped.Bip01_L_Trapezius" "ValveBiped.Bip01_L_upperarm"
	replacebone "ValveBiped.Bip01_R_Trapezius" "ValveBiped.Bip01_R_upperarm"
	replacebone "ValveBiped.Bip01_L_Wrist" "ValveBiped.Bip01_L_Forearm"
	replacebone "ValveBiped.Bip01_R_Wrist" "ValveBiped.Bip01_R_Forearm"
	replacebone "ValveBiped.Bip01_L_Bicep" "ValveBiped.Bip01_L_upperarm"
	replacebone "ValveBiped.Bip01_R_Bicep" "ValveBiped.Bip01_R_upperarm"

	replacematerial "candy_righteye" "candy_face"
	replacematerial "candy_lefteye" "candy_face"

	removemesh "models\candy\candy_righteye"
	removemesh "models\candy\candy_lefteye"

	nofacial
}
