Template:Chapters/Left 4 Dead 2: Difference between revisions
Jump to navigation
Jump to search
")


(Created page with "<noinclude> {{Ulf|all-lang=1}} {{todo|Add map names.}} {{Table| align = center | <!-- Keep this here to see the table --> </noinclude> <onlyinclude> {{tr| align = center | <!-- Col 1 --> {{td|width = 18%|font-size = 0.95em | 224px|Dead Center|link=https://left4dead.fandom.com/wiki/Dead_Center<br>'''{{l4dwiki|{{Chapters/strings|DC1}}|icon=hide}}''' }} {{td|width = 18%|font-size = 0.95em | File:C6_thepassing.png|224px|The Passing|link=http...") |
(Replaced all fandom links with miraheze.) |
||
| (14 intermediate revisions by 3 users not shown) | |||
| Line 1: | Line 1: | ||
<noinclude> | <noinclude> | ||
{{Ulf|all-lang=1}} | {{Ulf|all-lang=1}} | ||
{{Table| align = center | <!-- Keep this here to see the table --> | {{Table| align = center | <!-- Keep this here to see the table --> | ||
</noinclude> | </noinclude> | ||
| Line 8: | Line 7: | ||
{{tr| align = center | <!-- Col 1 --> | {{tr| align = center | <!-- Col 1 --> | ||
{{td|width = | {{td|width = 25%|font-size = 0.95em | ||
| [[File:C1_deadcenter.png|224px|Dead Center|link=https://left4dead. | | [[File:C1_deadcenter.png|224px|Dead Center|link=https://left4dead.miraheze.org/wiki/Dead_Center]]<br>'''{{l4dwiki|{{Chapters/strings|L4D2 Dead Center}}|icon=hide}}''' | ||
}} | }} | ||
{{td|width = | {{td|width = 25%|font-size = 0.95em | ||
| [[File:C6_thepassing.png|224px|The Passing|link=https://left4dead. | | [[File:C6_thepassing.png|224px|The Passing|link=https://left4dead.miraheze.org/wiki/The_Passing]]<br>'''{{l4dwiki|{{Chapters/strings|L4D2 The Passing}}|icon=hide}}''' | ||
}} | }} | ||
{{td|width = | {{td|width = 25%|font-size = 0.95em | ||
| [[File:C2_darkcanival.png|224px|Dark Carnival|link=https://left4dead. | | [[File:C2_darkcanival.png|224px|Dark Carnival|link=https://left4dead.miraheze.org/wiki/Dark_Carnival]]<br>'''{{l4dwiki|{{Chapters/strings|L4D2 Dark Carnival}}|icon=hide}}''' | ||
}} | }} | ||
{{td|width = | {{td|width = 25%|font-size = 0.95em | ||
| [[File:C3_swampfever.png|224px|Swamp Fever|link=https://left4dead. | | [[File:C3_swampfever.png|224px|Swamp Fever|link=https://left4dead.miraheze.org/wiki/Swamp_Fever]]<br>'''{{l4dwiki|{{Chapters/strings|L4D2 Swamp Fever}}|icon=hide}}''' | ||
}} | }} | ||
| Line 28: | Line 27: | ||
{{tr|align = left|bgcolor = rgba(0,0,0,.4) | <!-- Map list --> | {{tr|align = left|bgcolor = rgba(0,0,0,.4) | <!-- Map list --> | ||
{{td|width = | {{td|width = 25%|font-size = 0.95em | ||
|{{Chapters/strings| | |{{Chapters/strings | ||
|1 = L4D2 Dead Center maps | |||
|2 = <code>c1m1_hotel</code> | |||
|3 = <code>c1m2_streets</code> | |||
|4 = <code>c1m3_mall</code> | |||
|5 = <code>c1m4_atrium</code> | |||
}} | |||
}} | }} | ||
{{td|width = | {{td|width = 25%|font-size = 0.95em | ||
| {{Chapters/strings| | | {{Chapters/strings | ||
|1 = L4D2 The Passing maps | |||
|2 = <code>c6m1_riverbank</code> | |||
|3 = <code>c6m2_bedlam</code> | |||
|4 = <code>c6m3_port</code>}} | |||
}} | }} | ||
{{td|width = | {{td|width = 25%|font-size = 0.95em | ||
| {{Chapters/strings| | | {{Chapters/strings | ||
|1 = L4D2 Dark Carnival maps | |||
|2 = <code>c2m1_highway</code> | |||
|3 = <code>c2m2_fairgrounds</code> | |||
|4 = <code>c2m3_coaster</code> | |||
|5 = <code>c2m4_barns</code> | |||
|6 = <code>c2m5_concert</code>}} | |||
}} | }} | ||
{{td|width = | {{td|width = 25%|font-size = 0.95em | ||
| {{Chapters/strings| | | {{Chapters/strings | ||
|1 = L4D2 Swamp Fever maps | |||
|2 = <code>c3m1_plankcountry</code> | |||
|3 = <code>c3m2_swamp</code> | |||
|4 = <code>c3m3_shantytown</code> | |||
|5 = <code>c3m4_plantation</code>}} | |||
}} | }} | ||
| Line 48: | Line 68: | ||
{{tr|align = center| <!-- Col 2 --> | {{tr|align = center| <!-- Col 2 --> | ||
{{td|width = | {{td|width = 25%|font-size = 0.95em | ||
| [[File:C4_hardrain.png|224px|Hard Rain|link=https://left4dead. | | [[File:C4_hardrain.png|224px|Hard Rain|link=https://left4dead.miraheze.org/wiki/Hard_Rain]]<br>'''{{l4dwiki|{{Chapters/strings|L4D2 Hard Rain}}|icon=hide}}''' | ||
}} | }} | ||
{{td|width = | {{td|width = 25%|font-size = 0.95em | ||
| [[File:C5_theparish.png|224px|The Parish|link=https://left4dead. | | [[File:C5_theparish.png|224px|The Parish|link=https://left4dead.miraheze.org/wiki/The_Parish]]<br>'''{{l4dwiki|{{Chapters/strings|L4D2 The Parish}}|icon=hide}}''' | ||
}} | }} | ||
{{td|width = | {{td|width = 25%|font-size = 0.95em | ||
| [[File:C13_coldstream.png|224px|Cold Stream|link=https://left4dead. | | [[File:C13_coldstream.png|224px|Cold Stream|link=https://left4dead.miraheze.org/wiki/Cold_Stream]]<br>'''{{l4dwiki|{{Chapters/strings|L4D2 Cold Stream}}|icon=hide}}''' | ||
}} | }} | ||
| Line 63: | Line 83: | ||
{{tr|align = left|bgcolor = rgba(0,0,0,.4) | <!-- Map list --> | {{tr|align = left|bgcolor = rgba(0,0,0,.4) | <!-- Map list --> | ||
{{td|width = | |||
| {{Chapters/strings| | {{td|width = 25%|font-size = 0.95em | ||
| {{Chapters/strings | |||
|1 = L4D2 Hard Rain maps | |||
|2 = <code>c4m1_milltown_a</code> | |||
|3 = <code>c4m2_sugarmill_a</code> | |||
|4 = <code>c4m3_sugarmill_b</code> | |||
|5 = <code>c4m4_milltown_b</code> | |||
|6 = <code>c4m5_milltown_escape</code>}} | |||
}} | }} | ||
{{td|width = | |||
| {{Chapters/strings| | {{td|width = 25%|font-size = 0.95em | ||
| {{Chapters/strings | |||
|1 = L4D2 The Parish maps | |||
|2 = <code>c5m1_waterfront</code> | |||
|3 = <code>c5m2_park</code> | |||
|4 = <code>c5m3_cemetery</code> | |||
|5 = <code>c5m4_quarter</code> | |||
|6 = <code>c5m5_bridge</code>}} | |||
}} | }} | ||
{{td|width = | |||
| {{Chapters/strings| | {{td|width = 25%|font-size = 0.95em | ||
| {{Chapters/strings | |||
|1 = L4D2 Cold Stream maps | |||
|2 = <code>c13m1_alpinecreek</code> | |||
|3 = <code>c13m2_southpinestream</code> | |||
|4 = <code>c13m3_memorialbridge</code> | |||
|5 = <code>c13m4_cutthroatcreek</code>}} | |||
}} | }} | ||
}} <!-- Map list end --> | }} <!-- Map list end --> | ||
{{td | {{td|align = center|bgcolor = rgba(49, 124, 41, .2)|font-size = 0.95em|colspan=4 | ||
| {{Chapters/strings|l4dOG}} <!-- Left 4 Dead campaigns | Col 3 --> | |1=<span style="float: left; user-select:none; color: transparent; font-weight: bold;"><!-- | ||
-->{{Chapters/strings|TOGGLE}}</span>{{Chapters/strings|l4dOG}}<!-- | |||
--><span class="mw-customtoggle-L4D2-L4D1-TABLE" style="float: right; user-select:none; font-weight: bold; color: #FFF;">{{Chapters/strings|TOGGLE}}</span><!-- Left 4 Dead campaigns | Col 3 --> | |||
}} | }} | ||
{{tr|align = center | | {{tr|align = center | class = mw-collapsible {{#switch:{{{state1|}}}|collapsed=mw-collapsed|#default=}} | ||
| id = mw-customcollapsible-L4D2-L4D1-TABLE <!-- Unique id for it --> | | |||
{{td|width = | {{td|width = 25%|font-size = 0.95em | ||
| [[File:C8_nomercy.png|224px|No Mercy|link=https://left4dead. | | [[File:C8_nomercy.png|224px|No Mercy|link=https://left4dead.miraheze.org/wiki/No_Mercy]]<br>'''{{l4dwiki|{{Chapters/strings|L4D1 No Mercy}}|icon=hide}}''' | ||
}} | }} | ||
{{td|width = | {{td|width = 25%|font-size = 0.95em | ||
| [[File:C9_crashcourse.png|224px|Crash Course|link=https://left4dead. | | [[File:C9_crashcourse.png|224px|Crash Course|link=https://left4dead.miraheze.org/wiki/Crash_Course]]<br>'''{{l4dwiki|{{Chapters/strings|L4D1 Crash Course}}|icon=hide}}''' | ||
}} | }} | ||
{{td|width = | {{td|width = 25%|font-size = 0.95em | ||
| [[File:C10_deadtoll.png|224px|Death Toll|link=https://left4dead. | | [[File:C10_deadtoll.png|224px|Death Toll|link=https://left4dead.miraheze.org/wiki/Death_Toll]]<br>'''{{l4dwiki|{{Chapters/strings|L4D1 Death Toll}}|icon=hide}}''' | ||
}} | }} | ||
{{td|width = | {{td|width = 25%|font-size = 0.95em | ||
| [[File:C11_deadair.png|224px|Dead Air|link=https://left4dead. | | [[File:C11_deadair.png|224px|Dead Air|link=https://left4dead.miraheze.org/wiki/Dead_Air]]<br>'''{{l4dwiki|{{Chapters/strings|L4D1 Dead Air}}|icon=hide}}''' | ||
}} | }} | ||
}} <!-- Col 3 end --> | }} <!-- Col 3 end --> | ||
{{tr|align = left|bgcolor = rgba(0,0,0,.4) | <!-- Map list --> | {{tr|align = left|bgcolor = rgba(0,0,0,.4) | class = mw-collapsible {{#switch:{{{state1|}}}|collapsed=mw-collapsed|#default=}} | ||
{{td|width = | | id = mw-customcollapsible-L4D2-L4D1-TABLE <!-- Unique id for it --> | <!-- Map list --> | ||
| {{Chapters/strings| | |||
{{td|width = 25%|font-size = 0.95em | |||
| {{Chapters/strings | |||
|1 = L4D1 No Mercy maps | |||
|2 = <code>c8m1_apartments</code> | |||
|3 = <code>c8m2_subway</code> | |||
|4 = <code>c8m3_sewers</code> | |||
|5 = <code>c8m4_interior</code> | |||
|6 = <code>c8m5_rooftops</code>}} | |||
}} | }} | ||
{{td|width = | |||
| {{Chapters/strings| | {{td|width = 25%|font-size = 0.95em | ||
| {{Chapters/strings | |||
|1 = L4D1 Crash Course maps | |||
|2 = <code>c9m1_alleys</code> | |||
|3 = <code>c9m2_lots</code>}} | |||
}} | }} | ||
{{td|width = | |||
| {{Chapters/strings| | {{td|width = 25%|font-size = 0.95em | ||
| {{Chapters/strings | |||
|1 = L4D1 Death Toll maps | |||
|2 = <code>c10m1_caves</code> | |||
|3 = <code>c10n2_drainage</code> | |||
|4 = <code>c10m3_ranchhouse</code> | |||
|5 = <code>c10m4_mainstreet</code> | |||
|6 = <code>c10m5_houseboat</code>}} | |||
}} | }} | ||
| {{Chapters/strings| | {{td|width = 25%|font-size = 0.95em | ||
| {{Chapters/strings | |||
|1 = L4D1 Dead Air maps | |||
|2 = <code>c11m1_greenhouse</code> | |||
|3 = <code>c11m2_offices</code> | |||
|4 = <code>c11m3_garage</code> | |||
|5 = <code>c11m4_terminal</code> | |||
|6 = <code>c11m5_runway</code>}} | |||
}} | }} | ||
}} <!-- Map list end --> | }} <!-- Map list end --> | ||
{{tr|align = center| <!-- Col 4 --> | {{tr|align = center | class = mw-collapsible {{#switch:{{{state1|}}}|collapsed=mw-collapsed|#default=}} | ||
{{td|width = | | id = mw-customcollapsible-L4D2-L4D1-TABLE <!-- Unique id for it --> | <!-- Col 4 --> | ||
| [[File:C12_bloodharvest.png|224px|Blood Harvest|link=https://left4dead. | |||
{{td|width = 25%|font-size = 0.95em | |||
| [[File:C12_bloodharvest.png|224px|Blood Harvest|link=https://left4dead.miraheze.org/wiki/Blood_Harvest]]<br>'''{{l4dwiki|{{Chapters/strings|L4D1 Blood Harvest}}|icon=hide}}''' | |||
}} | }} | ||
{{td|width = | {{td|width = 25%|font-size = 0.95em | ||
| [[File:C7_thesacrifice.png|224px|The Sacrifice|link=The Sacrifice]]<br>'''[[The Sacrifice|{{Chapters/strings| | | [[File:C7_thesacrifice.png|224px|The Sacrifice|link=The Sacrifice]]<br>'''[[The Sacrifice|{{Chapters/strings|L4D1 The Sacrifice}}]]''' | ||
}} | }} | ||
{{td|width = | {{td|width = 25%|font-size = 0.95em | ||
| [[File:C14_thelaststand.png|224px|{{Chapters/strings| | | [[File:C14_thelaststand.png|224px|{{Chapters/strings|L4D2 TLS popup}}|link=https://left4dead.miraheze.org/wiki/The_Last_Stand_(Left_4_Dead_2)]]<br>'''{{l4dwiki|The Last Stand (Left_4_Dead_2)|{{Chapters/strings|L4D2 The Last Stand}}|icon=hide}}''' | ||
}} | }} | ||
}} <!-- Col 4 | }} <!-- Col 4 End --> | ||
{{tr|align = left|bgcolor = rgba(0,0,0,.4)| <!-- Map list --> | {{tr|align = left|bgcolor = rgba(0,0,0,.4) | class = mw-collapsible {{#switch:{{{state1|}}}|collapsed=mw-collapsed|#default=}} | ||
| id = mw-customcollapsible-L4D2-L4D1-TABLE <!-- Unique id for it --> | <!-- Map list --> | |||
{{td|width = | {{td|width = 25%|font-size = 0.95em | ||
| {{Chapters/strings| | | {{Chapters/strings | ||
|1 = L4D1 Blood Harvest maps | |||
|2 = <code>c12m1_hilltop</code> | |||
|3 = <code>c12m2_traintunnel</code> | |||
|4 = <code>c12m3_bridge</code> | |||
|5 = <code>c12m4_barn</code> | |||
|6 = <code>c12m5_cornfield</code>}} | |||
}} | }} | ||
{{td|width = | {{td|width = 25%|font-size = 0.95em | ||
| {{Chapters/strings| | | {{Chapters/strings | ||
|1 = L4D1 The Sacrifice maps | |||
|2 = <code>c7m1_docks</code> | |||
|3 = <code>c7m2_barge</code> | |||
|4 = <code>c7m3_port</code>}} | |||
}} | }} | ||
{{td|width = 25%|font-size = 0.95em | {{td|width = 25%|font-size = 0.95em | ||
| {{Chapters/strings| | | {{Chapters/strings | ||
|1 = L4D2 The Last Stand maps | |||
|2 = <code>c14m1_junkyard</code> | |||
|3 = <code>c14m2_lighthouse</code>}} | |||
}} | }} | ||
}} <!-- Map list end --></onlyinclude> | }} <!-- Map list end --></onlyinclude> | ||
<noinclude>}}</noinclude> | <noinclude>}}</noinclude> | ||
Latest revision as of 19:14, 10 August 2025
 Dead Center |
 The Passing |
 Dark Carnival |
 Swamp Fever |
1. The Hotel - c1m1_hotel2. The Streets - c1m2_streets3. The Mall - c1m3_mall4. The Atrium - c1m4_atrium
|
1. The Riverbank - c6m1_riverbank2. Underground - c6m2_bedlam3. The Port - c6m3_port
|
1. The Highway - c2m1_highway2. The Fairground - c2m2_fairgrounds3. The Coaster - c2m3_coaster4. The Barns - c2m4_barns5. The Concert - c2m5_concert
|
1. Plank Country - c3m1_plankcountry2. The Swamp - c3m2_swamp3. Shanty Town - c3m3_shantytown4. The Plantation - c3m4_plantation
|
 Hard Rain |
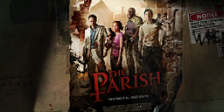 The Parish |
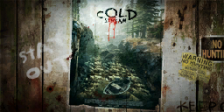 Cold Stream |
|
1. The Milltown - c4m1_milltown_a2. The Sugar Mill - c4m2_sugarmill_a3. Mill Escape - c4m3_sugarmill_b4. Return To Town - c4m4_milltown_b5. Town Escape - c4m5_milltown_escape
|
1. The Waterfront - c5m1_waterfront2. The Park - c5m2_park3. The Cemetery - c5m3_cemetery4. The Quarter - c5m4_quarter5. The Bridge - c5m5_bridge
|
1. Alpine Creek - c13m1_alpinecreek2. South Pine Stream - c13m2_southpinestream3. Memorial Bridge - c13m3_memorialbridge4. Cut-throat Creek - c13m4_cutthroatcreek
|
|
| Toggle chaptersCampaigns originally from |
|||
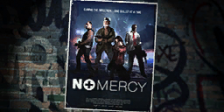 No Mercy |
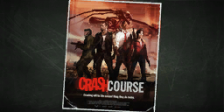 Crash Course |
 Death Toll |
 Dead Air |
1. The Apartments - c8m1_apartments2. The Subway - c8m2_subway3. The Sewer - c8m3_sewers4. The Hospital - c8m4_interior5. Rooftop Finale - c8m5_rooftops
|
1. The Alleys - c9m1_alleys2. The Truck Depot Finale - c9m2_lots
|
1. The Turnpike - c10m1_caves2. The Drains - c10n2_drainage3. The Church - c10m3_ranchhouse4. The Town - c10m4_mainstreet5. Boathouse Finale - c10m5_houseboat
|
1. The Greenhouse - c11m1_greenhouse2. The Crane - c11m2_offices3. The Construction Site - c11m3_garage4. The Terminal - c11m4_terminal5. Runway Finale - c11m5_runway
|
 Blood Harvest |
 The Sacrifice |
 The Last Stand (Campaign) |
|
1. The Woods - c12m1_hilltop2. The Tunnel - c12m2_traintunnel3. The Bridge - c12m3_bridge4. The Train Station - c12m4_barn5. Farmhouse Finale - c12m5_cornfield
|
1. The Docks - c7m1_docks2. The Barge - c7m2_barge3. Port Finale - c7m3_port
|
1. The Junkyard - c14m1_junkyard2. Lighthouse Finale - c14m2_lighthouse
|
|