|
|
| (One intermediate revision by one other user not shown) |
| Line 22: |
Line 22: |
|
| |
|
| == Interface == | | == Interface == |
| [[File:MaterialEditor.jpg]]
| |
|
| |
| The top edge of the screen is the main menu. From here you can load and save [[VMT]] files, undo and redo actions, and configure your workspace.
| |
|
| |
| # '''Properties''' is where the material properties are edited. Any user could set the properties to get the desired look or the material to be worked on.{{tip|You can use your scroll wheel to increase or decrease most values. There are three modifier keys to help with this:
| |
| #* For increments of 0.1, use {{key|Ctrl}}
| |
| #* For increments of 10, use {{key|Shift}}
| |
| #* To lock the value to 0-1, use {{key|Alt}}}}
| |
| # The '''engine viewport''' shows whatever the game is currently rendering. You can flip control to and from the game with {{key|F10}}, and maximise your view with {{key|F11}}.
| |
| # The '''preview window''' shows the current material as it may look like. You can manipulate your view by holding {{key|LMB}} to rotate, {{key|RMB}} to zoom, and {{key|MMB}} to move on the mouse.{{note|Some shaders may not show correctly, so their effect may not be entirely accurate.}}
| |
|
| |
|
|
| |
|
| Line 107: |
Line 97: |
| see [[Material]] for editing information | | see [[Material]] for editing information |
|
| |
|
|
| |
| == Selecting Surface Properties ==
| |
|
| |
| go to [[$surfaceprop]] from the properties list and click [[File:EditorDotDotDot.jpg]]
| |
|
| |
| the Select Surface Property window will appear
| |
|
| |
| [[File:Select_Surface_Property.jpg]]
| |
|
| |
| select from the list or type in the name of the surface property in the filter box
| |
|
| |
| see [[Material surface properties]] for more details
| |
|
| |
| {{todo|Explain the tool further}}
| |
|
| |
| == Selecting Shaders ==
| |
|
| |
| go to "shader" from the properties list and click [[File:EditorDotDotDot.jpg]]
| |
|
| |
| the Select Shader window will appear
| |
|
| |
| [[File:MaterialEditor Shader Select.jpg]]
| |
|
| |
| select from the list or type in the name of the shader in the filter box
| |
|
| |
| see [[:Category:Shaders|Shaders]]
| |
|
| |
|
| |
| ''Ideally, you should pick one of these three.''
| |
|
| |
| *[[LightmappedGeneric]] -> for world texturing
| |
|
| |
| *[[VertexLitGeneric]] -> for model texturing
| |
|
| |
| *[[UnlitGeneric]] -> for UI texturing
| |
|
| |
|
| |
| After your shader type is selected, the list of avalable parameters will update according to what the shader supports.
| |
|
| |
| == Selecting textures ==
| |
|
| |
| go to one of the fallowing parameters and click [[File:EditorDotDotDot.jpg]].
| |
| {{Note|Not all parameters need to be set}}
| |
|
| |
| *[[:Albedo|$albedo]]
| |
|
| |
| *[[$basetexture]] ''Primary Texture''
| |
| *[[$bumpcompress]] ''used on chairacter models to give wrinkle details for facial expressions (Overlaps the bumpmap texture)''
| |
| *[[$bumpmap]] ''use normal textures only (self shadowing bumpmaps If the [[$ssbump]] bool is set to 1)''
| |
| *[[$bumpstretch]]
| |
|
| |
| *[[$compress]] ''used on chairacter models to give wrinkle details for facial expressions (Overlaps the base texture)''
| |
|
| |
| *[[$detail]]
| |
|
| |
| *[[$emissiveblendbasetexture]]
| |
| *[[$emissiveblendtexture]]
| |
| *[[$emissiveblendflowtexture]]
| |
| *[[$envmap]] ''"env_cubemap" should be set for this if used''
| |
| *[[$envmapmask]]
| |
|
| |
| *[[$fleshbordertexture1d]]
| |
| *[[$fleshcubetexture]]
| |
| *[[$fleshinteriortexture]]
| |
| *[[$fleshinteriornoisetexture]]
| |
| *[[$fleshnormaltexture]]
| |
| *[[$fleshsubsurfacetexture]]
| |
|
| |
| *[[$lightwarptexture]]
| |
|
| |
| *[[$phongexponenttexture]]
| |
| *[[$phongwarptexture]]
| |
|
| |
| *[[$selfillummask]]
| |
| *[[$stretch]]
| |
|
| |
| {{todo|Finish filling out the small descriptions}}
| |
|
| |
| the select [[VTF]] window will appear
| |
|
| |
| [[File:MaterialEditor selectvtf.jpg]]
| |
|
| |
| select the desired texture to be used in the material
| |
|
| |
| '''Type Indications'''
| |
|
| |
| *_normal = bumpmap
| |
| *_ssbump = self shadowing bumpmap
| |
| *_ao = ambient occlusion map
| |
|
| |
| regular texture if none
| |
|
| |
| {{todo|Explain the tool further}}
| |
|
| |
| == Selecting Colors ==
| |
|
| |
| go to one of the fallowing parameters and click [[File:EditorColor.jpg]]
| |
| {{Note|Not all parameters need to be set}}
| |
|
| |
| *[[$cloakcolortint]]
| |
| *[[$color]]
| |
| *[[$color2]]
| |
|
| |
| *[[$detailtint]]
| |
|
| |
| *[[$emissiveblendtint]]
| |
| *[[$envmaptint]]
| |
|
| |
| *[[$fleshbordertint]]
| |
| *[[$fleshsubsurfacetint]]
| |
|
| |
| *[[$outlinecolor]]
| |
|
| |
| *[[$selfillumtint]]
| |
| *[[$srgbtint]]
| |
|
| |
| {{todo|Finish filling out the small descriptions}}
| |
|
| |
| the Select Color window will appear
| |
|
| |
| [[File:MaterialEditor selectcolor.jpg]]
| |
|
| |
| adjust the color swatch, or type in the values to get the desired color
| |
|
| |
| the color box [[File:EditorColor.jpg]] will change to the selected color
| |
|
| |
| {{todo|Explain the tool further}}
| |
|
| |
|
|
| |
|
In the works of writing up information for the Material Editor--Kwp17pitts 23:41, 1 January 2012 (PST)
If anyone has more information or a tutorial regarding this please add
- I'll be adding info when I can. Through use of the editor I've noticed that you can actually do things you can't manually editing vmt's, such as defining a 2nd bumpmap scale. I am not sure why manually editing vmts and editing them via the Editor saves the process differently, or rather the actual vmt.--MrFourVideoCards 02:32, 3 January 2012 (PST)
Material Editor Issues in Alien Swarm
Currently the material editor for Alien Swarm is largely bugged and crash prone. Trying to figure out if there is a possible solution to correct this problem.--Kwp17pitts 21:02, 17 January 2012 (PST)
Old Info
 Note:This information temporarly placed here until the rest of the appropriate pages are made, if you know more about this tool and want to help out let me know--Kwp17pitts 19:09, 27 June 2012 (PDT)
What is a Material?
A material (or VMT) is a script that defines how a texture (or VTF) will render as well as sound properties. Some materials may not even load textures for certain effects depending on the types of shaders used.
Note:This tool will not edit textures, just only scripts see VTFEdit for editing textures
Interface
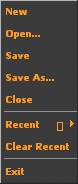
Note:The file menu is pretty self explanitory
| File |
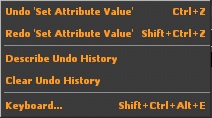
Edit |
Material |
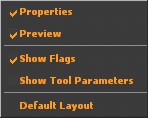
View |
 |
 |
 |
 |
- Open...
- Save
- Save As...
- Close
- Recent
- Clear Recent
- Exit
|
Shortcut keys Ctrl + Z
Shortcut keys ⇧ Shift + Ctrl + Z
 Confirm:What does this do?? Confirm:What does this do??Shortcut keys ⇧ Shift + Ctrl + Alt + E
See setting key bindings
|
Resets the material parameters
|
Shows the Properties Window If Checked
Shows the Preview Window If Checked
Shows the parameter flags If Checked
Shows the tool parameters on the properties window If Checked
Resets the layout to the defualt view
|
To Create a new material
click file -> new , then begin editing
see Material for editing information
Shader Parameters
see List of Shader Parameters for more details
Data types
Todo: add more information, Explain Data types
- bool "short for boolean" in which 0 = false and 1 = true
- color <color255 + int> (ex. 97 11 255 255)
- float "floating point" (ex. 5)
- int "short for integer" (ex. 56)
- matrix "written in binary" (ex. 1 0 0 0 0 1 0 0 0 0 1 0 0 0 0 1 )
- string "file path" (ex. brick\brickfloor001a.vtf) "name" (ex. VertexLitGeneric)
- vector2 "two configureable values" (ex. 23 45)
- vector3 "three configureable values" (ex. 23 45 37)
- vector4 "four configureable values" (ex. 23 45 37 89)
Loading a material
Note:Complex material designs can and may crash the editor when loading
 Warning:Do not load material vmts outside of the loaded mod or game directory, the associated vtf files may not load as a result
click file -> Open..., open the file located only in the mod or game directory currently running
Saving a material
Note:Somtimes settings may not stick, this could be due to having invalid configurations
Warning:Do not save material vmts outside of the loaded mod or game directory, the material will not load as a result
click file -> save as..., give the material a name, and save only in the mod or game directory currently running


