Rock Textures Creation
For help, see the VDC Editing Help and Wikipedia cleanup process. Also, remember to check for any notes left by the tagger at this article's talk page.
Overview
This tutorial will take you through a step by step explanation on how to create a rock texture, and producing a bumpmap/normal map that will bring out depth to the texture.
Requirements
- Photoshop with Nem's VTF Plugin
- nvTools Normal Map and DDS plugin for Photoshop
- A text editor (ex.
 Notepad)
Finding the right texture
Use any of the available online image search engines to find your texture source. Make sure to check if its publicly available and free to use.
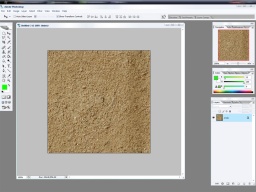
For tutorial purposes, use the following image:
Putting the texture to use
Now that you have the dirt texture to use, you can either right click it to copy, or save it to the hard drive.
Start Photoshop, when the program has finished loading, either open the existing file, or go to file menu and click New, don't change anything then click OK, then Ctrl+V or click Edit at the top and click Paste.
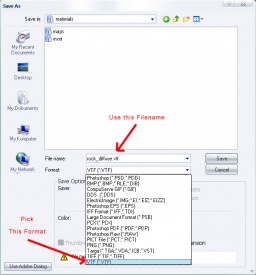
There, now the texture is in Photoshop. Now we are going to export it to VTF for use with HL2. Once you have the VTF plugin for Photoshop installed, this shouldn't be a problem, as the VTF save format is in the format list when saving. Click on File then down to Save As.
Change the format to VTF and save the file as "rock_diffuse.vtf". Save this file into your Materials folder of your mod. Then click Save.
If you get an error just like the image above, then you must convert the image into RGB format. To do this, click on Image at the top menu, then click Mode then RGB Color, then click OK. Now do the same step to save to VTF.
Creating the normal map
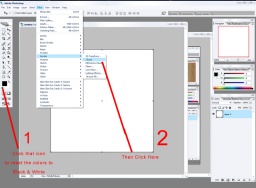
Now that the file has saved successfully, create a new image file with the same dimensions at the dirt image, then click New. See the image notes for additional steps:
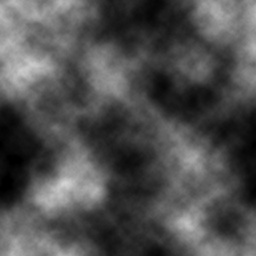
Now that you have an image with the clouds effect applied to it, now click Image, then Adjustments, then Levels. Here you can play around with the levels of the image. The left most arrow will make the darker colors darker when moved to the right. The right arrow will make light colors lighter when moved to the left. The middle will change the moderate colors to whatever direction you want (Left - lighter, Right - darker). By playing around with it, you may make an image looking like this, depending on how you played with the levels:
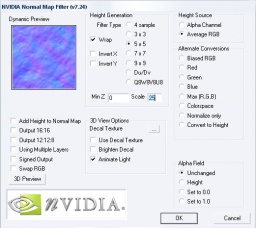
Now you got a reasonable rock texture bumpmap, go to Filters, then nvTools, then NormalMapFilter. Now set all the settings to the following image.
Click Ok, and the normal map is complete. Save the file in VTF format, similarly to the diffuse map. Save it as "rock_normal.vtf".
Putting it all together
Now that the diffuse and normal map are finished, you will need to create a VMT file which tells the game that the texture files are here. So now, open up notepad, and copy and paste the following into it:
"LightmappedGeneric"
{
	"$baseTexture" "rock_diffuse"
	"$bumpmap" "rock_normal"
}
Now save it as "rock_texture.vmt" in the same folder you saves the VTF's. Be sure that you have "All Files" instead of "Text Document" selected in the Notepad save dialog, otherwise, it may try to save it as "rock_texture.vmt.txt". Now it should be usable in-game. Open Hammer and add the texture to a wall or terrain surface to test it.
The end result
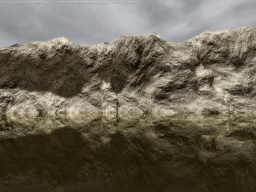
This is a sample of a map with water, a low saturated grayscale post process, HDR, and the rock texture added onto a cliff-side terrain map at 1:1 texture scale. Here is the outcome:

