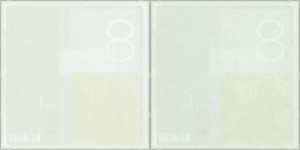
Fixing DXT Green Tint Compression
In the ![]() Source Engine, textures are stored using the Valve Texture Format (VTF), which can store image data in a great variety of formats. The most common and standard ones are the lossy and compression-based DXT1 (used for textures with no alpha channel) and DXT5 (used for textures with an alpha channel).
Source Engine, textures are stored using the Valve Texture Format (VTF), which can store image data in a great variety of formats. The most common and standard ones are the lossy and compression-based DXT1 (used for textures with no alpha channel) and DXT5 (used for textures with an alpha channel).
However, when a VTF file with DXT compression is viewed or extracted using ![]() VTFEdit (which also seems to affects Adobe Photoshop's VTF plug-in), a slightly green-tinted output is generated, due to issues with VTFEdit DXT decoder. This doesn't affect the VTFEdit DXT encoder (used to encode VTFs from TGA/PNG/other raster image formats). Usually, this altered result would merit no tampering. However, if a project requires both a texture and a modified version to be side by side, differences will inevitably become evident, calling for a workaround to be implemented.
VTFEdit (which also seems to affects Adobe Photoshop's VTF plug-in), a slightly green-tinted output is generated, due to issues with VTFEdit DXT decoder. This doesn't affect the VTFEdit DXT encoder (used to encode VTFs from TGA/PNG/other raster image formats). Usually, this altered result would merit no tampering. However, if a project requires both a texture and a modified version to be side by side, differences will inevitably become evident, calling for a workaround to be implemented.
The proper solution is to use ![]() VTFEdit Reloaded, which fixes the green tint issue when viewing or extracting texture. Another solution would be to store the texture using a different format, such as an uncompressed and, therefore, lossless one, like BGR888 or BGRA8888. However, these formats will considerably increase file size and VRAM usage.
VTFEdit Reloaded, which fixes the green tint issue when viewing or extracting texture. Another solution would be to store the texture using a different format, such as an uncompressed and, therefore, lossless one, like BGR888 or BGRA8888. However, these formats will considerably increase file size and VRAM usage.
Fixing green tint issues
- Open the original texture in the image editor of your choice.
- Create a blank layer with alpha channel support on top of the original texture.
- Bucket-fill the new layer with RGB 7 3 7 (HTML notation #070307).
- Copy the original texture and paste it into the alpha channel of the new layer.
- Set the layer mode to Legacy Addition (GIMP),[1] Linear Dodge (Add) (Photoshop) or the equivalent addition-based blend mode of your editor.
- Flatten the image if the texture has no transparency. Otherwise, merge all visible layers.
- Export as TGA and convert to VTF using
 VTFEdit Reloaded. For the image data format, use either DXT1 or DXT5, depending on your source material.
Footnotes
- For GIMP 2.10, the entire program was ported to the GEGL image processing library, which is based around linear RGB color space as opposed to gamma-corrected (perceptual) RGB color space, which modifies the behavior of several blending modes. This is why switching blending modes from Normal to Legacy is required; for pre-2.10 backwards compatibility.
