Optimización de materiales
Sombras
Cabe destacar que no todos los PC son iguales. El mapa debe poder ejecutarse en un amplio espectro de especificaciones y la mejora forma de conseguir un buen rendimiento sin sacrificar buenos acabados es prescindir en la medida de lo posible de sombras.
Lo bueno es que Valve tiene materiales de serie que ya están renderizados de esta manera, por lo que en la mayoría de casos no será necesario realizar ningún esfuerzo. Lo todavía mejor es que si necesitases crearlo, todo el trabajo más duro ya está realizado por Valve y solo habrá que elegir entre los niveles de DirectX.
Utilización
Las sombras son parámetros de materiales como el resto y deben ir junto al resto de materiales con los corchetes ({ y }).
Especificaciones condicionales
"<=dx90"
{
	<VMT Parameters to set>
}
The parameters within a conditional block are only applied if its opening statement is true. Accepted operators are:
>(above the value)>=(above or equal to the value)<(below the value)<=(below or equal to the value)
= is used in it like the example above, or it'll cause the VMT to error constantly!
Accepted values include:
dx90(DXLevel 90)dx90_20b(DXLevel 95)
Especificaciones condicionales según los ajustes gráficos
Conditional statements can also be based directly on the users current Shader Detail (GPU) setting, with values ranging from 0 to 3. The number value represents what setting they have their Shader Detail set to.
What each number value represents:
0(Low)1(Medium)2(High)3(Very High)
// Sets the value when Shader Detail is High or higher
"GPU>=2?$color" "[ 1 0 0 ]" // Quoted parameter because of equal sign.
GPU<2  // Sets the values in the block if Shader Detail is below High.
{
	$envmap	env_cubemap
	$color "[ 0 0 1 ]"
}
Accepted operators:
>=(above or equal to the value)<(below the value)
Sombras
LightmappedGeneric_HDR_DX9
{
	<DX9 with HDR parameters>
}
While a "top-level" shader is called in the first line of a material, the actual job of rendering is passed down by the engine to a specific 'family member'. You can pass commands that only apply to a single child shader by providing its name. There is a full list of fallback shaders here.
Ejemplo
You can clear a value out by typing "" (two quotes, nothing between).
LightmappedGeneric
{
	$basetexture metal/metalwall078a
	$surfaceprop metal

	$envmap	env_cubemap
	$envmaptint "[.56 .56 .75]"
	$envmapcontrast 1
	$envmapsaturation 1

	LightmappedGeneric_DX9
	{
		$bumpmap metal/metalwall078a_normal
		$normalmapalphaenvmapmask 1
		$envmaptint "[.09 .1 .12]"
	}

	LightmappedGeneric_DX8
	{
		$bumpmap metal/metalwall078a_normal
		$nodiffusebumplighting 1
		$normalmapalphaenvmapmask 1
	}

	LightmappedGeneric_NoBump_DX8
	{
		$basetexture metal/citadel_metalwall078a
		$basealphaenvmapmask 1
	}
}
Overdraw
Fillrate refers to the number of pixels that a video card can shove into its memory per second, independently of the time needed to decide what color they should be. It becomes an issue when the user tries to run a game at a higher resolution than the card is capable of, or more commonly when a given pixel is being processed and re-processed many times.
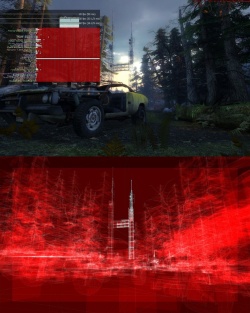
This latter effect is known as "overdraw" and occurs when a material is translucent (particles are dreadful), uses normal mapping, uses specular reflections, and/or is refractive. Dynamic lights and effects like motion blur and HDR (but not color correction) are also culprits. You can spot overdraw by checking showbudget for an unusually large "Swap Buffer" bar, and examine its effect precisely with mat_fillrate.
The only true solution to overdraw is reducing the number of pixels that needs to be re-processed. This can be done with a shader fallback, by creating fewer objects, or by reducing screen resolution. There are also a few tricks that can be employed, albeit to limited effect, which follow.
Partículas
Véase Particle Performance.
Refraction
Any object that crosses the plane of a refractive material will be rendered twice: once for the direct view, and again for the refracted view (it's also rendered for reflection, but that can't be helped). This becomes avoidable when the water is obscured—for instance, if the object is embedded in a displacement sand drift. By raising the model or cutting the water brush so that it doesn't extend beneath the displacement, a whole rendering pass can be avoided.
You can examine what is being rendered for refraction with mat_showwatertextures 1.
Mapeado normal
LightmappedGeneric materials are the prime suspects here. To help a little, you can add $nodiffusebumplighting 1 to the material in question, but as ever, the only true solution is a fallback.
Creating SSBumps instead of generic normalmaps may save on performance slightly.
LightmappedGeneric_NoBump_DX8 to differentiate between video cards that have and haven't been deemed suitable for normal mapping by Valve.Agua
With Water, overdraw is caused by both refraction and reflection, often over a large area. You can disable either or both if needed:
$forcecheap 1- Disables both reflection and refraction.
$refracttexture$reflecttexture- Using these commands without passing a texture bypasses one or both.
If you've got fillrate and CPU to burn, you can forcibly make the water do local reflections regardless of video config settings by specifying $forceexpensive 1, and you can forcibly make the water reflect entities by specifying $reflectentities 1.
Materiales especiales
Textura invisible «Nodraw»
tools\toolsnodraw prevents a surface from being drawn at all, prevents lightmaps from being compiled for it, and prevents it from reflecting light (it still casts shadows). Use it on surfaces that will never be seen by the player but can't be sealed off by another brush, such as the tops of roofs and ledges or the far side of building in inaccessible areas, particularly those in background maps.
Negro
tools/toolsblack is a material that behaves like nodraw but has a color value. It's useful at the bottom of deep pits, in inaccessible caves, etc.
Textura del cielo 2D
A 3D Skybox is drawn in full whenever the tools\toolsskybox material is being drawn. You can avoid this by using tools\toolsskybox2d in its place. Obviously, this only has an effect when the normal skybox material isn't visible, nor does it have any effect when there is no 3D skybox.

