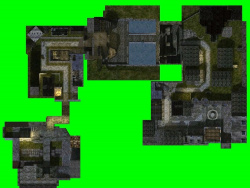
Creating an Overview Map for Day of Defeat
Day of Defeat have a mini-map mode, that shows a level overview and projects players and objects on that map. An overview map is an image made from in-game screenshots and should be created once a new map is finished.
Preparations
Open Day of Defeat and select to the Options Menu, then select the Video Tab.
Write down the following:
- Resolution
- Display Mode
- Any checkboxes that are checked and unchecked
Then close the game and proceed with the next step.
Configuring Day of Defeat for creating a overview
In your Steam Library, right-click on Day of Defeat, choose Properties then Set Launch Options.
In the opened Command Line add the following Command Line Options (if there are already Command Line Options make a backup of them and remove them before adding the following ones):
-nojoy -console -developer -dev -windowed -w 1024 -h 768
Click on OK and exit the Property Window.
Creating the overview screenshot and description file
Open Day of Defeat again, it will open now in the Resolution 1024x768 and in windowed mode. Open the Map you want to create the overview for and join a Team.
Tap the m key until the map/minimap is gone then enter the developer console (default ~ key) and type in the following commands:
hud_draw 0
r_drawviewmodel 0
sv_cheats 1
dev_overview 2
After entering these commands you should now view on top of your map. Use your movement keys to move around and center the overview of your map, if you need to zoom in or out use the mouse 1 & mouse 2 buttons. Take a screenshot (default F5 key), to open the developer console again and type:
dev_overview 1
The developer console now shows you the exact position of the screen, this is relevant to create a perfect fit of the overview. It should look like this:
Overview: Zoom 1.51, Map Origin (-608.00, 288.00, 136.00), Z Min 577.00, Z Max -305.00, Rotated 1
These values are important, write them down or take again a screenshot.
Finally, create a text file called <mapname>.txt in <game dir>\overviews\. This file will define the precise numbers needed to align the overview.
Example of the overview script with the example settings:
// Overview description file for MAPNAME
global
{
     ZOOM 1.51
     ORIGIN -608.00 288.00 136.00
     ROTATED 1
}
layer
{
    IMAGE "overviews/MAPNAME.bmp"
    HEIGHT -305.00
}
Of course replace MAPNAME with the name of your actual map.
Converting the screenshot to .bmp
Steam saves the taken screenshots as .jpg files by default, to use the overview screenshot we need to convert it to .bmp to get it working in Day of Defeat.
In the Steam Library window, click the Menu View and choose Screenshots, then choose Show on disk. Usually the bottom/last picture that is mostly numbers (like 20230907021558_1.jpg) is the picture you want.
Open the screenshot with Microsoft Paint or an Image Editor of your choice and export it as a .bmp 256 color bitmap file. Export the image to your <game dir>\overviews\ folder.
Testing the overview and trouble shooting
Open Day of Defeat and run your Map to test of the overview is working. If not open the developer console to see any error messages.
These are the error messages you may encounter:
- ERROR: Error parsing overview file overviews/MAPNAME.txt. (, unkown)
Check in your created overview script file the ORIGIN field and search for commas. Compare the Values in your script with the example script in this article and remove the commas.
- ERROR: Error parsing overview file overviews/MAPNAME.txt. ( unkown)
Possibly missing the ending quote (") on the IMAGE line.
- ERROR: Unsupported image file format.
Check that the file extension is .bmp for the IMAGE and make sure its a 256 colour bitmap file.
If your overview is working you just need to revert the Command Line Options you entered earlier and insert the commands you backed up if there was any.
