Ru/Moving water (Source)
Template:Otherlang2 Template:Totranslate:ru Template:Seealso:ru Движок Source поддерживает воду как энтити func_water_analog, которая может передвигаться так же, как и func_movelinear .
Ограничения
Хотя перемещение воды в принципе возможно, есть некоторые ограничения.
- Не используется шейдер воды. Для воды используется bump mapping (чтобы "удешевить" воду, т.е. сделать менее ресурсоёмкой).
- Перемещение воды не всегда корректно реагирует как нормальная вода. Ентити клиента, например, осколки от объектов в HL2MP или рэгдоллы,не всплывают.
- Всплески (чаще всего видны при взрывах) неправильно визуализируются. Скорее всего, они будут появляться на начальном уровне воды, чем на конечном,.
- Под водой не происходит изменения вида, и вода выглядит "ярче", чем нормальная.
Изготовление
To add a moving water volume to your level, follow these steps:
Создание водный браши
- Создайте браш размера водной массы используя Block Tool.
- Откройте Texture Browser нажав на кнопку Browse на Texture Bar.
- Дважды кликните
tools\toolsnodrawматериал в Texture Browser. - Теперь нажмите на кнопку Apply Current Texture чтобы применить текстуру nodraw на браш.
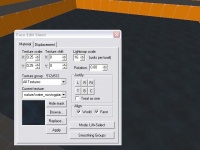
- Выберете Texture Application Tool, который откроет режим Face Edit.
- Кликните левой кнопкой мыши на верхний фейс водного браша в 3D виде, чтобы выделить его.
- Нажмите Browse, чтобы снова отобразить Texture Browser.
- Введите
movingplaneв поле filter и выберити текстуруnature/water_movingplane. - Нажмите кнопку Apply на панели Face Edit.
Configuring the func_water_analog entity
- Now you have constructed the water brush, press Ctrl + T to tie the brush to an entity. Select
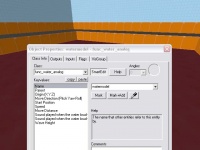
func_water_analogfrom the list. - In order to trigger your water, you must name it. Enter an identifier for the water in the
Namefield. - Select the direction for the water to move in the
Move Directionfield. For most cases, you should select Up from the list. - Enter a speed at which your water should move. 55 works well, but the speed should depend on the situation.
- The entity uses the
Move Distancefield to determine how far the water should move. If you enter the height of your water brush, it will move fully above its starting position (the bottom of the brush will be where the top of the brush was originally). - You can select sounds to be played when the water starts or stops moving with the
Sounds played...fields.
Triggering the Water
The func_water_analog entity can be moved via two inputs, Open and Close. See Inputs & Outputs for more information.
Cubemaps and Moving Water
As mentioned earlier, moving water cannot use the water shader and instead has the same visual properties as "cheap" water, using a pre-calculated environment map from an env_cubemap instead.
Cubemaps are important to use with water surfaces. On lower than DX9 level video cards, it is not possible to render the real-time reflective water shader. For these cards, an env_cubemap entity provides the pre-calculated environment map use to render water on sub-DX9 cards.
Adding a env_cubemap to water surfaces:
- Add an env_cubemap entity using the Entity Tool.
- Place the env_cubemap above the top surface of the water, near the center.
- Double-click the env_cubemap in the 3D view to bring up the Object Properties dialog.
- Click on the Brush faces key in the Object Properties.
- Click the Pick... button. The mouse cursor will change to the eye dropper icon.
- Click the top water face to select it with the eyedropper. The face will highlight in red, to show it has been associated with the env_cubemap entity.
- Close the Object properties dialog.
- Compile and run your map. After the map is loaded, open the developers console and type
buildcubemaps. The engine will calculate an environment map for each env_cubemap entity, and save the data into the BSP file.

