Complex Brush Creation: Difference between revisions
Thunder4ik (talk | contribs) m (→See also: clean up, replaced: See Also → See also) |
Thunder4ik (talk | contribs) m (Unicodifying, replaced: [[Image: → [[File: (48)) |
||
| Line 8: | Line 8: | ||
Here are a few examples of complex brush creation. | Here are a few examples of complex brush creation. | ||
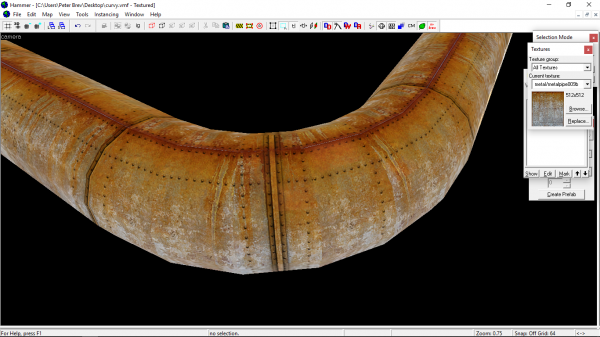
[[ | [[File:6-sided_curve.png|thumb|600px|center|A curved pipe connecting 2 cylinders.]] | ||
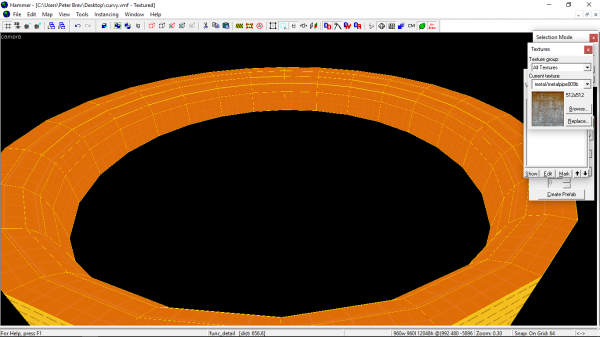
[[ | [[File:Curvy_the_curve.png|thumb|600px|center|An arch connected to rounded edges.]] | ||
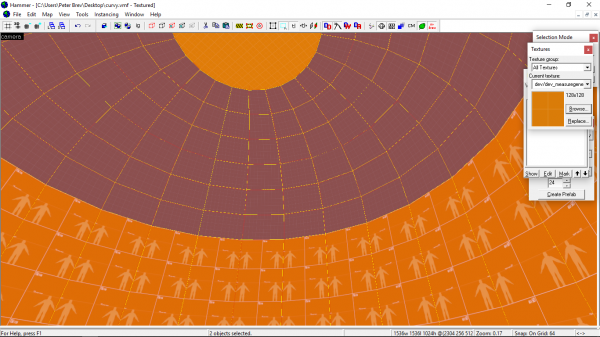
[[ | [[File:Dome.png|thumb|600px|center|A dome.]] | ||
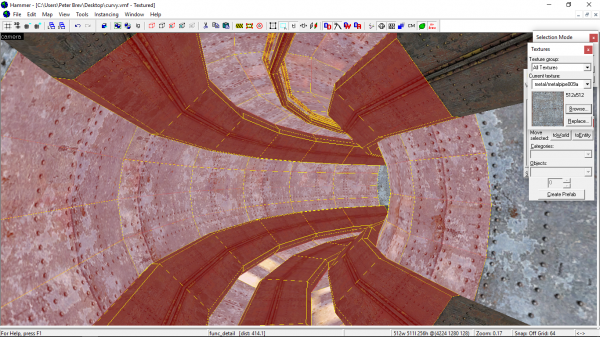
[[ | [[File:Complex_detail_curve.png|thumb|600px|center|A detailed connecting tube with all brushes vertexes connected.]] | ||
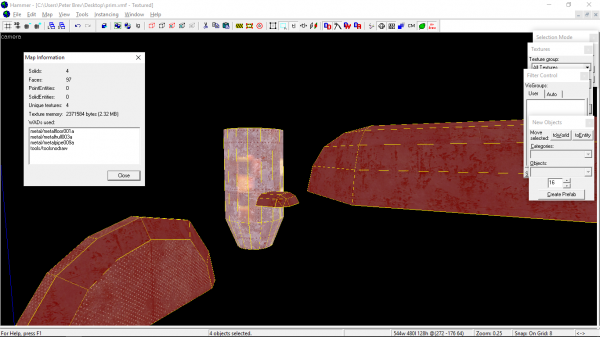
[[ | [[File:BrushNumber.png|thumb|600px|center|4 complex brushes.]] | ||
{{Note|The [[Hammer_Torus_Properties|Torus primitive]] was not used in any of the examples shown above. With this technique, you should no longer need to use such an inaccurate [[Primitive|primitive]].}} | {{Note|The [[Hammer_Torus_Properties|Torus primitive]] was not used in any of the examples shown above. With this technique, you should no longer need to use such an inaccurate [[Primitive|primitive]].}} | ||
| Line 24: | Line 24: | ||
Let's go ahead and create a brush with a sphere type corner. Create a normal brush using the [[Hammer Block Tool|block tool]]. | Let's go ahead and create a brush with a sphere type corner. Create a normal brush using the [[Hammer Block Tool|block tool]]. | ||
[[ | [[File:Block_Creation.png|thumb|600px|center|A normal 6-sided brush.]] | ||
Using the [[Hammer Clipping Tool|clipping tool]], create a rounded edge (as if you were creating a cylinder). | Using the [[Hammer Clipping Tool|clipping tool]], create a rounded edge (as if you were creating a cylinder). | ||
[[ | [[File:Cutting_The_Edges_Off.png|thumb|600px|center|]] | ||
[[ | [[File:Cutting_The_Edges_Off_2.png|thumb|600px|center|]] | ||
[[ | [[File:Clipped_Edge.png|thumb|600px|center|]] | ||
Proceed to do the same thing on the adjacent side. | Proceed to do the same thing on the adjacent side. | ||
[[ | [[File:Proceeding_At_Doing_The_Same.png|thumb|600px|center|]] | ||
You want to make sure that all [[Vertex|vertexes]] are on grid. This is very important, else the editor will act all funky like later on. | You want to make sure that all [[Vertex|vertexes]] are on grid. This is very important, else the editor will act all funky like later on. | ||
[[ | [[File:Align_Vertexes.png|thumb|600px|center|Aligned Vertexes.]] | ||
[[ | [[File:Perfectly_Aligned_Vertexes.png|thumb|600px|center|Make sure that there is a perfect 45-degree angle; making sure vertexes are all properly aligned.]] | ||
Clip the corner of the brush in a 45-degree. | Clip the corner of the brush in a 45-degree. | ||
[[ | [[File:Clip_the_angle_of_the_brush_in_a_.png|thumb|600px|center|Clipping the angle on a 45-degree.]] | ||
From here, you want to enter Vertex Manipulation mode by hitting {{key|Shift|V}}. | From here, you want to enter Vertex Manipulation mode by hitting {{key|Shift|V}}. | ||
[[ | [[File:Entering_Vertex_Manipulation_Mode.png|thumb|600px|center|]] | ||
Pull the appropriate vertexes until you get the following shape. | Pull the appropriate vertexes until you get the following shape. | ||
[[ | [[File:VMM.png|thumb|600px|center|]] | ||
[[ | [[File:VMR.png|thumb|600px|center|]] | ||
Select both middle vertexes and hit {{key|Ctrl|F}}. This will split the face into 2 and eliminate the invalid solid structure error. | Select both middle vertexes and hit {{key|Ctrl|F}}. This will split the face into 2 and eliminate the invalid solid structure error. | ||
[[ | [[File:Selecting_Vertexes.png|thumb|600px|center|]] | ||
[[ | [[File:Vertex_manipulating.png|thumb|600px|center|Everything went fine if Hammer doesn't report the solid as invalid.]] | ||
{{Note|If nothing happens, then the face wouldn't end up flat. Check that all your vertexes are aligned to the grid and on the same plane and try again.}} | {{Note|If nothing happens, then the face wouldn't end up flat. Check that all your vertexes are aligned to the grid and on the same plane and try again.}} | ||
Select the middle and bottom vertexes and hit {{key|Ctrl|F}}. Then, select the bottom and top left and hit {{key|Ctrl|F}}. Finally, select the bottom and top right and hit {{key|Ctrl|F}}. | Select the middle and bottom vertexes and hit {{key|Ctrl|F}}. Then, select the bottom and top left and hit {{key|Ctrl|F}}. Finally, select the bottom and top right and hit {{key|Ctrl|F}}. | ||
[[ | [[File:Splitting_Faces.png|thumb|600px|center|]] | ||
[[ | [[File:Splitting_Faces_Again.png|thumb|600px|center|]] | ||
Select the bottom vertex and move it so that each line shown by the arrows are straight. | Select the bottom vertex and move it so that each line shown by the arrows are straight. | ||
[[ | [[File:Moving_Vertexes.png|thumb|600px|center|]] | ||
Finally, select the middle vertex and merge it with the one to the left or the right. | Finally, select the middle vertex and merge it with the one to the left or the right. | ||
[[ | [[File:Merging_Vertex.png|thumb|600px|center|]] | ||
[[ | [[File:Merging_Vertex_2.png|thumb|600px|center|]] | ||
[[ | [[File:Final_Product.png|thumb|600px|center|Final Product.]] | ||
==Creating A 45-Degree Cylinder Corner== | ==Creating A 45-Degree Cylinder Corner== | ||
The process is very similar to creating a sphere like corner. Create a block and clip the sides to have a cylinder type edge. The number of faces doesn't matter if it's higher than 2. | The process is very similar to creating a sphere like corner. Create a block and clip the sides to have a cylinder type edge. The number of faces doesn't matter if it's higher than 2. | ||
[[ | [[File:Creating_The_Block.png|thumb|600px|center|A brush with 4 faces clipped.]] | ||
Cut the brush on a 45-degree. Pull the vertexes until they are straight. Make sure every vertex is aligned to the grid. | Cut the brush on a 45-degree. Pull the vertexes until they are straight. Make sure every vertex is aligned to the grid. | ||
[[ | [[File:45-Degree_Clip.png|thumb|600px|center|]] | ||
Select the vertexes from top to bottom and hit {{key|Ctrl|F}}. | Select the vertexes from top to bottom and hit {{key|Ctrl|F}}. | ||
{{Note|Once again, if hitting {{key|Ctrl|F}} does nothing, then your vertexes aren't placed properly.}} | {{Note|Once again, if hitting {{key|Ctrl|F}} does nothing, then your vertexes aren't placed properly.}} | ||
[[ | [[File:Moving_The_Vertexes.png|thumb|600px|center|]] | ||
[[ | [[File:Cylinder_Corner.png|thumb|600px|center|Finished Product.]] | ||
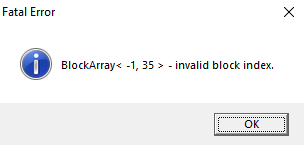
{{Warning|If you get the following error message (see screenshot below, then your vertexes were not aligned and/or on grid. '''You cannot recover from this error if it happens as Hammer will crash.'''}} | {{Warning|If you get the following error message (see screenshot below, then your vertexes were not aligned and/or on grid. '''You cannot recover from this error if it happens as Hammer will crash.'''}} | ||
[[ | [[File:Warning_hammer_box.png|thumb|600px|center|Error when attempting to split the faces. Hammer crashes if you see this error after clicking on "Ok". You cannot recover from this error.]] | ||
==Creating A Funnel Brush== | ==Creating A Funnel Brush== | ||
Create a cylinder and enter vertex mode by hitting {{key|Shift|V}}. | Create a cylinder and enter vertex mode by hitting {{key|Shift|V}}. | ||
[[ | [[File:Create_cylinder.png|thumb|600px|center|]] | ||
Select every yellow dots in the middle and hit {{key|Ctrl|F}}. Then select every white dot in the middle and hit {{key|Ctrl|F}} as well. | Select every yellow dots in the middle and hit {{key|Ctrl|F}}. Then select every white dot in the middle and hit {{key|Ctrl|F}} as well. | ||
{{Note|You cannot draw a box around the yellow and white dots using the selection tool and hit {{key|Ctrl|F}}. You will need to select a pair of yellow dots and white dots next to each other manually and go around the primitive. You also cannot select a yellow and white dot together. Hammer forces you to either choose one or the other. In some cases, we can circumvent the problem altogether, or find a different way to achieve what we want to do.}} | {{Note|You cannot draw a box around the yellow and white dots using the selection tool and hit {{key|Ctrl|F}}. You will need to select a pair of yellow dots and white dots next to each other manually and go around the primitive. You also cannot select a yellow and white dot together. Hammer forces you to either choose one or the other. In some cases, we can circumvent the problem altogether, or find a different way to achieve what we want to do.}} | ||
[[ | [[File:Splitting_The_Faces.png|thumb|600px|center|]] | ||
Select the bottom vertexes and hit {{key|Alt|E}}. | Select the bottom vertexes and hit {{key|Alt|E}}. | ||
[[ | [[File:Vertex_Manipulation_Bottom.png|thumb|600px|center|]] | ||
Change the value to your desired value and once satisfied with the new look, exit vertex mode by selecting the selection tool ({{key|Shift|S}}). | Change the value to your desired value and once satisfied with the new look, exit vertex mode by selecting the selection tool ({{key|Shift|S}}). | ||
[[ | [[File:Final_Funnel_Product.png|thumb|600px|center|Final Product.]] | ||
{{Note|Hit {{key|Alt|P}} to make sure your brush isn't reported as an invalid brush structure.}} | {{Note|Hit {{key|Alt|P}} to make sure your brush isn't reported as an invalid brush structure.}} | ||
| Line 96: | Line 96: | ||
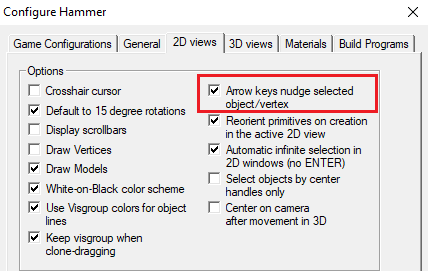
{{Note|Before going further, enable [[Hammer_2D_Views_Options|"Arrow keys nudge selected object/vertex"]] in the [[Hammer_Options_Dialog|Options]].}} | {{Note|Before going further, enable [[Hammer_2D_Views_Options|"Arrow keys nudge selected object/vertex"]] in the [[Hammer_Options_Dialog|Options]].}} | ||
[[ | [[File:SettingsInHammer.png|thumb|600px|center|This is a must have to make your life easier on the long run.]] | ||
{{Note|This shows how to do a 90-degree tunnel curve, but this method can be applied to any brushwork you'd like to have a curve for as seen in the first four screenshots.}} | {{Note|This shows how to do a 90-degree tunnel curve, but this method can be applied to any brushwork you'd like to have a curve for as seen in the first four screenshots.}} | ||
This example will use two tunnels created using the [[Hammer_Arch_Properties|arch primitive]]. To demonstrate the effectiveness of this technique, a couple of brushes that will act as detail has been added to the tunnels. | This example will use two tunnels created using the [[Hammer_Arch_Properties|arch primitive]]. To demonstrate the effectiveness of this technique, a couple of brushes that will act as detail has been added to the tunnels. | ||
[[ | [[File:Two_Arches_To_Connect.png|thumb|600px|center|Two arches to connect.]] | ||
===Finding the correct rotation size=== | ===Finding the correct rotation size=== | ||
In order to properly connect those two arches, we need to find the proper size. Make a copy of a tube (in this example, the top one) and place it accordingly so that the finished product connects perfectly with the existing arches. | In order to properly connect those two arches, we need to find the proper size. Make a copy of a tube (in this example, the top one) and place it accordingly so that the finished product connects perfectly with the existing arches. | ||
[[ | [[File:Size.png|thumb|600px|center|We have to use the distance from one tube to the other *2. More simply, (2 * 128 units) + (2 * 128 units) because there are 2 squares of 128 units big until the two arrows connect.]] | ||
{{Note|The number of sides is determined by the rotation number you input in the transform dialog box. In order to make sure that the finished product is 100% aligned and have a 360 degree rotation, you need to divide 360 by whichever number you want. The smaller the degree rotation number is, the more detailed the final product will look like, but the more expensive on brushsides it will be. Use it sparingly. Make use of a calculator. This example will make use of 15-degree rotations - thus creating 24 sides.}} | {{Note|The number of sides is determined by the rotation number you input in the transform dialog box. In order to make sure that the finished product is 100% aligned and have a 360 degree rotation, you need to divide 360 by whichever number you want. The smaller the degree rotation number is, the more detailed the final product will look like, but the more expensive on brushsides it will be. Use it sparingly. Make use of a calculator. This example will make use of 15-degree rotations - thus creating 24 sides.}} | ||
| Line 112: | Line 112: | ||
Select the top and bottom tubes. Hit {{key|Ctrl|M}} to open the transform dialog box. Rotate them by 7.5 degrees on the Z axis. | Select the top and bottom tubes. Hit {{key|Ctrl|M}} to open the transform dialog box. Rotate them by 7.5 degrees on the Z axis. | ||
[[ | [[File:Rotating_Brushes.png|thumb|600px|center|]] | ||
Split the brushes in the exact center of the boundary box, then open the transform dialog box again and rotate 15 degrees the other way. Split the brushes in the exact center of the boundary box once again. Finally, rotate everything back into position by opening the transform dialog box and inputting 7.5 degrees. | Split the brushes in the exact center of the boundary box, then open the transform dialog box again and rotate 15 degrees the other way. Split the brushes in the exact center of the boundary box once again. Finally, rotate everything back into position by opening the transform dialog box and inputting 7.5 degrees. | ||
[[ | [[File:Rotating_15_degrees.png|thumb|600px|center|]] | ||
[[ | [[File:Second_Split.png|thumb|600px|center|]] | ||
[[ | [[File:Putting_everything_back_into_position.png|thumb|600px|center|]] | ||
[[ | [[File:More_Splitting.png|thumb|600px|center|]] | ||
Remove the left and right sides of each brush. | Remove the left and right sides of each brush. | ||
[[ | [[File:Removing_excess.png|thumb|600px|center|]] | ||
Now comes the time to paste rotated copies of these. Unfortunately, we cannot use paste special for this as pasted copies will not rotate around the center axis. This is why "Arrow keys nudge selected object/vertex" needs to be enabled in the options. Select both copies, hit {{key|Shift|Right}} to create a copy, then release the {{key|Shift}} key and press the {{key|Left}} key to put it back in the same spot. Hit {{key|Ctrl|M}} and input a 15 degree rotation on the Z axis. You will notice that the copy will connect perfectly vertex wise with the first set of brushes. | Now comes the time to paste rotated copies of these. Unfortunately, we cannot use paste special for this as pasted copies will not rotate around the center axis. This is why "Arrow keys nudge selected object/vertex" needs to be enabled in the options. Select both copies, hit {{key|Shift|Right}} to create a copy, then release the {{key|Shift}} key and press the {{key|Left}} key to put it back in the same spot. Hit {{key|Ctrl|M}} and input a 15 degree rotation on the Z axis. You will notice that the copy will connect perfectly vertex wise with the first set of brushes. | ||
[[ | [[File:Copying_Brushes.png|thumb|600px|center|]] | ||
[[ | [[File:Connected_Set_Of_Brushes.png|thumb|600px|center|Notice how both set of brushes are perfectly connected together. No micro leaks either.]] | ||
Then, using the newly pasted copy, copy and keep pasting using a 15-degree rotation until you get a full circle. Once you have your entire circle done, select everything, open the transform dialog box and rotate the entire brushwork by 7.5 degrees on the Z axis. | Then, using the newly pasted copy, copy and keep pasting using a 15-degree rotation until you get a full circle. Once you have your entire circle done, select everything, open the transform dialog box and rotate the entire brushwork by 7.5 degrees on the Z axis. | ||
[[ | [[File:Final_rotation.png|thumb|600px|center|]] | ||
[[ | [[File:Final_Product_Ring.png|thumb|600px|center|Almost done. Notice that the size of it is off by a few Hammer units. This is not a problem here as it will be resized without any grid snapping issue.]] | ||
Slightly resize the entire brushwork using the corner handles until it's perfectly on grid. | Slightly resize the entire brushwork using the corner handles until it's perfectly on grid. | ||
[[ | [[File:Resizing_the_brushwork.png|thumb|600px|center|Final Product.]] | ||
The last thing you need to do is tie this entire group of brushes to a func_detail. | The last thing you need to do is tie this entire group of brushes to a func_detail. | ||
[[ | [[File:Tying_the_brushwork_to_a_func_detail.png|thumb|600px|center|Final Product tied to a func_detail.]] | ||
==Wrapping Things Up== | ==Wrapping Things Up== | ||
Revision as of 07:32, 8 January 2024
Introduction
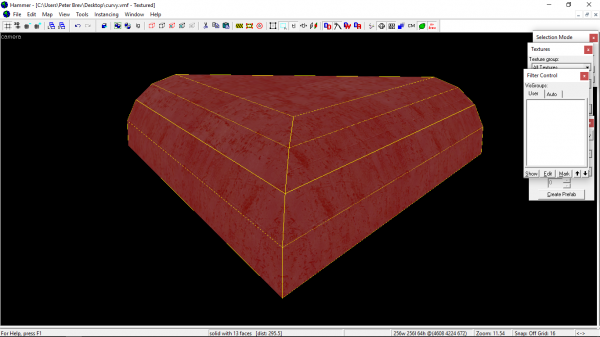
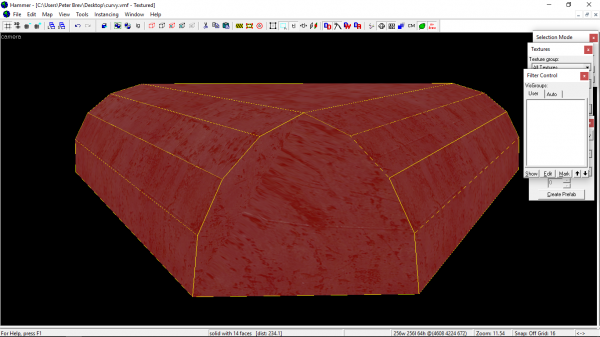
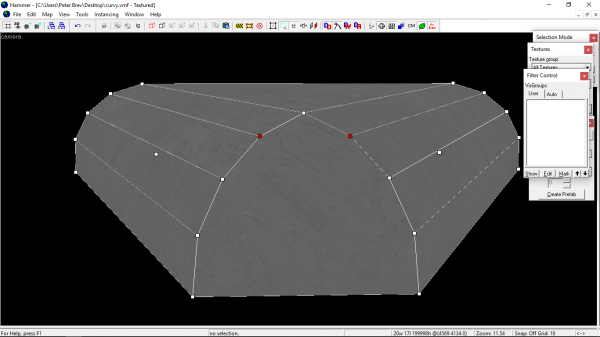
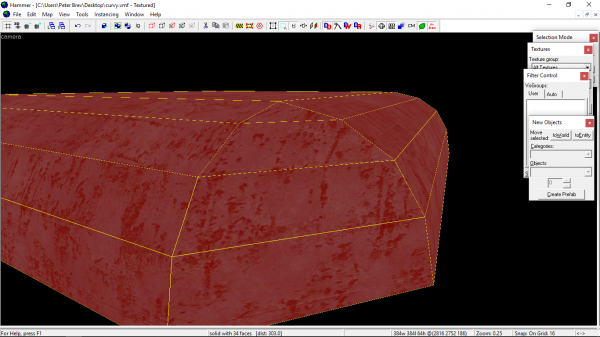
Creating complex brushwork without resorting to using many brushes can be tedious. Hammer allows you to have complex brushes without them being invalid nor having to create multiple useless pieces and unnecessarily increase the brushsides value.
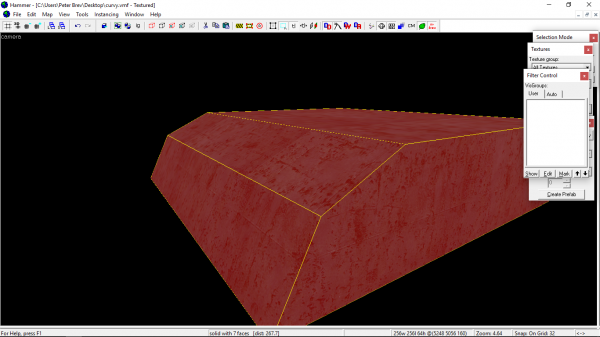
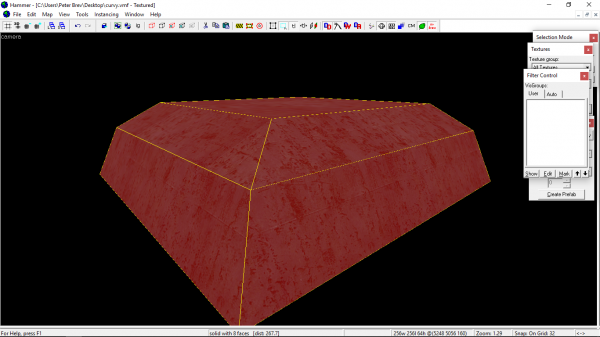
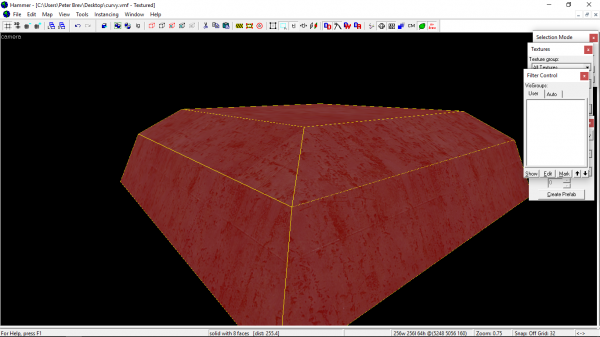
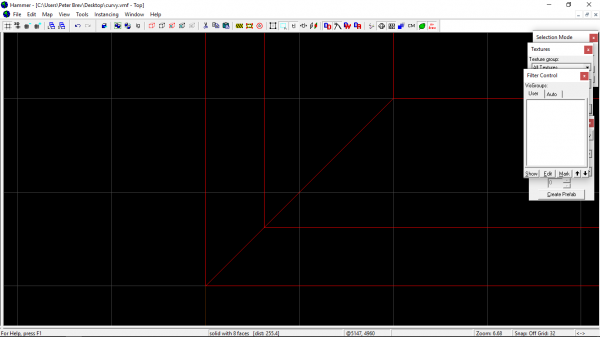
Here are a few examples of complex brush creation.
Creating A Sphere Type Corner
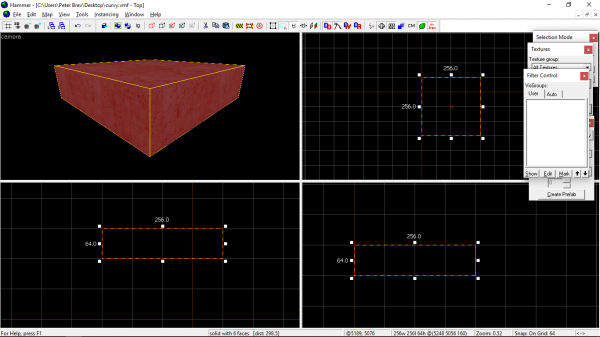
Let's go ahead and create a brush with a sphere type corner. Create a normal brush using the block tool.
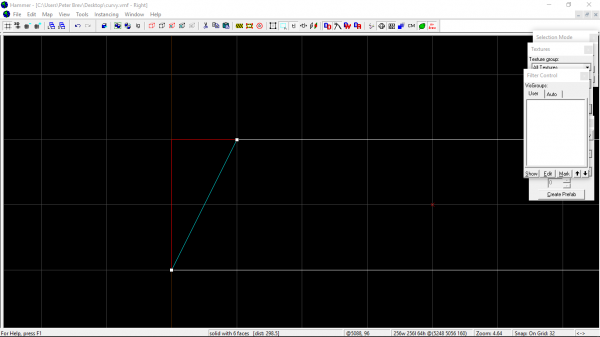
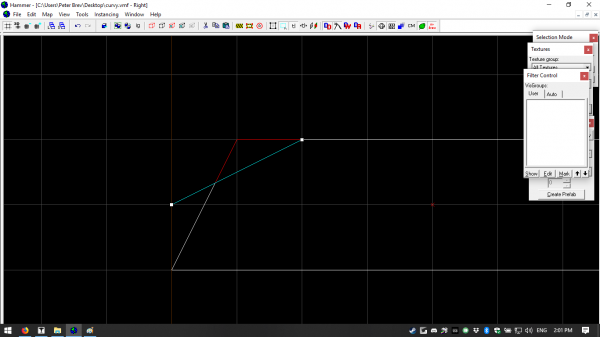
Using the clipping tool, create a rounded edge (as if you were creating a cylinder).
Proceed to do the same thing on the adjacent side.
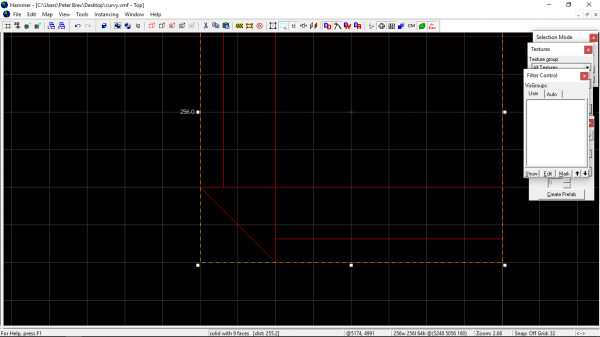
You want to make sure that all vertexes are on grid. This is very important, else the editor will act all funky like later on.
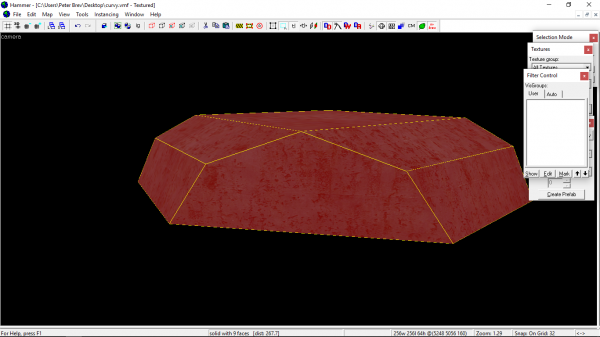
Clip the corner of the brush in a 45-degree.
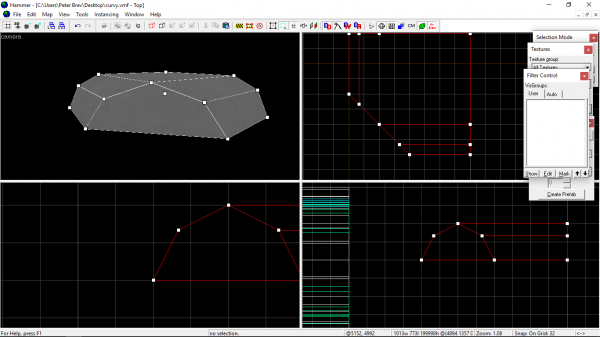
From here, you want to enter Vertex Manipulation mode by hitting ⇧ Shift+V.
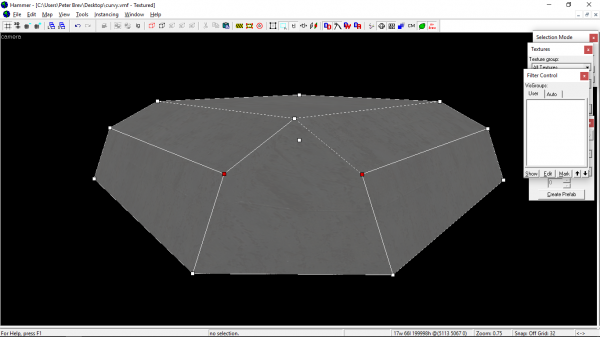
Pull the appropriate vertexes until you get the following shape.
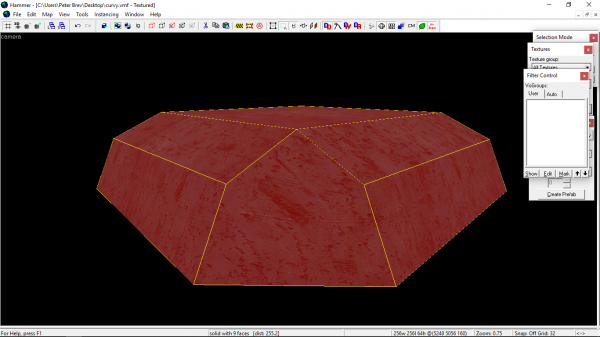
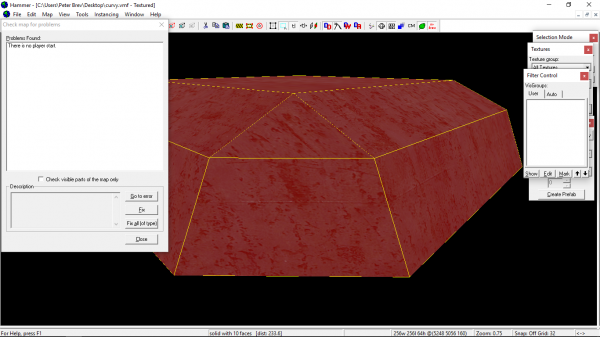
Select both middle vertexes and hit Ctrl+F. This will split the face into 2 and eliminate the invalid solid structure error.
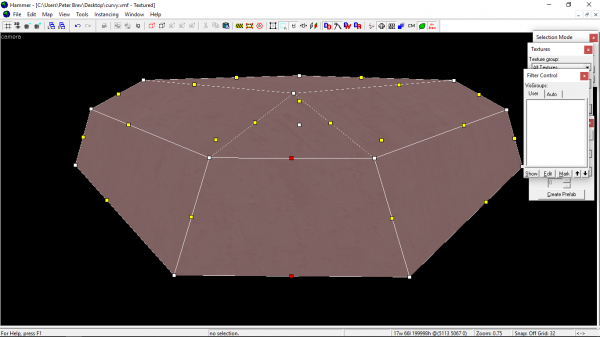
Select the middle and bottom vertexes and hit Ctrl+F. Then, select the bottom and top left and hit Ctrl+F. Finally, select the bottom and top right and hit Ctrl+F.
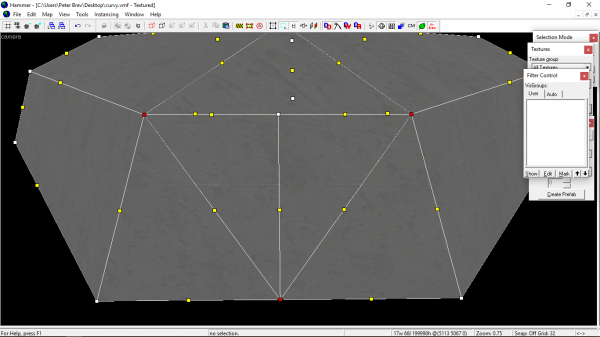
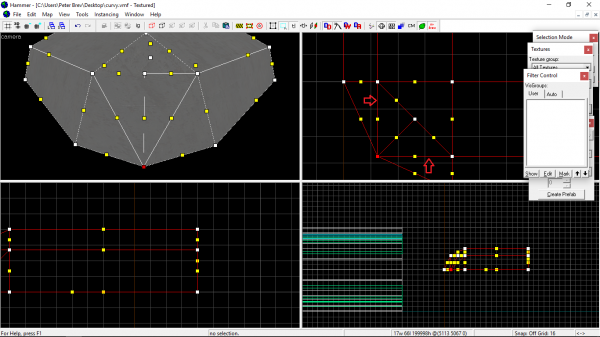
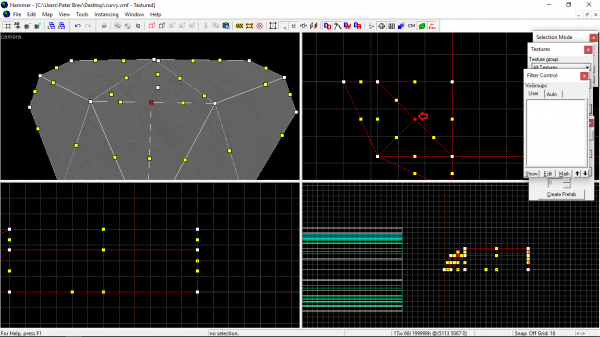
Select the bottom vertex and move it so that each line shown by the arrows are straight.
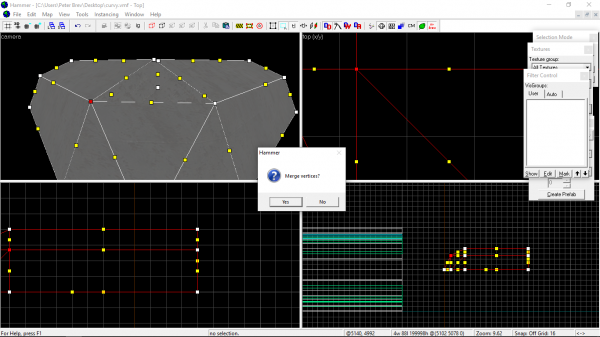
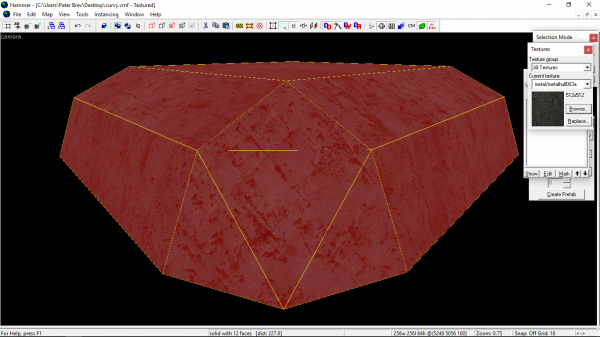
Finally, select the middle vertex and merge it with the one to the left or the right.
Creating A 45-Degree Cylinder Corner
The process is very similar to creating a sphere like corner. Create a block and clip the sides to have a cylinder type edge. The number of faces doesn't matter if it's higher than 2.
Cut the brush on a 45-degree. Pull the vertexes until they are straight. Make sure every vertex is aligned to the grid.
Select the vertexes from top to bottom and hit Ctrl+F.
Creating A Funnel Brush
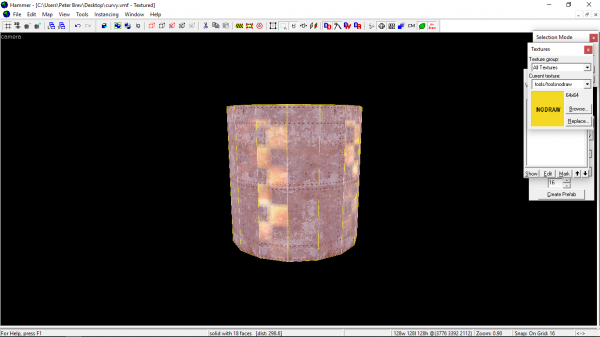
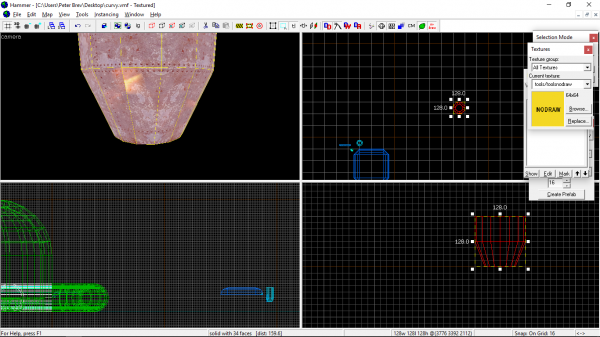
Create a cylinder and enter vertex mode by hitting ⇧ Shift+V.
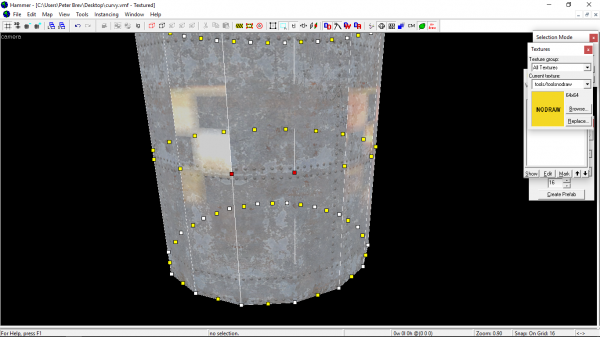
Select every yellow dots in the middle and hit Ctrl+F. Then select every white dot in the middle and hit Ctrl+F as well.
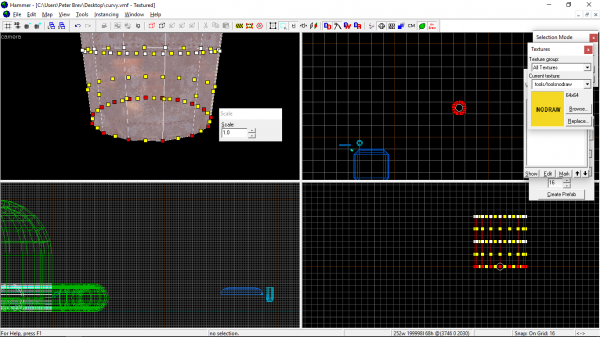
Select the bottom vertexes and hit Alt+E.
Change the value to your desired value and once satisfied with the new look, exit vertex mode by selecting the selection tool (⇧ Shift+S).
Creating A 90-Degree Tunnel Curve
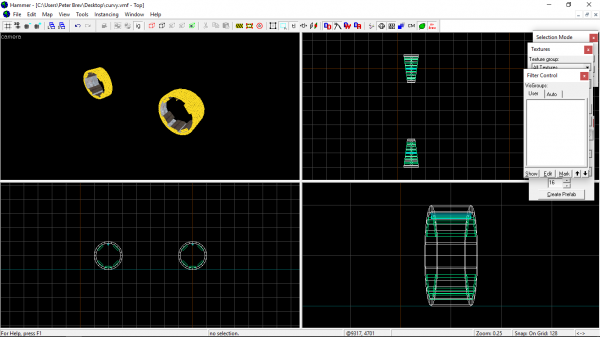
This example will use two tunnels created using the arch primitive. To demonstrate the effectiveness of this technique, a couple of brushes that will act as detail has been added to the tunnels.
Finding the correct rotation size
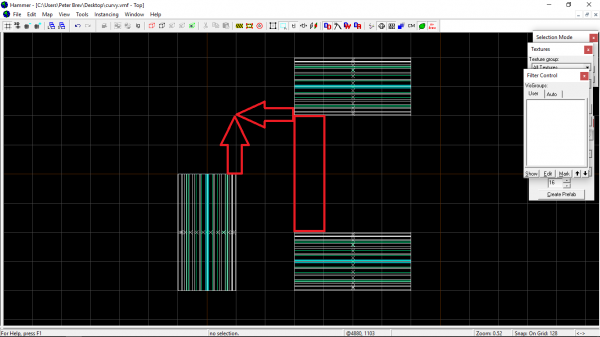
In order to properly connect those two arches, we need to find the proper size. Make a copy of a tube (in this example, the top one) and place it accordingly so that the finished product connects perfectly with the existing arches.
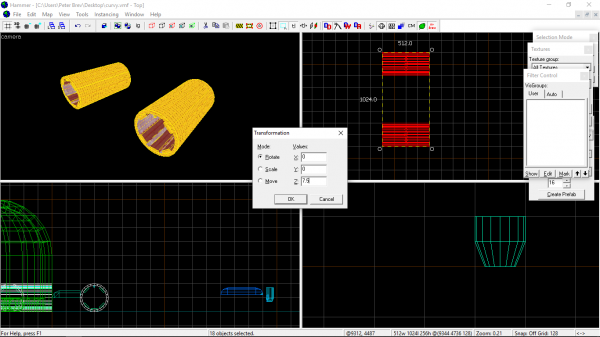
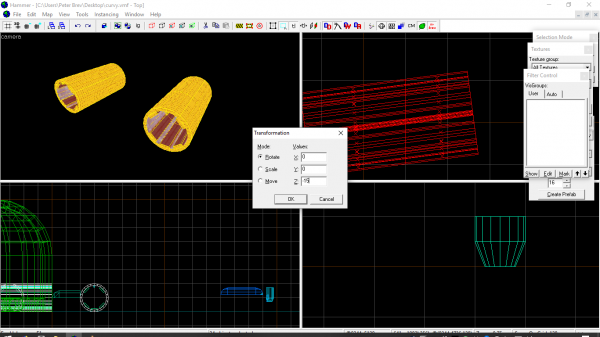
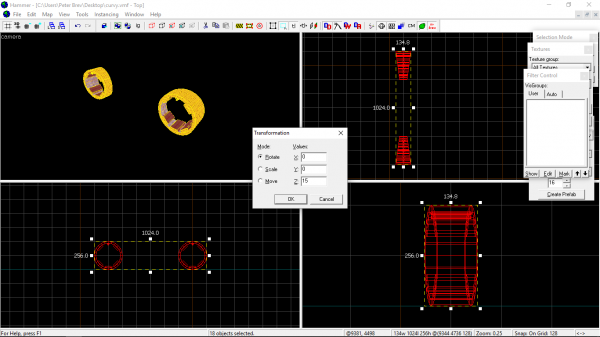
Select the top and bottom tubes. Hit Ctrl+M to open the transform dialog box. Rotate them by 7.5 degrees on the Z axis.
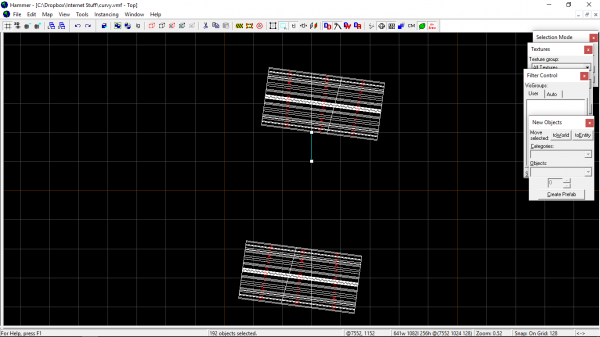
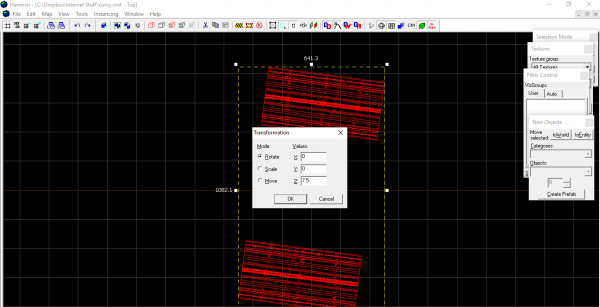
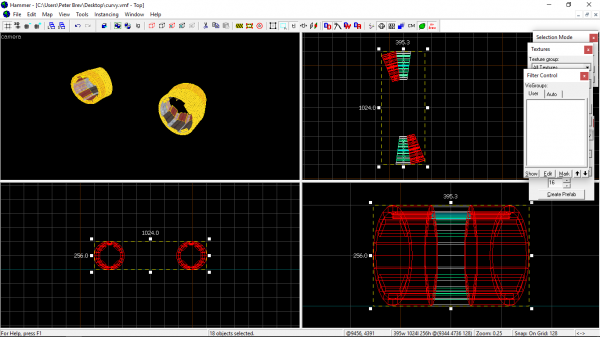
Split the brushes in the exact center of the boundary box, then open the transform dialog box again and rotate 15 degrees the other way. Split the brushes in the exact center of the boundary box once again. Finally, rotate everything back into position by opening the transform dialog box and inputting 7.5 degrees.
Remove the left and right sides of each brush.
Now comes the time to paste rotated copies of these. Unfortunately, we cannot use paste special for this as pasted copies will not rotate around the center axis. This is why "Arrow keys nudge selected object/vertex" needs to be enabled in the options. Select both copies, hit ⇧ Shift+→ to create a copy, then release the ⇧ Shift key and press the ← key to put it back in the same spot. Hit Ctrl+M and input a 15 degree rotation on the Z axis. You will notice that the copy will connect perfectly vertex wise with the first set of brushes.
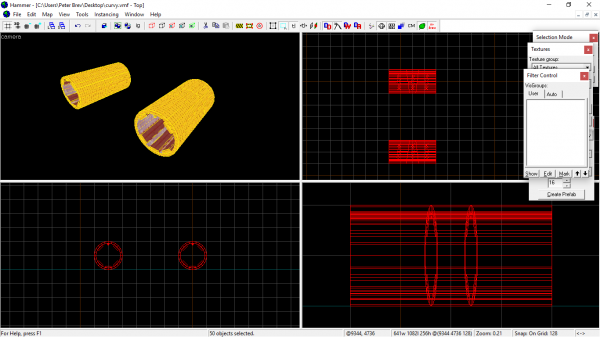
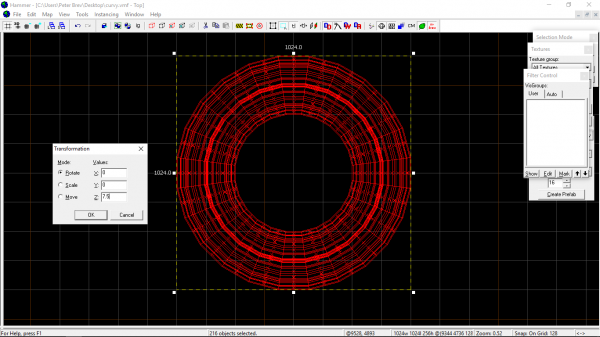
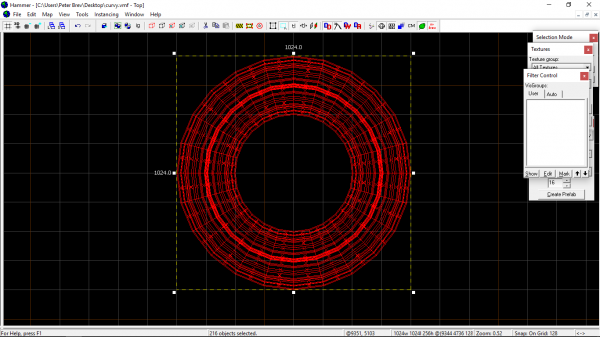
Then, using the newly pasted copy, copy and keep pasting using a 15-degree rotation until you get a full circle. Once you have your entire circle done, select everything, open the transform dialog box and rotate the entire brushwork by 7.5 degrees on the Z axis.
Slightly resize the entire brushwork using the corner handles until it's perfectly on grid.
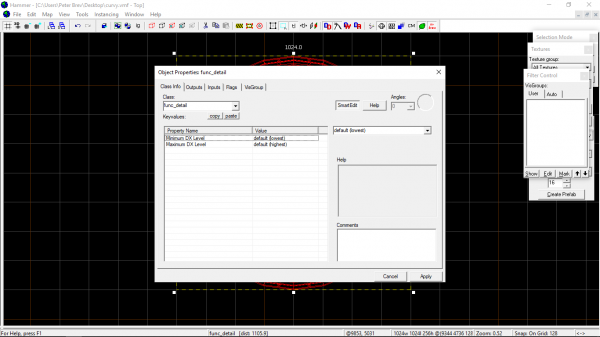
The last thing you need to do is tie this entire group of brushes to a func_detail.
Wrapping Things Up
If you'd like to get your hands on a sample of what's been explained on this page, you may grab such sample here.
