Creating Portal turrets: Difference between revisions
Jump to navigation
Jump to search
")

")
 Note:Under Flags, check Disabled if you don't want it to be active right away.
No edit summary |
m (→Rocket turrets) |
||
| Line 22: | Line 22: | ||
{{note|Under ''Flags'', check '''Disabled''' if you don't want it to be active right away.}} | {{note|Under ''Flags'', check '''Disabled''' if you don't want it to be active right away.}} | ||
{{todo|Explain how to carve hole in ground for turret to recede into when disabled}} | |||
== See also == | == See also == | ||
Revision as of 13:01, 13 June 2022
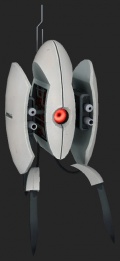
![]() Rocket/bullet turrets are very easy to add to your Portal map.
Rocket/bullet turrets are very easy to add to your Portal map.

Bullet (floor) turrets
- Select the entity tool (Shift + E) and in the dropdown menu select
npc_portal_turret_floor. - Then place it where you would like it on the map and rotate it so it's facing the correct direction.
- Right-click on it and go to Properties.
- Set Damage pushes player to Yes if you want the player pushed back by the turret.
- Under Flags, check Autostart and Fast retire. This will cause your turret to automatically start and retire fast (like the ones in Portal).
Additionally, you can create a box around your turret to prevent it from being knocked down.
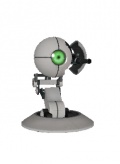
Rocket turrets

- Select the entity tool (Shift + E) and in the dropdown menu select
npc_rocket_turret. - Then place it where you would like it on the map and rotate it so it's facing the correct direction.
Todo: Explain how to carve hole in ground for turret to recede into when disabled