Creating an energy ball launcher and catcher: Difference between revisions
(otherlang2) |
No edit summary |
||
| Line 1: | Line 1: | ||
{{back | Portal Level Creation}} | |||
{{otherlang2 | {{otherlang2 | ||
|ru=Creating an energy ball launcher and catcher:ru | |ru=Creating an energy ball launcher and catcher:ru | ||
Revision as of 02:05, 13 June 2019
Introduction
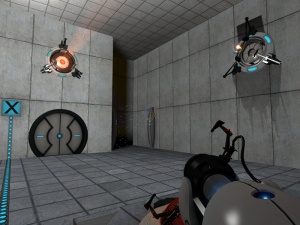
The purpose of this tutorial is to illustrate how to create a single ball launcher and have a single ball catcher as its target. Both, the launcher and the catcher instructions will detail how the basic animations as well as the visual and sound effects work.
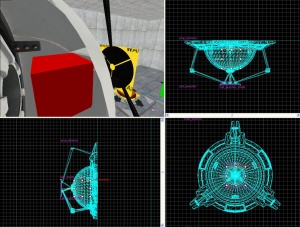
The Aperture Science High Energy Pellet Launcher
The launcher is comprised of three entities:
The model used is:
models/props/combine_ball_launcher.mdl
To create the launcher:
- 1. Create a
prop_dynamicentity (Shift+E) with aWorld Modelset to "models/props/combine_ball_launcher.mdl" and theNamekey of "ball_launcher". - 2. Place the new entity where you want it in your map.
- 3. Create a
point_energy_ball_launcherentity and set its name to "ball". - 4. Place the new entity inside the dome of the "ball_launcher" model.
- 5. Create a new sqare brush 20 units or so on each side and 1 unit thick with the nodraw texture.
- 6. Turn this brush into a
func_brushentity (Ctrl+T) and name it "ball_launcher_shield". - 7. Place the "ball_launcher_shield" so that it is touching the black circular shield of the "ball_launcher model".
- 8. Open up the
point_energy_ball_launcherproperties and set these outputs:
- 9. Adjust the keyvalues of
point_energy_ball_launcherto set the desiredDirection,Speed,Type, andLifeof the ball.
The Aperture Science High Energy Pellet Launcher is now complete.
point_energy_ball_launcher outside of the "ball_launcher" model and remove the "ball_launcher_shield" outputs.The Aperture Science High Energy Pellet Target
The target is comprised of eleven entities:
- ambient_generic
- env_sprite
- filter_combineball_type
- func_tracktrain
- logic_relay
- path_track (2)
- point_spotlight
- prop_dynamic (2)
- trigger_multiple
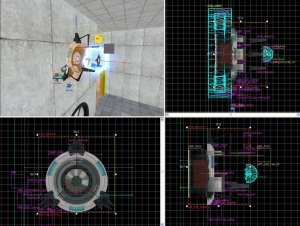
The models used are:
/models/props/combine_ball_catcher.mdl/models/Effects/combineball.mdl
To create the catcher:
- 1. Create a
prop_dynamicentity with aWorld Modelkey pointing to "models/props/combine_ball_catcher.mdl" and theNameset to "ball_trap". - 2. Place the entity where you want it in your map.
- 3. Create a
filter_combineball_typeentity and name it "filter_ball". - 4. Set the ball type for "filter_ball" to "Launched by
point_combine_ball_launcher". - 5. Create a cylinder brush with 8 faces, and size it to same the length and width, as the Dynamic prop. Texture it with the trigger texture to cover the opening of the "ball_trap" model.
- 6. Turn this brush into a
trigger_multipleentity and name it "trigger_ball_trap", also set thefilter_nameto "filter_ball". Make sure to have the flags Physics Objects selected. - 7. Create a
prop_dynamicentity with aWorld Modelof "models/Effects/combineball.mdl", set itsParentto "ball_trap" andNameit "ball_trap_ball". Also make sure to haveStart Disabledset to "Yes". - 8. Create a
env_spriteentity, set itsSprite Nameto "sprites/physring1.vmt", set itsParentto "ball_trap" andNameit "ball_trap_sprite". Make sure to have 'Render mode' set to Additive. Also, the 'Scale should be set to 1.5 'Size of Glow proxy' set to 0, and HDR Color Scale set to 1.0, yet all these values can be changed to your liking. Also be sure to have 'Render Fx' set to Distort. - 9. Place both "ball_trap_ball" and "ball_trap_sprite" somewhere near the front of the "ball_trap" model.
- 10. Create a
logic_relayentity and name it "relay_ball_trap_spawn". - 11. Open up the
logic_relayproperties and set these outputs:
- 12. Create a
path_trackentity and name it "path_ball_trap_01", setNext Stop Targetto "path_ball_trap_02". - 13. Place "path_ball_trap_01" 34 units from the base of "ball_trap" model and 18 Units High from the center of the base model.
- 14. Create a
path_trackentity and name it "path_ball_trap_02, setNext Stop Targetto "path_ball_trap_01". - 15. Place "path_ball_trap_02" 56 units away from the center of the original path_track. Make sure to have both even in a straight line, and matching up.
- 16. Create a brush with the nodraw texture. Its measurements should be 14x8x16, Length, Width Height.
- 17. Turn this brush into a
func_tracktrainentity and name it "ball_trap_door". - 18. The placing doesn't matter, so feel free to place it anywhere you like.
- 19. Open up the property window for "ball_trap_door" and set these keyvalues:
Property Name Value First Stop Target path_ball_trap_01 Move Sound d3_citadel.podarm_move Start Sound d3_citadel.podarm_move_start Stop Sound d3_citadel.podarm_move_stop Change Angles Never (Fixed Orientation) Height Above Tracks 0
- Also be sure to have these flags checked:
Property Name Value No user Control Checked Fixed Orientation Checked
- 20. Open up the property window for "path_ball_trap_02" and set this output:
- 21. Create a
point_spotlightentity (Shift+E) and name it "ball_trap_spotlight". You may also want to disable theDynamic Lightflag. - 22. Set the
Colorfor "ball_trap_spotlight" to "255 0 0", theBeam Lengthis normally the length of the room, andBeam Widthsomewhere between 20 and 40. - 23. Create an
ambient_genericentity andNameit "ball_trap_sound" - 24. Set the
Sound Namekey for "ball_trap_sound" to "AlyxEMP.Charge". Set it's Source Entity Name to the Main Prop_dynamic. - 25. Open the property window for "trigger_ball_trap" and set these outputs:
- Then under the Flags tab un-check "clients" and check everything else.
The Aperture Science High Energy Pellet Target is now complete.
PlaySound.The theory
These instructions illustrate the most basic use of the launcher and catchers. Theoretically you should be able to have one launcher and multiple catchers, or even catchers that reset themselves.
See also
External links
- Example map Example map using this tutorial. VMF included.


