Destinations/Getting Started: Difference between revisions
Jump to navigation
Jump to search
m ("filed" -> "field") |
|||
| Line 124: | Line 124: | ||
*** If your teleport mesh is more complex than a simple square or rectangle, make sure you select 'Physics Type: Mesh' in the Object Properties box - this will ensure the teleport beam correctly traces against the mesh. | *** If your teleport mesh is more complex than a simple square or rectangle, make sure you select 'Physics Type: Mesh' in the Object Properties box - this will ensure the teleport beam correctly traces against the mesh. | ||
** Click “Tie Selected Meshes to Entity”. | ** Click “Tie Selected Meshes to Entity”. | ||
** Type vr_teleport_area into the | ** Type vr_teleport_area into the field and hit enter. This gives the mesh you just created the properties needed to teleport the player around. | ||
** If you have a teleport mesh that is concave or | ** If you have a teleport mesh that is concave or non-planar, make sure to set "Physics Type" to "Mesh" under Object Properties. | ||
{{clr}} | {{clr}} | ||
Revision as of 23:59, 23 June 2016
Getting Started with Destination Workshop Tools
In this tutorial, we will walk through the basics of creating a Destination using Destinations Workshop Tools.
Topics we will cover in this tutorial:
- Creating an addon
- Player, Floor, Light
- Build and test
- Bringing a model into Destination Workshop Tools
- Adding Teleport
- Adding a sky
- Submitting to the Destinations Workshop
What you will need
- A 3D Model in OBJ or FBX format
- Your model can be made in any 3D modeling program that supports OBJ or FBX export.
- Maya or Maya LT
- Modo or Modo Indie
- Blender (free)
- This can also be a 3D model made with photogrammetry. For a tutorial on creating a Destination from photogrammetry, click here.
- Your model can be made in any 3D modeling program that supports OBJ or FBX export.
- Destinations Workshop Tools (free)
- This is what you will use to turn your 3D environment into a Destination and upload it to the Steam Workshop. Once downloaded, you can find this application in the Library > Tools section.
Create an addon
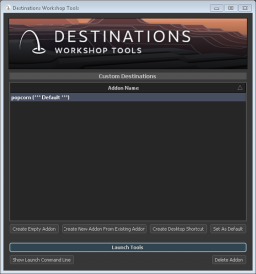
- Open Destinations Workshop Tools - this can be found in the Tools section of your Steam Library.
- For a new Destination, click “Create Empty Addon” and name your addon (this will be used in the file path of your Workshop submission).
- A Destinations "addon" is similar to a Dota 2 custom game. An addon consists of a map, models, materials, Panorama UI files, Lua scripts, etc.--anything that is required to make the addon function.
- Select your addon click “Launch Tools.” This will launch Destinations in Tools mode.
Open Hammer
- Hammer is Valve’s level editor. This is where everything will be assembled before publishing to the Steam Workshop.
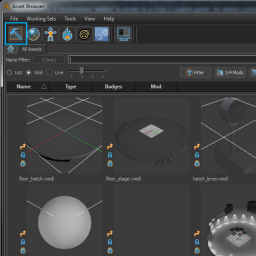
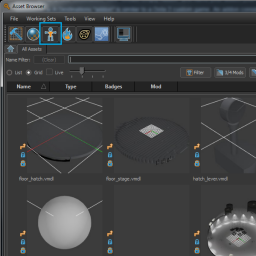
- On the Asset Browser window, click the hammer icon in the top left.
- In Hammer, hit Ctrl-N to (or File > New File) to start a new map.
Place Player
- This determines where the player will start when they load your Destination.
- Select the Entity tool from the left-most tool panel. (light bulb icon).
- Make sure the Entity Class is “info_player_start” (this should be the default).
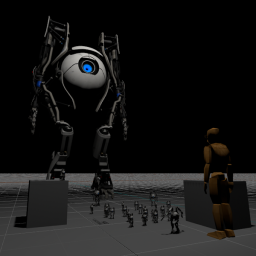
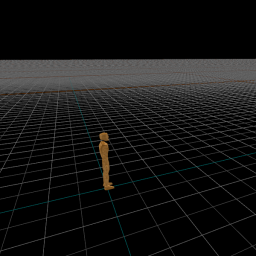
- Click in the center window to place the Player Start. It should look like a low poly scientist, and is a good scale reference.
- You can adjust the player start position and orientation using the Translate (T) and Rotate (R) tools.
- For more information on navigating around Hammer: Hammer Navigation
Add a floor
- Click the block tool on the left.
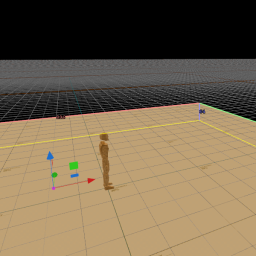
- Click and drag in the center panel to make a floor.
- It will come in centered around the origin, which means your player start will be inside of it.
- To lower it, first make the grid more granular by pressing the “[“ button.
- Then press “T” to go into translate mode.
- Drag the vertical arrow down until the ground is flush with the origin.
Add a light
- Click the entity tool on the left.
- Type “light_spot” in the entity class field.
- Click in the center panel to place your light.
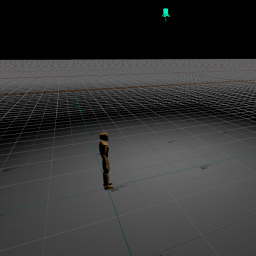
- Use the Translate “T” and Rotate “R” tools to position the light pointing down on the player start.
- You can make the light brighter by putting a larger number under Brightness in Object Properties.
Build and test
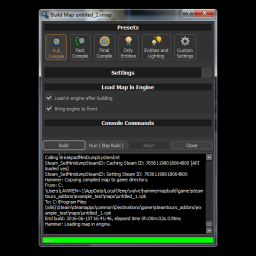
- Press F9 and click Build to build the map and view it in VR.
- You will be asked to save – do so.
- Once this is built you should be able to see a ground and a pool of light in VR. Not much to see or do, but we’ll fix that in the coming steps.
Bring your model into Destination Workshop Tools
- Go back to the Asset Browser click the Model Editor button.
- Click "New VMDL from Mesh file", browse to, and select your OBJ or FBX.
- Click OK when it asks if you want to create a new content directory.
- On the dialog window that comes up, select the “…” button at the end of the Destination Directory line.
- Create a folder here called whatever you want (the name of your destination, for instance).
- You should end up with something that looks like ".../steamtours_addons/popcorn/models/popcorn".
- Under the "Collision type" drop down, select "Collision using exact geometry".
- For everything else you can leave the defaults.
- Click OK. Depending on the complexity of your model, it may take some time to import.
Bring your model into Hammer
- Find your model in Asset Browser (you can search in the Asset Browser if you need to).
- Once you find it, you can drag the model into Hammer.
- It should now appear in your world.
- Resize “E”, Move “T”, Rotate “R”, or Duplicate “Shift+Drag” until you are happy with the placement.
- You can build and view in VR to see if you like how it looks (F9).
Placing Teleport areas
This determines where the player can teleport to in your Destination. There are two types of teleports – meshes and markers.
Placing Teleport meshes
- Teleport meshes work great for large, flat areas that you would like the user to be able to teleport around.
- Select the Polygon tool.
- Click to add vertices around your desired teleport area until you have the shape you want. Hit Enter when done.
- You may need to Translate(T) and Scale(E) the polygon to get it to the right size and place in your map. Make sure the mesh is slightly above the ground to prevent z-fighting.
- To make this polygon into a teleport mesh, go to the Materials tab in the center bottom panel. Search for “teleport” and find teleport_area_visible.vmat.
- Click and drag this material onto your polygon to apply the material.
- Select the polygon and you should see options show up in the bottom right panel.
- If you don’t see options, make sure “Mesh” in the top right panel is selected.
- If your teleport mesh is more complex than a simple square or rectangle, make sure you select 'Physics Type: Mesh' in the Object Properties box - this will ensure the teleport beam correctly traces against the mesh.
- Click “Tie Selected Meshes to Entity”.
- Type vr_teleport_area into the field and hit enter. This gives the mesh you just created the properties needed to teleport the player around.
- If you have a teleport mesh that is concave or non-planar, make sure to set "Physics Type" to "Mesh" under Object Properties.
Placing Teleport markers
- Teleport markers are great for irregularly shaped areas, or spots of interest.
- Select Entity (light bulb icon).
- In the Entity Class field type vr_teleport_marker.
- Placing teleport markers is as simple as clicking on your model. Like everything else, these markers can be moved around once placed.
Optional: Add a Sky
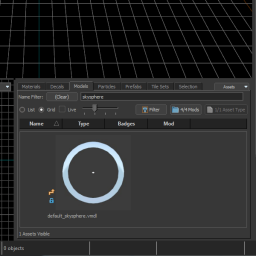
- If your model is not enclosed within an environment, you may want a sky sphere - without it, the background will be completely black.
- We have included some default skyspheres with the Destinations workshop.
- Go to the models tab in the bottom center panel and type skysphere.
- Drag the skysphere model into your environment.
- It should be much larger than your model - move it around to center it around your model.
Optional: Add a Cubemap
- Cubemaps are used by the vr_standard shader both for reflections and ambient lighting. For more realistic lighting, it can be useful to add one to your scene.
- Select Entity (light bulb icon).
- In the Entity Class field type env_cubemap_box.
- Place the entity roughly in the centre of your environment - this will be where your reflections and lighting will be calculated from.
- Drag the white dots shown on the sides of the blue cube to encompass the area you will be navigating through - for a rectangular room, this should contain the walls.
- Now right-click on the sphere at the centre of the cubemap entity you have placed, and choose Selected cubemap : Write Custom Cubemap...
- This will bring up a save dialogue box, which should be pointed at your maps folder.
- Create a new folder - typically this will be 'yourmapname_baked'. (Replace 'yourmapname' accordingly!)
- Now save the cubemap there - it will be named something like 'yourmapname_custom_cubemap_123.exr'.
- The system will now bake a cubemap from all the static geometry in your scene.
- Once the cubemap is baked, there will be a dialog asking to apply it - click Yes.
- The entity shown in the 3D view will now look like a mirrored sphere - this is to help visualise what has been baked, and will not appear in the compiled map.
- Remember to re-bake it (under the same name) whenever you significantly change your scene, otherwise things may not match up!
- You may need to increase the distance for 'Bake Far Z' in the entity's Object Properties if the sky or other distant objects appear as black in the cubemap.
Test your Destination
- To build and test press F9. Make sure the "Full Compile" option is selected.
- Once built, you should be able to test your Destination now in VR.
- Continue adding and editing models, environments, and lighting to your Destination until you feel it's ready to submit to the Workshop.
Submit to the Steam Workshop
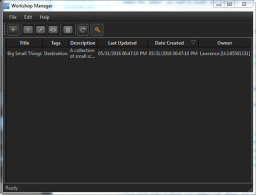
- Once you are happy with your Destination, go back to the Asset Browser and click the Workshop Manager Button.
- Click on the "+" icon or go to File > New Submission.
- Fill in the fields and select an image to represent your Destination. A screenshot of the Destination works great as a thumbnail.
- Finally, click “Submit” to upload your Destination to the Steam Workshop. Depending on the size of your submission, this may take a while.
- Your Destination will now show up in the Destination Workshop.
- Don’t forget to sign the Workshop agreement, or others will not be able to see your work.
Congratulations! Other players will now be able to download and explore your Destination.
