Ru/Level Design Introduction (Portal 2)/Your First Level: Difference between revisions
| Line 113: | Line 113: | ||
{{clr}} | {{clr}} | ||
== | == Создание стен и потолка == | ||
Теперь давайте создадим в комнате стены и потолок. Самый простой способ сделать это - ''продублировать'' браш пола. | |||
=== | === Дублирование === | ||
Чтобы создать их, можно выбрать существующий пол и продублировать его. | |||
{{note| | {{note:ru|Для дублирования необходимо, чтобы опция '''Arrow keys nudge selected object/vertex''' была включена. Сделайте это, если ещё не сделали ранее. Вы можете найти её в меню '''Tools > Options > 2D Tab'''.}} | ||
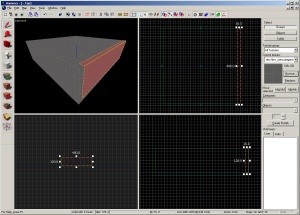
[[Image:l4d_hammer_brush_04.jpg|right|thumb|300px|caption| | [[Image:l4d_hammer_brush_04.jpg|right|thumb|300px|caption|Дублирование брашей для создания комнаты.]] | ||
Для дублирования: | |||
# | # Выберите созданный вами браш пола. | ||
# | # Наведите курсор на окно просмотра '''Вид сбоку''' ('''Side'''). | ||
# | # Зажмите {{key|Shift}} и нажмите клавишу {{key|Стрелка_вверх}}, чтобы создать дубликат и переместить его на 1 единицу сетки вверх. | ||
Это действие создаст ещё один браш, такой же, как пол, и поместит его над существующим полом. | |||
Теперь, чтобы создать стену, вы можете изменить размеры нового браша, перемещая рукоятки ("квадратики") на его углах. Давайте сделаем стену в 128 единиц высотой и 16 единиц толщиной. | |||
{{tip| | {{tip:ru|Для перемещения созданного браша используйте стрелки на клавиатуре или просто кликните в центре браша и перетащите его мышой в нужное место.}} | ||
Теперь, чтобы создать остальные стены, продублируем созданную стену 3 раза.{{clr}} | |||
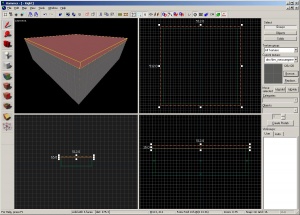
[[Image:l4d_hammer_brush_05.jpg|right|thumb|300px|caption| | [[Image:l4d_hammer_brush_05.jpg|right|thumb|300px|caption|Дублирование пола для создания потолка.]] | ||
Продублируем браш пола ещё раз и поднимем его, чтобы он стал потолком. | |||
{{tip|Keeping your level clean will become very important when you start to run it in the game. It's a good idea not to have overlapping brushes (brushes that intersect one another). This can cause "z-fighting" in the game, which is where multiple faces fight to get drawn over one another.}}{{clr}} | {{tip:ru|Keeping your level clean will become very important when you start to run it in the game. It's a good idea not to have overlapping brushes (brushes that intersect one another). This can cause "z-fighting" in the game, which is where multiple faces fight to get drawn over one another.}}{{clr}} | ||
== Deleting brushes == | == Deleting brushes == | ||
Revision as of 04:15, 15 July 2012
A brush является простой 3D фигурой, созданная с помощью инструмента "Block Toll Hammer. Браши используются для создания большинства крупных поверхностей в вашем уровне, например, потолков и полов. Теперь мы создадим простую комнату, используя браши.
Создание пола с помощью брашей
- Из меню в левой части экрана "Tool" ("Инструменты") выберите
 Block Tool.
 - Теперь щёлкните левой кнопкой мыши по Виду сверху (Top) (правый верхний прямоугольник) и двиньте мышку вправо и вниз, как показано на рисунке.
- При перетаскивании вы увидите пунктирный контур прямоугольника или квадрата.
- Создайте квадрат 512x512 единиц и отпустите левую кнопку мыши.
- Нажмите ↵ Enter на клавиатуре, чтобы создать браш, который вы только что нарисовали.
Чтобы вернуться в режим выделения, кликните на иконку ![]() Selection tool на панели Tool или нажмите клавишу Esc.
Selection tool на панели Tool или нажмите клавишу Esc.
В режиме выделения, когда браш выделен, вы можете изменять размер браша, кликая левой кнопкой мышки на любом из квадратиков, появляющихся на контуре браша, и перетаскивая его внутрь или наружу браша.
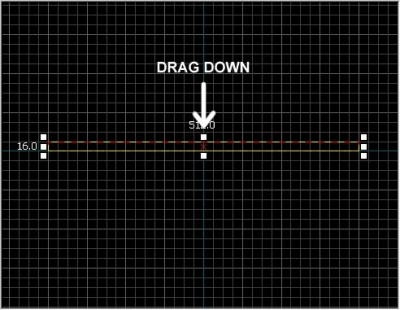
Давайте уменьшим толщину браша (который мы будем использовать в качестве пола) со стоящих по умолчанию 64 единиц до 16. Для этого нам нужно изменить размер сетки.
Сетка
Сетка отображается во всех 2D-видах. По умолчанию все объекты привязаны к сетке. Хотя вы и можете отключить привязку, считается хорошим тоном оставлять её, поскольку она предотвращает утечки и другие ошибки в вашей карте.
По умолчанию размер сетки составляет 64 единицы, что означает, что каждая её линия отстоит друг от друга на 64 единицы. Текущий размер сетки отображается в строке состояния в нижней части окна Hammer.
- Нажатие иконки Smaller Grid
 сделает сетку в 2 раза гуще (увеличит частоту линий). Это может пригодиться для более точной подгонки. Также вы можете уменьшить размер сетки с помощью клавиши [.
 - Нажатие иконки Larger Grid
 сделает сетку вдвое реже (увеличит частоту линий). Также вы можете увеличить размер сетки с помощью клавиши ] .
Чтобы уменьшить размер сетки до 16 единиц, нажмите клавишу [ дважды. Посмотрите Status bar в правой нижней части окна Hammer и убедитесь, что там указано Grid: 16. Если это не так, жмите [ или ] до получения нужного результата. :)
Изменение размера пола
Теперь сетка должна быть достаточно мелкой.
Переключитесь на нижнюю правую зону редактирования (Вид сбоку). При наведении на неё курсора должна высплывать подсказка Side. Переместите верхнюю границу браша вниз так, чтобы он стал толщиной в 16 единиц.
Перемещение брашей
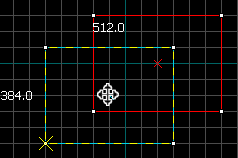
Вы можете перемещать браши. Выберите Selection Tool ![]() и наведите курсор мышки на браш (но не на его угол) в одном из 2D-видов. Курсор поменяется на 4 стрелочки, указывающие на все 4 направления
и наведите курсор мышки на браш (но не на его угол) в одном из 2D-видов. Курсор поменяется на 4 стрелочки, указывающие на все 4 направления ![]() , - это означает возможность перемещения объекта.
, - это означает возможность перемещения объекта.
Чтобы переместить браш, нажмите на него и потащите его в одном из 2D-видов. После того, как вы отпустите кнопку мышки, браш будет перемещён на указанную позицию.
Вы также можете перемещать объекты клавишами со стрелками на клавиатуре. Для этого, правда, вам нужно будет поменять настройки Hammer:
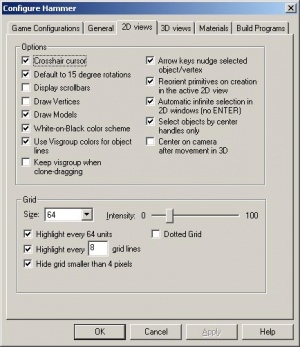
- Зайдите в меню Tools и выберите Options, чтобы открыть диалоговое окно Configure Hammer.
- Выберите вкладку 2D Views.
- Здесь находится много настроек, но сейчас мы просто отметим чекбокс Arrow keys nudge selected object/vertex.
- Нажмите OK, чтобы подтвердить изменения и закрыть окно настроек.
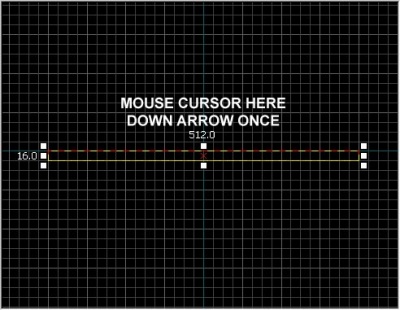
Теперь переместим браш-пол на 16 единиц вниз, просто поместив курсор мышки над брашем в Виде сбоку (Side) и 1 раз нажав клавишу Стрелка_вниз.
Навигация в 2D-видах
- Для перемещения по 2D-видам вы можете использовать полосы прокрутки.
- Более быстрый метод: зажмите Пробел и просто перетаскивайте область левой кнопкой мышки.
- Для масштабирования используйте Колёсико Мышки.
Текстурирование
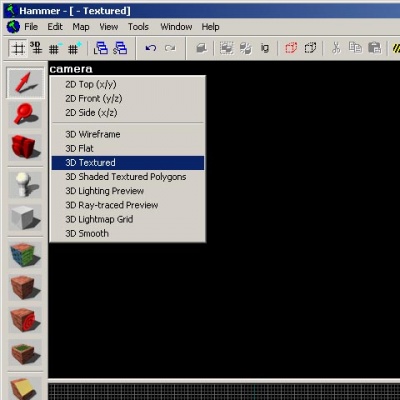
Чтобы увидеть текстуры в окне просмотра 3D Camera, кликните в нём правой кнопкой мышки по слову camera и выберите 3D Textured.
Навигация в окне просмотра 3D Camera
Перемещение в 3D слегка отличается от перемещения в 2D-видах:
- Зажмите Пробел и левую кнопку мышки и двигайте мышь, чтобы вращать камеру.
- Зажмите Пробел и правую кнопку мышки и двигайте мышь, чтобы перемещаться вверх/вниз и влево/вправо.
- Зажмите Пробел, правую и левую кнопку мышки и двигайте мышь, чтобы перемещаться вперёд и назад.
- Также вы можете использовать клавиши W, A, S и D для того, чтобы перемещаться вперёд, назад, стрейфиться влево и стрейфиться вправо соответственно.
- Клавиша Z включает и выключает режим "mouse look". Переместите курсор мышки в окно 3D Camera и нажмите клавишу Z. Передвигая мышь, вы можете смотреть вокруг так же, как делаете это в игре.
Переместитесь в окно просмотра 3D Camera и посмотрите сверху на пол, который мы только что создали.
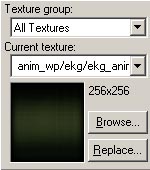
На вашем полу сейчас находится текстура по умолчанию. Наверное, вы захотите поменять её. Чтобы сменить текущую текстуру, нажмите на кнопку Browse на панели Texture справа.
Откроется окно Texture Browser.
С помощью поля Filter в нижней части окна можно отфильтровать текстуры по имени. В качестве примера для этого руководства, введите в это поле слово "dev_measure" (со знаком подчёркивания). После этого у нас появится список "разработческих" текстур, которые легко и быстро позволят нам что-нибудь сделать.
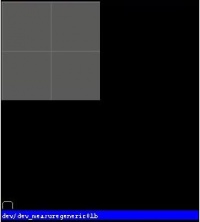
Теперь найдите текстуру dev/dev_measuregeneric01b и дважды кликните по ней.
Это вернёт вас обратно в редактор и поместит выбранную текстуру в качестве текущей на панели Texture.
Выберите браш пола, если он ещё не выбран, кликнув на него в окне просмотра Camera. Он должен стать красным.
После выбора браша нажмите на иконку ![]() Apply current texture на панели Tool, чтобы применить текущую текстуру к выделению. Серая текстура должна покрыть пол.
Apply current texture на панели Tool, чтобы применить текущую текстуру к выделению. Серая текстура должна покрыть пол.
Создание стен и потолка
Теперь давайте создадим в комнате стены и потолок. Самый простой способ сделать это - продублировать браш пола.
Дублирование
Чтобы создать их, можно выбрать существующий пол и продублировать его.
Для дублирования:
- Выберите созданный вами браш пола.
- Наведите курсор на окно просмотра Вид сбоку (Side).
- Зажмите ⇧ Shift и нажмите клавишу Стрелка_вверх, чтобы создать дубликат и переместить его на 1 единицу сетки вверх.
Это действие создаст ещё один браш, такой же, как пол, и поместит его над существующим полом.
Теперь, чтобы создать стену, вы можете изменить размеры нового браша, перемещая рукоятки ("квадратики") на его углах. Давайте сделаем стену в 128 единиц высотой и 16 единиц толщиной.
Теперь, чтобы создать остальные стены, продублируем созданную стену 3 раза.
Продублируем браш пола ещё раз и поднимем его, чтобы он стал потолком.
Deleting brushes
To delete a brush, select it with the Selection Tool ![]() and press the Delete key.
and press the Delete key.
Multiple selection
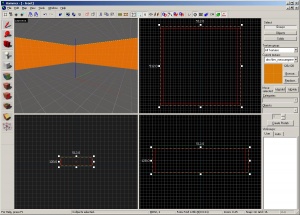
You'll notice that in the Camera viewport, if you navigate inside the room, it's hard to tell what's going on because all of the walls, floor and ceiling are the same texture. Next we'll change the walls to a different texture.
You can select all of the walls by holding down the Ctrl key and clicking on them one at a time in the Camera viewport. You will have to use the SPACE camera controls to rotate the camera around so you can select each wall.
After you have all of the walls selected, click on the Browse button in the Texture bar. This time, select the orange texture next to the current one, labeled dev/dev_measuregeneric01. Double-click it to select it and close the browser window.
Use the ![]() tool on the Tool Bar to apply the orange texture to the walls.
tool on the Tool Bar to apply the orange texture to the walls.
Saving the file
To save a level, you can use Ctrl+S or Save from the File menu.
You will need to give the map a file a name and choose the directory to place it in.
For this tutorial, name the map "tutorial01" and save it into the mapsrc directory, located by default at:
C:\Program Files\Steam\steamapps\common\portal 2\sdk_content\maps\
Your directory may be slightly different, depending upon where you have installed Steam.
Included sample maps
When you went to save your map, you may have noticed other directories underneath the mapsrc path. The Portal 2 Authoring Tools come with some example maps to help you.
| Directory | Contents |
|---|---|
maps\mp_coop_doors |
Coop map. |
maps\mp_coop_paint_red_racer |
Coop map with Propulsion Gel. |
maps\sp_a2_column_blocker |
Single Player map with Bridges. |
maps\sp_a2_trust_fling |
Single Player map with Aerial Faith Plates. |
maps\sp_a3_speed_ramp |
Single Player map with Propulsion Gel. |
maps\sp_a4_laser_catapult |
Single Player map with Tractor Beams, Lasers and an Aerial Faith Plate. |
maps\zoo_mechanics |
Contains most of the the gameplay mechanics used in Portal 2. |
Placing entities
Next we'll place an entity in our level:
- Select the
 Entity Tool on the Tool Bar.
 - Once the Entity Tool is enabled, the Entity selection list on the Object bar becomes active.
- Keep the Categories entry as Entities.
- Click the arrow on the Objects drop down list and select
info_player_start. - Now, navigate in the Camera viewport to the middle of the inside of the room.
- left-click on the floor to place the entity.
This will place an info_player_start entity in the middle of the room.
Placing a light
Now we'll place a source of illumination in the map:
- Select the Entity Tool again
- Select
lightfrom the Objects drop down list on the Object bar. - This time, place the light on the ceiling (above the player's head).
- Go back into selection mode by clicking on the
 Selection tool in the Tool Bar or by pressing the Esc key.
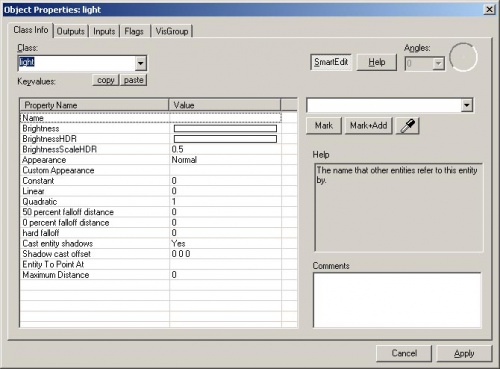
Next we'll change some settings on the light. Bring up the light's properties by double-clicking it in the Camera viewport or by selecting it (left-clicking on it) and then pressing the Alt+↵ Enter keys. This will bring up the Object Properties dialog box.
From the Object Properties, you can change various properties of the entity. For example, you can change the Brightness of this light. Click on the Brightness row under Keyvalues and you will see a set of numbers on the drop down menu on the right side. The default setting for the brightness of a light is 255 255 255 200. The first three numbers represent the RGB values (color) and the last number represents the intensity of the light.
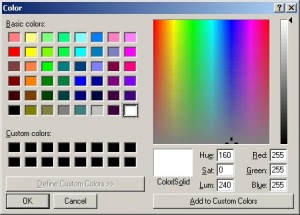
You can click on the Pick Color button to select a color rather than input values for it.
Simply click on the color you want the light to be and click OK.
This will bring you back to the Object Properties dialog box for the light. You should see any changes you made to the brightness on the Brightness row and the drop down field on the right side if the Brightness row is selected.
Click the Apply button to set your changes to the entity and close the dialog box by clicking on the "X" at the upper right side of the window.
Placing a prop_static
Entities also consist of props like furniture, decoration, and complex parts of architecture. There are a variety of different kinds of props. Prop_static entities are props that are static – they don't move, animate, turn on or turn off. There are also prop_dynamic entities that can move, animate, be enabled and disabled. There are also prop_physics entities which the player can interact with and behave physically as they would in the real world.
To place a prop:
- Select on the Entity Tool again.
- Go to the Object bar and change the Objects field to
prop_static. - Point to the floor in front of the model of Francis and left-click to place a prop_static. You will see a red cube that represents the
prop_staticbefore a model is attached to it. - Go back into selection mode by clicking on the
 Selection tool in the Tool Bar or by pressing the Esc key.
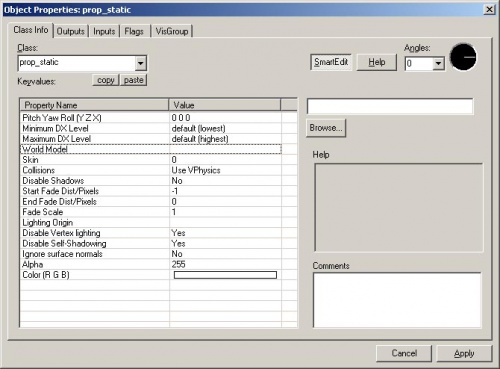
 - Double-click on the red cube to open the properties.
- Double-click on the World Model field to open the Model Browser.
Selecting the model
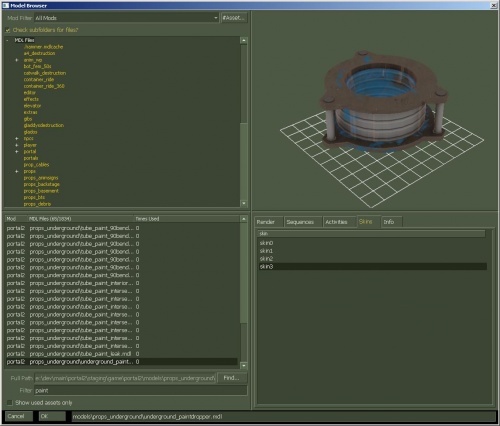
- In the Filter field at the bottom of the dialog box, type in "
paint". This will show all the models that have the word "paint" in their name. - Scroll down to the one named:
- "
props_underground\underground_paintdropper.mdl". - It should look like the image shown.
- "
- Click OK to select it and close the browser and return to the Object Properties dialog box. You should see the name of the model now in the World Model row.
- Click the Apply button to set your changes to the entity.
- Close the Properties box.
You will see the table that you just placed in the room in any of the viewports in the editor.
Moving entities
You can move entities like our paintdropper the same way you can move brushes. Click and drag inside the bounding box of the selected entity to move it around with your mouse or put your mouse over any of the viewports and use the arrow keys on your keyboard to move them around.
Rotating entities
To rotate an object , you simply select the object you wish to rotate using the Selection Tool ![]() , then click once on the object. You should see the object surrounded at the corners with circles. Mouse over a circle in any 2D view, then click and drag to rotate the object.
, then click once on the object. You should see the object surrounded at the corners with circles. Mouse over a circle in any 2D view, then click and drag to rotate the object.
Use your mouse wheel to zoom into the Front viewport and click once inside the bounding box of the paintdropper model to make its four corners highlight with circles around each one.
Left-click and drag in a counter-clockwise motion to rotate the paintdropper so that it can drop paint from the ceiliing.
Running your level in the game
You have saved your map, but you will also need to compile it before it can be played in the game engine.
When a map is compiled, it is converted from the raw .VMF file that you just saved, into the .BSP format used by the game engine. The geometry is processed and the proper lighting and shadows are pre-calculated with several compile programs.
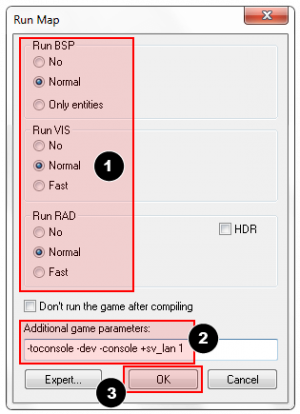
- Open the File menu, and choose Run Map... or press the F9 key.
- The Run Map dialog will open.
- This dialog is used to set some basic compile parameters.
- Make sure that Normal is set under the Run BSP, Run VIS, and Run RAD settings.
- Under Additional game parameters:, make sure these settings are present, and type them in if not:
-toconsole -dev -console +sv_lan 1
- Now click the OK button to start the map compile process.
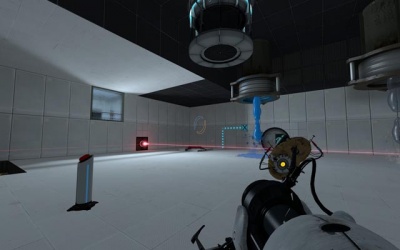
The Compile Process Window will show the progress of the compile. When the compilation is done, the game you are mapping for will automatically launch, and load your map in the engine.
Your level in the game should load up after compiling. It may take a minute or two.
The Developer console
Making levels for Portal 2 sometimes involves using commands typed into the Developer Console window. The console can also be used to do things like spawn cubes and turrets to test your level.
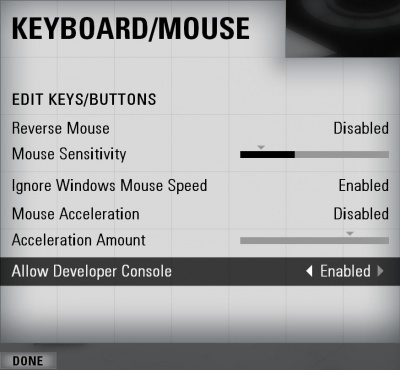
If you haven't already, make sure the console is enabled in the game:
- Press the Esc key in the game.
- Click on Options, then Keyboard/Mouse.
- Click on the Allow Developer Console and select "Enabled".
- Click on the Done Button.
- Click on Return to Game.
Using the developer console:
- Bring down your developer console ` (tilde).
- Type any console command and press the ↵ Enter key.
- Hide the console again with `.
Noclip mode
One console command you'll find constantly useful is noclip mode. This is a mode that let's you fly around the level without being stopped ("clipped") by anything in the level. It's useful to get around large levels quickly.
To enter noclip mode:
- Press ` to enter the console.
- Type
noclipin the console and press ↵ Enter. - Fly around the level.
- Type
noclipagain to leave noclip and walk around the level normally. - You can toggle noclip with the press of a button with the bind console command. For example,
bind mouse3 noclipfor the middle mouse button.
Some useful console commands
There are lots of console commands available. Here is a sampling.
- sv_cheats 1
- Turns on cheats. Necessary for many console commands.
- map <name of map>
- Loads a map or reloads the level you're in.
- changelevel <name of map>
- Loads a map while continuing the session.
- god 1
- Turns on god mode for all players. The players are invulnerable.
- noclip
- Allows you to fly through the world.
