List of SE1 Levels: Difference between revisions
Jump to navigation
Jump to search

(Added more descriptions to the page) |
(Added a spoiler warning, added more descriptions for some of the maps, moved the background section to be the last part) |
||
| Line 2: | Line 2: | ||
{{DISPLAYTITLE: SiN Episodes - List of Levels}} | {{DISPLAYTITLE: SiN Episodes - List of Levels}} | ||
{{toc-right}} | {{toc-right}} | ||
{{Spoiler2}} | |||
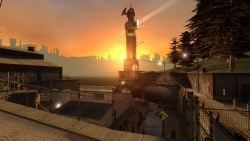
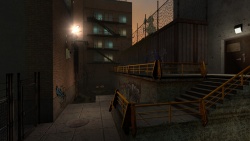
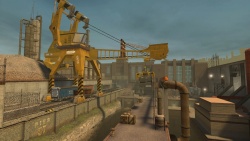
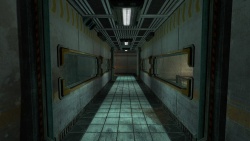
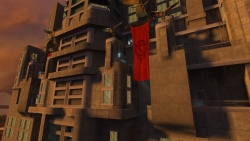
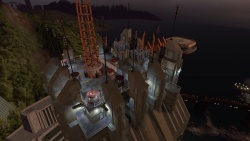
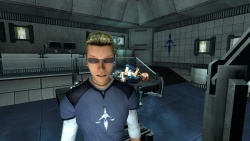
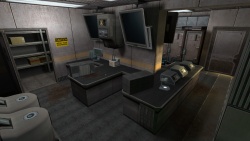
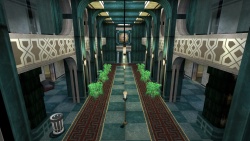
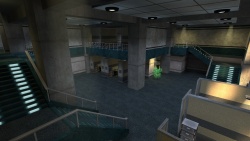
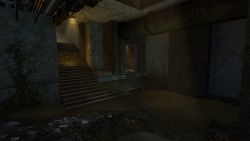
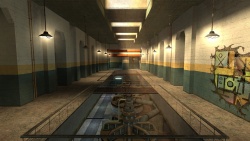
This page contains a list of all the official maps available in [[Sin Episodes]] in the order they mostly appear in the game, with the list containing the mapname of the level, the level name, a description of what happens throughout the level and an image of how a section of the map looks like. There is a total of 18 story missions (6 chapters, ~3 maps per chapter), 7 arena maps, 6 backgrounds and 1 minigame, making it 32 official levels in the entire game by default. | This page contains a list of all the official maps available in [[Sin Episodes]] in the order they mostly appear in the game, with the list containing the mapname of the level, the level name, a description of what happens throughout the level and an image of how a section of the map looks like. There is a total of 18 story missions (6 chapters, ~3 maps per chapter), 7 arena maps, 6 backgrounds and 1 minigame, making it 32 official levels in the entire game by default. | ||
| Line 16: | Line 17: | ||
|se1_intro01 | |se1_intro01 | ||
|align="center" | Escape | |align="center" | Escape | ||
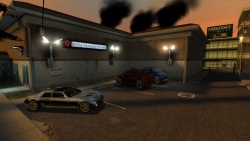
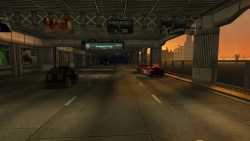
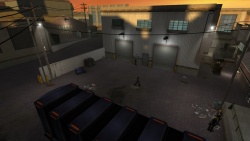
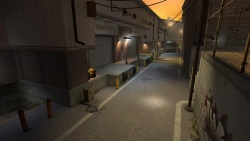
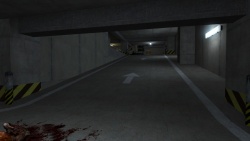
| | |The screen fades in from white only for the player to see being woken up being bound to a metal bed, looked physically looked down upon by [[Elexis Sinclaire | Elexis]] and [[Viktor Radek | Radek]] - the main villians of the story. They are talking about and to the player about the procedure that is gonna happen following their monologue, which never happens as after Elexis leaves the room [[Jessica Cannon | Jessica]] arrives, frees and gets introduces to the player through her actions as it plays out in the cutscene. Jessica and the player now has to escape the facility through its corridors as it explodes and falls apart around them; to the car located in the parkinglot which they use to drive out of their in a hurry, finalising with the player passing out in the passenger seat. | ||
|[[file: se1_level_intro01.jpg | center | 250px]] | |[[file: se1_level_intro01.jpg | center | 250px]] | ||
|- | |- | ||
| Line 66: | Line 67: | ||
|- | |- | ||
|se1_u4lab01 | |se1_u4lab01 | ||
|Infiltration | |align="center" | Infiltration | ||
| | | | ||
|[[file: se1_level_U4Lab01.jpg | center | 250px]] | |[[file: se1_level_U4Lab01.jpg | center | 250px]] | ||
|- | |- | ||
|se1_u4lab02 | |se1_u4lab02 | ||
|Laboratory | |align="center" | Laboratory | ||
| | | | ||
|[[file: se1_level_U4Lab02.jpg | center | 250px]] | |[[file: se1_level_U4Lab02.jpg | center | 250px]] | ||
| Line 87: | Line 88: | ||
|se1_u4lab05 | |se1_u4lab05 | ||
|align="center" | Minigame | |align="center" | Minigame | ||
| | |A secret minigame called 'Whack-A-Grunt' that can only be accessed by the use of the console, where the rules of the game reads as follows: | ||
Kill all grunts. Grunts spawn in progressively larger waves over time. Total grunts in game: 150. | |||
# Kill all the grunts (pigeons flying over the stadium can also be killed, counts seperately). | |||
# Use any gun, but no grenades (assault rifle not available for whatever reason, only magnum and scattergun) | |||
# Player with the highest score when all grunts have spawned wins (players taking turns locally). | |||
# In the event of a tie, player with lowest time display wins. | |||
|[[file: se1_level_U4Lab05.jpg | center | 250px]] | |[[file: se1_level_U4Lab05.jpg | center | 250px]] | ||
|} | |} | ||
| Line 100: | Line 106: | ||
|se1_pit01 | |se1_pit01 | ||
|align="center" | Descent | |align="center" | Descent | ||
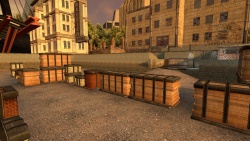
| | |The player has just left the selfdestroying ship through the utility tunnels and will now have to witness the horrors the tests conductet there, has released upon the world in the process of destroying the ship itself. After going through countless dark and dirty sewers fighting mosters the player will end up in an arena and will have to fight an quadralex for the first time in preperation for the finale fight and also be given the [[weapon_assault_rifle | assault rifle]] right in the room beforehand, having to learn its strong and weak points. | ||
|[[file: se1_level_pit01.jpg | center | 250px]] | |[[file: se1_level_pit01.jpg | center | 250px]] | ||
|- | |- | ||
|se1_pit02 | |se1_pit02 | ||
|align="center" | Emergence | |align="center" | Emergence | ||
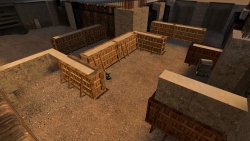
| | |Following the fight against the quadralex, a small simple labyrinth section covered in [[prop_u4_barrel]] and grunts everywhere appears, with Jessica arriving in the [[prop_vehicle_sin | car]] being chased by an [[npc_druglab_helicopter | attack helicopter]] when reaching the end of the maze. The player will enter the vehicle, open a gate by a control room by the end of the arena and then arrive at Supremacy Tower by driving at full speed through its doors. | ||
|[[file: se1_level_pit02.jpg | center | 250px]] | |[[file: se1_level_pit02.jpg | center | 250px]] | ||
|} | |} | ||
| Line 148: | Line 154: | ||
|This map is one entire cutscene that begins by letting the player know of what is going to happen in the next episode - the situations that are currently unfolding in the game's world by the actions taken throughout the game's story. Afterwards the credits about the people creating the software will rollover the screen, with a hidden gem with bloopers before returning to the main menu. | |This map is one entire cutscene that begins by letting the player know of what is going to happen in the next episode - the situations that are currently unfolding in the game's world by the actions taken throughout the game's story. Afterwards the credits about the people creating the software will rollover the screen, with a hidden gem with bloopers before returning to the main menu. | ||
|[[file: se1_level_finale02.jpg | center | 250px]] | |[[file: se1_level_finale02.jpg | center | 250px]] | ||
|} | |} | ||
| Line 229: | Line 197: | ||
|A weird floating platform in the middle of nowhere with teleporters. | |A weird floating platform in the middle of nowhere with teleporters. | ||
|[[file: se1_level_arena_vertigo.jpg | center | 250px]] | |[[file: se1_level_arena_vertigo.jpg | center | 250px]] | ||
|} | |||
== Backgrounds == | |||
{| class="standard-table" | style="width:100%;" | |||
!width="140px" | Map | |||
!width="140px" | Name | |||
!Description | |||
!width="250px" | Image | |||
|- | |||
|background01 | |||
|align="center" | ''none'' | |||
|Used as the background map on the main menu during chapter 1: "Emergence" | |||
|[[file: se1_level_background01.jpg | center | 250px]] | |||
|- | |||
|background02 | |||
|align="center" | ''none'' | |||
|Used as the background map on the main menu during chapter 2: "Docks" | |||
|[[file: se1_level_background02.jpg | center | 250px]] | |||
|- | |||
|background03 | |||
|align="center" | ''none'' | |||
|Used as the background map on the main menu during chapter 3: "U4 Laboratory" | |||
|[[file: se1_level_background03.jpg | center | 250px]] | |||
|- | |||
|background04 | |||
|align="center" | ''none'' | |||
|Used as the background map on the main menu during chapter 4: "Pursuit" | |||
|[[file: se1_level_background04.jpg | center | 250px]] | |||
|- | |||
|background05 | |||
|align="center" | ''none'' | |||
|Used as the background map on the main menu during chapter 5: "Supremacy Tower" | |||
|[[file: se1_level_background05.jpg | center | 250px]] | |||
|- | |||
|background06 | |||
|align="center" | ''none'' | |||
|Used as the background map on the main menu during chapter 6: "Showdown". Identical to background05. | |||
|[[file: se1_level_background06.jpg | center | 250px]] | |||
|} | |} | ||
[[Category:Level Design]][[Category: Sin Episodes Level Creation]][[Category: Sin Episodes]] | [[Category:Level Design]][[Category: Sin Episodes Level Creation]][[Category: Sin Episodes]] | ||
Revision as of 04:10, 15 June 2019
Spoiler Warning
Some information on this page may contain plot spoilers. Continue reading at your own risk.
Some information on this page may contain plot spoilers. Continue reading at your own risk.
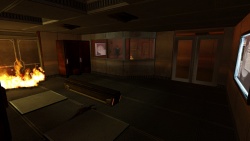
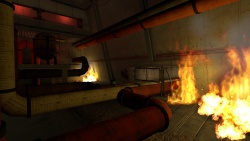
This page contains a list of all the official maps available in Sin Episodes in the order they mostly appear in the game, with the list containing the mapname of the level, the level name, a description of what happens throughout the level and an image of how a section of the map looks like. There is a total of 18 story missions (6 chapters, ~3 maps per chapter), 7 arena maps, 6 backgrounds and 1 minigame, making it 32 official levels in the entire game by default.
Intro
| Map | Name | Description | Image |
|---|---|---|---|
| se1_intro01 | Escape | The screen fades in from white only for the player to see being woken up being bound to a metal bed, looked physically looked down upon by Elexis and Radek - the main villians of the story. They are talking about and to the player about the procedure that is gonna happen following their monologue, which never happens as after Elexis leaves the room Jessica arrives, frees and gets introduces to the player through her actions as it plays out in the cutscene. Jessica and the player now has to escape the facility through its corridors as it explodes and falls apart around them; to the car located in the parkinglot which they use to drive out of their in a hurry, finalising with the player passing out in the passenger seat. | |
| se1_intro02 | Pursuit | ||
| se1_intro03 | Arrival |
Docks
| Map | Name | Description | Image |
|---|---|---|---|
| se1_docks01 | Trapped | ||
| se1_docks02 | Lighthouse | ||
| se1_docks03 | Generators | ||
| se1_docks04 | Trainyard |
Druglab
| Map | Name | Description | Image |
|---|---|---|---|
| se1_u4lab01 | Infiltration | ||
| se1_u4lab02 | Laboratory | ||
| se1_u4lab03 | Catastrophe | ||
| se1_u4lab04 | Hunted | ||
| se1_u4lab05 | Minigame | A secret minigame called 'Whack-A-Grunt' that can only be accessed by the use of the console, where the rules of the game reads as follows:
Kill all grunts. Grunts spawn in progressively larger waves over time. Total grunts in game: 150.
|
Pit
| Map | Name | Description | Image |
|---|---|---|---|
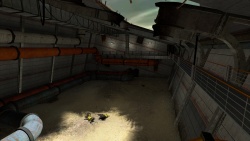
| se1_pit01 | Descent | The player has just left the selfdestroying ship through the utility tunnels and will now have to witness the horrors the tests conductet there, has released upon the world in the process of destroying the ship itself. After going through countless dark and dirty sewers fighting mosters the player will end up in an arena and will have to fight an quadralex for the first time in preperation for the finale fight and also be given the assault rifle right in the room beforehand, having to learn its strong and weak points. | |
| se1_pit02 | Emergence | Following the fight against the quadralex, a small simple labyrinth section covered in prop_u4_barrel and grunts everywhere appears, with Jessica arriving in the car being chased by an attack helicopter when reaching the end of the maze. The player will enter the vehicle, open a gate by a control room by the end of the arena and then arrive at Supremacy Tower by driving at full speed through its doors. |
Highrise
| Map | Name | Description | Image |
|---|---|---|---|
| se1_highrise01 | Entry | ||
| se1_highrise02 | Search | ||
| se1_highrise03 | NOC |
Finale
| Map | Name | Description | Image |
|---|---|---|---|
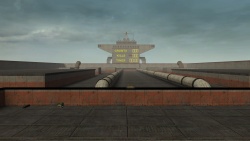
| se1_finale01 | Finale | The finale battle in the game for the player to overcome with what has been learned throughout, starting with a short cutscene of Jessica getting poison injected into her by Radek. Following the route around the top of the tower the player will end up on the roof of the building and has to fight against an quadralex and a druglab attack helocopter. The map will end by walking to the end of the destroyed helipad where a helicopter is waiting and the screen will fade to black. | |
| se1_finale02 | Finale | This map is one entire cutscene that begins by letting the player know of what is going to happen in the next episode - the situations that are currently unfolding in the game's world by the actions taken throughout the game's story. Afterwards the credits about the people creating the software will rollover the screen, with a hidden gem with bloopers before returning to the main menu. |
Arena
| Map | Name | Description | Image |
|---|---|---|---|
| arena_behindzeebeaker | Behind Zee Beaker | Set in an enlarged open lab area. | |
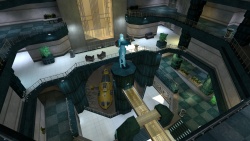
| arena_lobby | Highrise Lobby | Uses the theme of the elevator lobby in Supremacy Tower. | |
| arena_office | The Office | Set in the Supremacy Tower office section of the campaign. | |
| arena_pit01 | The Pit | Themed after and uses a repurposed enclosed part of the pit01 map. | |
| arena_turbine | Turbine | Set in a very open turbine area with a lower and top floor. | |
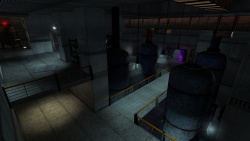
| arena_u4factory | U4 Processing Station | A dark enclosed factory setting with multiple cramped levels. | |
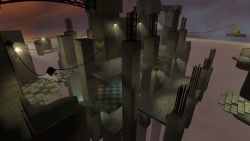
| arena_vertigo | Vertigo | A weird floating platform in the middle of nowhere with teleporters. |
Backgrounds
| Map | Name | Description | Image |
|---|---|---|---|
| background01 | none | Used as the background map on the main menu during chapter 1: "Emergence" | |
| background02 | none | Used as the background map on the main menu during chapter 2: "Docks" | |
| background03 | none | Used as the background map on the main menu during chapter 3: "U4 Laboratory" | |
| background04 | none | Used as the background map on the main menu during chapter 4: "Pursuit" | |
| background05 | none | Used as the background map on the main menu during chapter 5: "Supremacy Tower" | |
| background06 | none | Used as the background map on the main menu during chapter 6: "Showdown". Identical to background05. |
