Glass Light (Portal 2): Difference between revisions
mNo edit summary |
(removed see also, already in category) |
||
| Line 16: | Line 16: | ||
===Step 5=== | ===Step 5=== | ||
Another job well done. Rinse and repeat. | Another job well done. Rinse and repeat. | ||
[[Category:Portal 2 Level Design]] | [[Category:Portal 2 Level Design]] | ||
[[Category:Portal 2 Tutorials]] | [[Category:Portal 2 Tutorials]] | ||
Revision as of 13:39, 9 May 2011
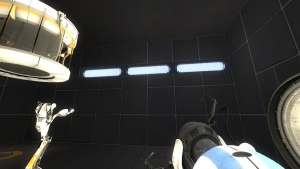
Glass Lights in Portal 2 replace the Recessed Wall Lights from the original first Portal. They are used in almost every Portal 2 test chamber and often are the main source of lighting. In this tutorial, you will learn how to create these glass lights for your test chamber.
While recessed wall lights can still be created in Portal 2, it's usually a better idea to use the "new" glass lights to keep consistency.
How to do them
Step 1
Create a standard room.
Step 2
Cut a hole, 128 units wide, 32 units high, into that wall. Remember to not carve.
Step 3
Create a solid, also 128 units wide and 32 units high. Move it inside the hole you just cut, but retract it into the wall (watch out for leaks). Texture the face pointing inside the room with lights/light_panel_cool. Texture the remaining faces with tools/nodraw.
Step 4
Create a prop_static. Set it's world model to models/props_lab/glass_lightcover.mdl. Use it to cover up the hole inside the wall. Rotate as needed!
Step 5
Another job well done. Rinse and repeat.
