Creating a Turret door: Difference between revisions
Neobenedict (talk | contribs) (save) |
Neobenedict (talk | contribs) No edit summary |
||
| Line 14: | Line 14: | ||
== Step Two: The Door == | == Step Two: The Door == | ||
Now for the fun bit. If you've read the [[Creating_a_button_and_door|door tutorial here]], you'll already know what to do. If you haven't, I would advise you do that tutorial first before attempting this one! | Now for the fun bit. If you've read the [[Creating_a_button_and_door|door tutorial here]], you'll already know what to do. If you haven't, I would advise you do that tutorial first before attempting this one! | ||
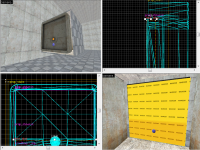
[[Image:StepTwo_TurretDoor.png|thumb|200px|right|float|End of step Two]] | |||
Create a [[prop_static]] with a world model of '''<tt>vert_door_frame.mdl</tt>'''. Line it up with the box. Now, the box may be a little big for the frame. You can ajust that later. | Create a [[prop_static]] with a world model of '''<tt>vert_door_frame.mdl</tt>'''. Line it up with the box. Now, the box may be a little big for the frame. You can ajust that later. | ||
Revision as of 07:06, 22 December 2010
Introduction
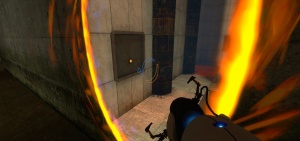
This tutorial will teach you how to make a turret door which opens revealing a Turret, like in the Escape Levels of Portal, in Hammer Editor.
Step One: The Cube
Firstly, create a block which is 192w x 160l x 160l. This is the size Valve uses in the game. If you want to make the box a bit longer, you can, but don't ajust the height and length. This is the box where the turret will be sitting, and where the door will be on. Make the cube hollow (I gave the walls a thickness of 4, but it doesn't matter). Now texture the inside walls with concrete_bts_modular_wall001b, the floor with concrete_bts_floor002a and finally the ceiling with concrete_bts_ceiling002a. If you have the guts to go into that place again, you'll see inside the ceiling has a hole in it with white light coming out of it. We'll get to that later.
Important: Press the "fit" button on each of the textures to make them look right.
Delete one of the walls (one on the front or back, long-wise) for the entrance. We're ready to move on. Don't texture the outside faces yet - You can do that when we move the block into a wall later on.
Step Two: The Door
Now for the fun bit. If you've read the door tutorial here, you'll already know what to do. If you haven't, I would advise you do that tutorial first before attempting this one!
Create a prop_static with a world model of vert_door_frame.mdl. Line it up with the box. Now, the box may be a little big for the frame. You can ajust that later.
Next, make a prop_dynamic with the world model of vert_door_upper.mdl, and name it turretDoor1_model_top and parent it to turretDoor1_top. Align it perfectly in the frame. Then, repeat, but this time make it with a world model of vert_door_lower.mdl. Parent it with turretDoor1_bottom, and name it turretDoor1_model_bottom.
Make a shape with dimensions of 120w x 4l x 81h Place it in the top door (align it perfectly, but a little bit behind the door in the box). Rotate it 90 degrees around Z. Turn it into a func_door and name it turretDoor1_top. Texture it with nodraw. Repeat for the bottom part, this time the dimensions are 120w x 4l x 48h and the name is turretDoor1_bottom!
Now you're done with the door... for now.
Step Three: The Additions
Now, you know that gap which I said earlier? Between the box/frame? Well, this is where we fix that. Do not be tempted to make the box smaller. This isn't the method which is used in the official maps.


