Help:Images: Difference between revisions
Jump to navigation
Jump to search

m (wip fix) |
(finished) |
||
| Line 13: | Line 13: | ||
Go to [[Special:Upload]] and follow the instructions there. | Go to [[Special:Upload]] and follow the instructions there. | ||
== | ==Inserting an image into an article== | ||
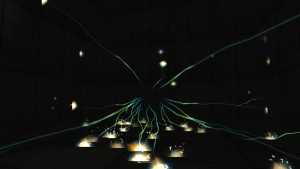
[[{{ns:6}}:Point_Tesla.jpg|thumb|right|300px|An example image]] | |||
*Begin editing the article, and locate the point in the text where you would like the screenshot to appear. | |||
*Add a new line with this template: '''<nowiki>[[{{ns:6}}:IMAGENAME.jpg|thumb|right|300px|CAPTION]]. </nowiki> {{tip|Put the image code on the line above the line you want it to appear next to}} {{tip|If the image is supposed to appear at the top of a section, put the image code on the line below the section heading.}} | |||
*Replace the ''"imagename.jpg"'' with the name of your file as it appears on the Wiki. Replace ''"description"'' with a caption that will be displayed under the image. To resize the image, change ''300px'' to the desired width in pixels. To align the image to the left (which should normally be avoided) replace ''"right"'' with ''"left"''. | |||
Here is the code for the example image on the right: <nowiki>[[{{ns:6}}:Point_Tesla.jpg|thumb|right|300px|An example image]]. </nowiki> | |||
Revision as of 16:45, 27 September 2010
This Help page is actively undergoing a major edit.
As a courtesy, please do not edit this Help while this message is displayed.
If this page has not been edited for at least several hours to a few days, please remove this template. This message is intended to help reduce edit conflicts; please remove it between editing sessions to allow others to edit the page.
The person who added this notice will be listed in its edit history should you wish to contact them.
Many articles require screenshots or other images to illustrate article subjects or add visual reference to tutorials. Any registered user can upload images to be used in articles.
When to use an image
- To show the appearance of an interface or dialog box
- To demonstrate the appearance of the article's subject in game (for example, a screenshot of an effect or model)
- To illustrate an aspect of the development process (for example, a screenshot of designing a moving platform in Hammer)
- To quickly convey how to set up object properties or inputs and outputs in Hammer
- To add a diagram or chart to help explain the subject or a procedure (for example, a flow chart illustrating the flow of logic in a complex puzzle)
How to upload an image
Go to Special:Upload and follow the instructions there.
Inserting an image into an article
- Begin editing the article, and locate the point in the text where you would like the screenshot to appear.
- Add a new line with this template: [[{{ns:6}}:IMAGENAME.jpg|thumb|right|300px|CAPTION]].
 Tip:Put the image code on the line above the line you want it to appear next to
 Tip:If the image is supposed to appear at the top of a section, put the image code on the line below the section heading.
- Replace the "imagename.jpg" with the name of your file as it appears on the Wiki. Replace "description" with a caption that will be displayed under the image. To resize the image, change 300px to the desired width in pixels. To align the image to the left (which should normally be avoided) replace "right" with "left".
Here is the code for the example image on the right: [[{{ns:6}}:Point_Tesla.jpg|thumb|right|300px|An example image]].
