User:Brandished/Sandbox 1: Difference between revisions

From Valve Developer Community
Jump to navigation Jump to search
m (more details)
m (Unicodifying, replaced: [[Image: → [[File: (22))
 
(6 intermediate revisions by one other user not shown)
Line 1: Line 1:
This tutorial will cover the basics of [[Left 4 Dead]] map creation. It will explain the required entities, such as the director, weapons, and spawns. It will also answer some of the questions that Left 4 Dead mappers will have.
Thumbnails and image scaling.
This tutorial is not intended for new mappers: [[Your_First_Map|Basic level construction]] is already covered in other topics.


----
== Pixel scaling, no thumb tags, no align ==
<center>[[Image:Tut title.png]]</center>
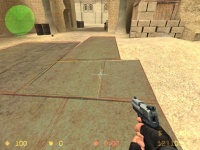
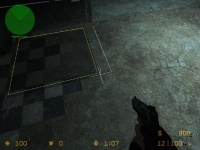
[[File:nav_edit.jpg|200px|Before split]]
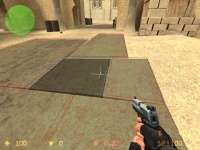
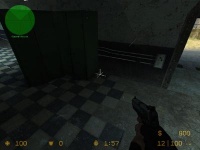
[[File:nav_split.jpg|200px|After split]]
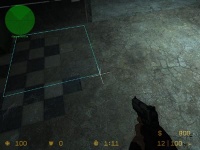
[[File:nav_mark.jpg|200px|Marked first area]]
{{clr}}
== Thumb tags, default align ==
[[File:nav_edit.jpg|200px|thumb|Before split]]
[[File:nav_split.jpg|200px|thumb|After split]]
[[File:nav_mark.jpg|200px|thumb|Marked first area]]
{{clr}}
== Thumb tags, left align ==
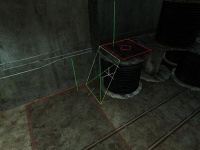
[[File:nav_jump.jpg|200px|thumb|left|'''Jump areas''' (marked with green X's) tell bots that they must jump to reach the higher connected area, and that this area is not usable as a hiding/sniping spot.]]
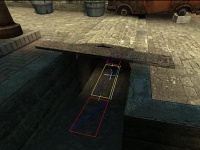
[[File:nav_crouch.jpg|200px|thumb|left|'''Crouch areas''' (marked with a blue diagonal slash) force bots to crouch when moving through this area.]]
[[File:nav_end_area.jpg|200px|thumb|left|Area created]]
{{clr}}
== Thumb tags, right align ==
[[File:nav_begin_area.jpg|200px|thumb|right|Start dragging area at first corner]]
[[File:nav_drag_area.jpg|200px|thumb|right|Drag area extent]]
[[File:nav_end_area.jpg|200px|thumb|right|Area created]]
{{clr}}
== Thumb tags, center align ==
[[File:nav_edit.jpg|200px|thumb|center|Before split]]
[[File:nav_split.jpg|200px|thumb|center|After split]]
[[File:nav_mark.jpg|200px|thumb|center|Marked first area]]
{{clr}}
== Thumb tags, left, center, right align ==
[[File:nav_edit.jpg|200px|thumb|left|Before split]]
[[File:nav_split.jpg|200px|thumb|center|After split]]
[[File:nav_mark.jpg|200px|thumb|right|Marked first area]]
{{clr}}
== Gallery tags ==
<gallery>
Image:nav_edit.jpg|Before split
Image:nav_split.jpg|After split
Image:nav_mark.jpg|Marked first area
</gallery>
{{clr}}
== Table enclosure ==
=== Model Description ===


[[Image:1st_l4d_map_1.gif|frame|right|The map layout.]]
'''Skins'''
For this tutorial we will be making a simple 2 level campaign that never ends. Sounds fun, right?  Well, the purpose really isn't to create a full campaign, but to explain the basics of level construction in L4D.
{|
 
| [[File:Doormain01 handle1 skin1.jpg|none|thumb|50px|Skin 1]]
<br>
| [[File:Doormain01 handle1 skin2.jpg|none|thumb|50px|Skin 2]]
First, lets cover what our L4D campaign will need to work right:
| [[File:Doormain01 handle1 skin3.jpg|none|thumb|50px|Skin 3]]
* A director
| [[File:Doormain01 handle1 skin4.jpg|none|thumb|50px|Skin 4]]
* A starting point
|}
* 2 safe house doors
* Some weapons, ammo, and health
* A rescue closet
* A change-level
* A fog controller
<br>
The image on the right will be used for our map layout during this tutorial.{{clr}}
 
== The Spawn Room ==
To start with will make the room on the far left (area 1) the initial spawn room  by adding an <code>info_player_start</code> entity to it.  Next, let's add an <code>info_director</code> and a <code>env_fog_controller</code>, make sure the fog_controller's "Fog Enable" property is set to "Yes".
 
For a supplies area create a small brush to act as a table and add these entities on top:
* health kits, 4 <code>weapon_first_aid_kit_spawn</code> entities
* 2 weapons; <code>weapon_smg_spawn</code> and <code>weapon_pumpshotgun_spawn</code>.
* an ammunition resupply, <code>weapon_ammo_spawn</code>
 
Now for an exit add a "<code>prop_door_rotating_checkpoint</code>" entity. For it's properties, name it "checkpoint_exit", set its "body" property to "1", the "Spawn Position" to "Closed" (spawnpos keyvalue 0), the "world model" to "models/props_doors/checkpoint_door_01.mdl", and the make sure the "Starts Open" flag is unchecked.  Make sure the side of the door with the EXIT sign in the center is facing the inside of the room.
{{note|If the prop_door_rotating_checkpoint set in anymore then 8 units from the wall outside the safehouse, the infected may try to climb over it.}}
 
That should finish the starting point, but before we move on, lets add a <code>info_landmark</code> to the room as well, name it "landmark_a". Well go more into detail on this later.
 
== Rescue closets ==
Next we'll make the two small rooms near the number 2 into places for dead players to respawn (referred to as a rescue closets). Rescue closets are fairly basic and only consist of 4 entities, 3 <code>info_survivor_rescue</code> entities and a <code>prop_door_rotating</code>.  Add the 3 <code>info_survivor_rescue</code> entities to the inside of each room. Next up is the door. You will want a space with a width of 56 and height of 104 for the door to sit in, add the <code>prop_door_rotating</code> and set it's world model to "models/props_doors/doormainmain01.mdl".
 
== The safe house and changing levels ==
Now to connect this map to another inside the campaign with a safe room.  To start with, well add another "<code>prop_door_rotating_checkpoint</code>" entity to the entrance of area 3 for the safe houses door.  This one is set up a bit different then the last one.  Open its properties and set the name to "checkpoint_entrance", the "body" property to "0", the "Spawn Position" to "Open Forward" (spawnpos keyvalue 1), the "world model" to "models/props_doors/checkpoint_door_02.mdl", and the make sure the "Starts Open" flag is checked. You want the side of the door with the picture of the house facing outside.
 
To finish setting up the transition from one map to the next we still need to add an <code>info_landmark</code> and a <code>trigger_changelevel</code>. First add the <code>info_landmark</code> to the center of the room near the ceiling, then open it's properties and name it "landmark_2".  Now create a large brush to cover the floorspace inside the safehouse and tie it to the <code>trigger_changelevel</code> entity, make sure the brush comes in contact with the floorspace inside the room (doesn't necessarily have to overlap the floor space, but it does have to at least touch it). Open the changelevel's properties and set the landmark name to the one we just created, "landmark_b" and for the "next map" property, enter "lst_l4dmap_b".
 
== Building a navigation mesh ==
For the survivor bots and infected to be able to move, you will need to create a navigation mesh ("mapname.nav" file) for your map. To build a basic mesh you need to have the map already compiled and loaded.  Once the map is running, aim your crosshairs at the floor space, open up the console in game, and then type the following:
: <code>sv_cheats 1</code>
: <code>nav_edit 1</code>
: <code>nav_mark_walkable</code>
: <code>nav_generate</code>
 
The map will be reloaded after you type nav_generate, and if all goes well, we should no longer have the "NAV ERRORS - Map is unplayable!" message displayed on the screen when the map loads. This is because nav_generate assigned certain attributes to the nav mesh through a process known as "nav marking". 
 
You can see the changes using the "select_with_attribute A" command.  What this console command does is select all the nav areas that have been "marked" with the attribute "A". For instance, by using "select_with_attribute CHECKPOINT", all the nav areas that have been marked with the "CHECKPOINT" attribute would be highlighted.
 
With "nav_edit 1" set, you would open the console and type:
: select_with_attribute DOOR
:: 4 nav squares should be highlighted telling the bot AI there is a door in these locations.
 
: select_with_attribute CHECKPOINT
:: The nav areas in the safehouse at the end of the level should be highlighted.
 
: select_with_attribute RESCUE_CLOSET
:: The two two rescue closets should have there nav squares highlighted
 
: select_with_attribute ESCAPE_ROUTE
:: Now a lot of nav squares are highlighted forming a path from the player spawn to the nav areas marked "checkpoint" at the end of the level.
 
=== NAV Marking ===
In this case, nav_generate did a fairly good job at locating and assigning the final checkpoint, rescue closets, and other attributes to the nav mesh, but you may not always be so lucky.  To manually assign attributes to nav squares, you will need use the MARK command via 'mark A', where A is the attribute you wish to mark the nav area with.
 
For example, before we can get our level working correctly, we will have to manually "mark" one additional location on the nav mesh that nav_generate missed, a starting checkpoint. To do this, we need to be in nav editing mode with:
sv_cheats 1
nav_edit 1
Now inside the starting safe room we will label one nav square at a time by pointing the targeting reticule at them then typing this into the console:
mark CHECKPOINT
Or, to speed things up, you can use the nav gui interface by opening up the console again and typing:
nav_gui
With the nav gui enabled, you can now left click multiple meshes, and use the <code>mark CHECKPOINT</code> console command to set the attribute for all the selected areas.
 
If you make a mistake, you can remove a single attribute from a selected nav area by using:
* <code>nav_clear_attribute A</code>
** where A is the attribute you wish to remove (eg: <code>nav_clear_attribute CHECKPOINT</code>
Or, if you wanted to remove all nav attributes from the selected area, you could use:
* <code>wipe_attributes</code>
 
Once you have finished with nav marking, be sure to save the changes to your map with <code>nav_save</code>, then re-analyze it with <code>nav_analyze</code>
 
== Getting the infected to spawn ==
Now that the nav mesh is built, you should be able to get the infected to spawn by using the console commands:
: <code>director_stop</code>
: <code>director_start</code>
You should only have to do this once inside the map, then every time you load the map after that the director should start on it's own.
 
== Making the second chapter ==
With the first map out of the way, the second map can be made quite easily. Back in Hammer, with the map we just compiled still loaded, go up to the file menu and choose "Save As". Now type in "lst_l4dmap_b" to save the current map under a new name. Go up to the exit menu and hit "Select all", hit CTRL and M to bring up the translation tool and type 180 into the Z field and hit "Ok".
 
Change the name of the <code>info_landmark</code> entities so that the one in the starting room is named "landmark_b" and the one in the ending safehouse is named "landmark_a". Remember "landmark_a" we created in the first map?  We're going to link the changelevel in our new map to it, open the trigger_changelevel's properties and replace "landmark_b" with "landmark_a" and "lst_l4dmap_b" with "lst_l4dmap_a". After changing up the names, finish up by compiling the map and repeating the nav creation steps you used for the previous map, don't forget to mark the spawn room with the checkpoint attribute.  If all goes well, you should now have a working 2 level campaign.

Latest revision as of 02:38, 7 January 2024

Thumbnails and image scaling.

Pixel scaling, no thumb tags, no align

Before split After split Marked first area

Thumb tags, default align

Before split
After split
Marked first area

Thumb tags, left align

Jump areas (marked with green X's) tell bots that they must jump to reach the higher connected area, and that this area is not usable as a hiding/sniping spot.
Crouch areas (marked with a blue diagonal slash) force bots to crouch when moving through this area.
Area created

Thumb tags, right align

Start dragging area at first corner
Drag area extent
Area created

Thumb tags, center align

Before split
After split
Marked first area

Thumb tags, left, center, right align

Before split
After split
Marked first area

Gallery tags

Table enclosure

Model Description

Skins
Skin 1
Skin 2
Skin 3
Skin 4