User:Brandished/Sandbox 1: Difference between revisions
Jump to navigation
Jump to search
Brandished (talk | contribs) (hmmm) |
Thunder4ik (talk | contribs) m (Unicodifying, replaced: [[Image: → [[File: (22)) |
||
| (21 intermediate revisions by one other user not shown) | |||
| Line 1: | Line 1: | ||
Thumbnails and image scaling. | |||
== Pixel scaling, no thumb tags, no align == | |||
[[File:nav_edit.jpg|200px|Before split]] | |||
[[File:nav_split.jpg|200px|After split]] | |||
[[File:nav_mark.jpg|200px|Marked first area]] | |||
{{clr}} | |||
== Thumb tags, default align == | |||
[[File:nav_edit.jpg|200px|thumb|Before split]] | |||
[[File:nav_split.jpg|200px|thumb|After split]] | |||
[[File:nav_mark.jpg|200px|thumb|Marked first area]] | |||
{{clr}} | |||
== Thumb tags, left align == | |||
[[File:nav_jump.jpg|200px|thumb|left|'''Jump areas''' (marked with green X's) tell bots that they must jump to reach the higher connected area, and that this area is not usable as a hiding/sniping spot.]] | |||
[[File:nav_crouch.jpg|200px|thumb|left|'''Crouch areas''' (marked with a blue diagonal slash) force bots to crouch when moving through this area.]] | |||
[[File:nav_end_area.jpg|200px|thumb|left|Area created]] | |||
{{clr}} | |||
== Thumb tags, right align == | |||
[[File:nav_begin_area.jpg|200px|thumb|right|Start dragging area at first corner]] | |||
[[File:nav_drag_area.jpg|200px|thumb|right|Drag area extent]] | |||
[[File:nav_end_area.jpg|200px|thumb|right|Area created]] | |||
{{clr}} | |||
== Thumb tags, center align == | |||
[[File:nav_edit.jpg|200px|thumb|center|Before split]] | |||
[[File:nav_split.jpg|200px|thumb|center|After split]] | |||
[[File:nav_mark.jpg|200px|thumb|center|Marked first area]] | |||
{{clr}} | |||
== Thumb tags, left, center, right align == | |||
[[File:nav_edit.jpg|200px|thumb|left|Before split]] | |||
[[File:nav_split.jpg|200px|thumb|center|After split]] | |||
[[File:nav_mark.jpg|200px|thumb|right|Marked first area]] | |||
{{clr}} | |||
== Gallery tags == | |||
<gallery> | |||
Image:nav_edit.jpg|Before split | |||
Image:nav_split.jpg|After split | |||
Image:nav_mark.jpg|Marked first area | |||
</gallery> | |||
{{clr}} | |||
== Table enclosure == | |||
=== Model Description === | |||
'''Skins''' | |||
{| | |||
| [[File:Doormain01 handle1 skin1.jpg|none|thumb|50px|Skin 1]] | |||
| [[File:Doormain01 handle1 skin2.jpg|none|thumb|50px|Skin 2]] | |||
: | | [[File:Doormain01 handle1 skin3.jpg|none|thumb|50px|Skin 3]] | ||
: | | [[File:Doormain01 handle1 skin4.jpg|none|thumb|50px|Skin 4]] | ||
: | |} | ||
Latest revision as of 01:38, 7 January 2024
Thumbnails and image scaling.
Pixel scaling, no thumb tags, no align


Thumb tags, default align
Thumb tags, left align


Thumb tags, right align


Thumb tags, center align
Thumb tags, left, center, right align
Gallery tags
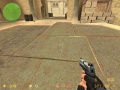
Before split
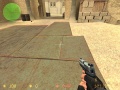
After split
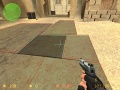
Marked first area
Table enclosure
Model Description
Skins


