Ko/Team Fortress 2/Creating a CP assault map: Difference between revisions
No edit summary |
m (obsolete language category) |
||
| (13 intermediate revisions by 6 users not shown) | |||
| Line 1: | Line 1: | ||
{{ | {{TF2 topicon|suf=:ko}} {{lang|Team Fortress 2/Creating a CP assault map|title=Creating a CP assault map}} | ||
{{ABSGametypeLib:ko}} | |||
__NOEDITSECTION__ | __NOEDITSECTION__ | ||
| Line 6: | Line 7: | ||
== Step 1 - 개요작성 == | == Step 1 - 개요작성 == | ||
[[ | [[File:Tutlin outline.jpg|right|thumb|150px|"개요"]] | ||
이 부분은 수직 시스템의 개요를 알려드릴것입니다.<br /> | 이 부분은 수직 시스템의 개요를 알려드릴것입니다.<br /> | ||
| Line 14: | Line 15: | ||
== Step 2 - 점령 지점 == | == Step 2 - 점령 지점 == | ||
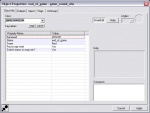
[[ | [[File:Tutlin properties.jpg|right|thumb|150px|"설정"]] | ||
이 단계는 {{ent|team_control_point_master}} 와 {{ent|team_control_point_round}} 엔티티의 사용법을 알려줍니다. | 이 단계는 {{ent|team_control_point_master}} 와 {{ent|team_control_point_round}} 엔티티의 사용법을 알려줍니다. | ||
* <code>team_control_point_master</code> 를 당신이 원하는 곳에 냅두고 설정에 들어가주세요. | * <code>team_control_point_master</code> 를 당신이 원하는 곳에 냅두고 설정에 들어가주세요. | ||
{{ | {{Note|이 설정은 하나의 라운드 맵과는 다릅니다, 기본적으로 <code>team_control_point_round</code> 엔티티가 게임플레이를 지배하는 것부터요 - 마치 민주적인 의회처럼 : 국민은 그들의 국가가 있지만, 통치하는 것은 의회인것 처럼요.}} | ||
* | * '''Switch teams on map win?''' 설정을 <code>Yes</code> 로 맞춰주세요. | ||
* | * 다음 단계는 <code>team_control_point_round</code> 엔티티를 당신의 맵에 각 라운드 마다 배치해주는 것입니다. 이 엔티티들의 설정은 <code>team_control_point_master</code> 과 흡사합니다. 당신이 <code>round_1</code> 과 같은 식별하기 쉬운 이름을 지었는지 확인하세요. 우선 설정 항목들은 게임이 수직적인지 확인해야합니다: 첫 라운드는 100이고 다음 라운드는 99 그렇게 쭉. 당신은 또한 방어 팀의 승리를 제한할수도 잇습니다 - '''Restrict team from winning''' 항목을 RED로 정해주세요. 마지막으로, '''Control points in this round''' 항목은, 각 라운드마다 점령 지점의 '''이름''' 을 쓰시면 됩니다, 여백에 따라 구분합니다. | ||
<br˛/> | <br˛/> | ||
{{ | {{Note|당신은 또한 '''OnWonByTeam1''', '''OnStart''' 그리고 '''OnWonByTeam2''' 을 이용하여 맵에 엔티티를 사용가능/사용불가능 으로 만들수 있습니다.}} | ||
== Step 3 - 리스폰 지점 == | |||
[[File:Tutlin spawn.jpg|right|thumb|150px|"playerspawn"]] | |||
이제 당신은 당신의 맵에 라운드가 있습니다, 이제 당신은 각 팀에 입장 지점을 설정할때가 왔습니다. | |||
* 당신의 리스폰 방의 {{ent|info_player_teamspawn}} 엔티티들의 설정을 채워넣어 봅시다, '''Team''' 항목에는 아무 팀이나 설정해주세요, 아무거나 상관없습니다. 진정 상관 있는건 '''Associated Control Point''' 이기 떄문입니다: 만약 당신이 어느 팀이 점령 지점을 차지하면 그와 가까운 지점에서 태어나게 하기 위해, name 칸에 점령 지점에 이름을 써주세요. 중요한것은 '''Blue''' 그리고 '''Red spawn for round''' 입니다. 이 지점에서 스폰 시키고 싶은 팀을 선택해주세요. | |||
{{clr}} | {{clr}} | ||
== Step 4 - 시간과 라운드 == | == Step 4 - 시간과 라운드 == | ||
[[ | [[File:Tutlin time.jpg|right|thumb|150px|"시간"]] | ||
모든 맵들은 이것이 필요합니다, 이것이 없으면 : 아무팀도 이기지 못합니다. | 모든 맵들은 이것이 필요합니다, 이것이 없으면 : 아무팀도 이기지 못합니다. | ||
이것을 만들기 위해, 이 단계가 추가적인 기능이 있는 기본적 시계 설계의 방법을 설명합니다. | 이것을 만들기 위해, 이 단계가 추가적인 기능이 있는 기본적 시계 설계의 방법을 설명합니다. | ||
* <code> | * <code>{{L|Team_Round_timer|team_round_timer}}</code> 엔티티를 추가해주세요. 아래를 따라서 주요 값들을 넣어주세요. | ||
::{| class=standard-table | ::{| class=standard-table | ||
! 설정 이름 || 설명 || 값 | ! 설정 이름 || 설명 || 값 | ||
| Line 60: | Line 60: | ||
! || My Output || Target Entity || Target Input || Parameter || Delay || Only Once | ! || My Output || Target Entity || Target Input || Parameter || Delay || Only Once | ||
|- | |- | ||
| [[ | | [[File:Io11.png]] || OnSetupFinished || relay_spawn_1 || Trigger || <none> || 0.00 || No | ||
|- | |- | ||
| [[ | | [[File:Io11.png]] || OnSetupFinished || relay_spawn_2 || Trigger || <none> || 0.00 || No | ||
|} | |} | ||
| Line 71: | Line 71: | ||
! || My Output || Target Entity || Target Input || Parameter || Delay || Only Once | ! || My Output || Target Entity || Target Input || Parameter || Delay || Only Once | ||
|- | |- | ||
| [[ | | [[File:Io11.png]] || OnTrigger || !self || Disable || <none> || 0.00 || No | ||
|- | |- | ||
| [[ | | [[File:Io11.png]] || OnTrigger || (spawn room door) || Open || <none> || 0.00 || No | ||
|- | |- | ||
| [[ | | [[File:Io11.png]] || OnTrigger || (name of next relay) || Enable || <none> || 0.00 || No | ||
|} | |} | ||
=== 추가 시간 === | === 추가 시간 === | ||
* | * 3 라운드 동안 하기에는 시간이 조금 부족한 감이 있습니다, 이것이 이 추가 시간 제도가 있어야 하는 이유입니다. {{ent|trigger_capture_area}} 마다 다음의 output을 따라주세요: | ||
::{| class=standard-table | ::{| class=standard-table | ||
! || My Output || Target Entity || Target Input || Parameter || Delay || Only Once | ! || My Output || Target Entity || Target Input || Parameter || Delay || Only Once | ||
|- | |- | ||
| [[ | | [[File:Io11.png]] || OnCapTeam2 || start_timer || AddTime || (same time limit as beginning) || 0.00 || No | ||
|} | |} | ||
이것은 이제 한팀이 점령 지점이 점령 됬을때 추가시간이 부여됩니다. | |||
== Step 5 - 팀 승리 == | == Step 5 - 팀 승리 == | ||
| Line 91: | Line 91: | ||
=== 방어 === | === 방어 === | ||
[[ | [[File:Tutlin win.jpg|right|thumb|150px|"승리"]] | ||
* 당신은 {{ent|game_round_win}} 에 다음과 같은 설정을 추가할 필요가 있습니다: | * 당신은 {{ent|game_round_win}} 에 다음과 같은 설정을 추가할 필요가 있습니다: | ||
::{| class=standard-table | ::{| class=standard-table | ||
| Line 110: | Line 110: | ||
! || My Output || Target Entity || Target Input || Parameter || Delay || Only Once | ! || My Output || Target Entity || Target Input || Parameter || Delay || Only Once | ||
|- | |- | ||
| [[ | | [[File:Io11.png]] || OnFinished || end_of_game || RoundWin || <none> || 0.00 || No | ||
|} | |} | ||
| Line 133: | Line 133: | ||
! || My Output || Target Entity || Target Input || Parameter || Delay || Only Once | ! || My Output || Target Entity || Target Input || Parameter || Delay || Only Once | ||
|- | |- | ||
| [[ | | [[File:Io11.png]] || OnCapTeam2 || blue_win || RoundWin || <none> || 0.00 || No | ||
|} | |} | ||
== 개요 == | == 개요 == | ||
이제 강의의 끝입니다. 당신은 라운드 기반 맵의 기능을 완전히 갖추었습니다. 만약 당신이 질문이 있다면, | 이제 강의의 끝입니다. 당신은 라운드 기반 맵의 기능을 완전히 갖추었습니다. 만약 당신이 질문이 있다면, {{L|Talk:{{PAGENAME}}|질문 방}}으로 오시기 바랍니다. | ||
== 다른 볼것 == | == 다른 볼것 == | ||
* | * {{L|Team Fortress 2 Level Creation|카테고리 : 팀 포트리스2 레벨디자인}} | ||
{{ACategory|Level Design}} | |||
{{ACategory|Team Fortress 2}} | |||
Latest revision as of 03:37, 22 August 2024
이 게임종류는 Boojum Snark의 팀 포트리스2 게임종류 라이브러리에 포함된것 입니다.
이 게임모드를 위해서 만들어야 하는 완전한 엔티티는 Boojum Snark의 팀 포트리스2 게임종류 라이브러리에 포함되어 있습니다, 다운로드 가능한 VMF에 모든 팀 포트리스2의 게임종류가 포함되어 있습니다 엔티티들은 VMF에서 당신의 맵으로 스스로 만들어야 하거나 혹은 디버깅해야 하는 번거로운 상황없이 쉽게 옮길 수 있습니다.
Boojum Snark의 팀 포트리스2 게임종류 라이브러리는 여기서 다운받으실수 있습니다 : TF2Maps.net
이 강의는 destbowl 형식의 라운드 시스템을 만드는 방법을 소개합니다.
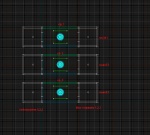
Step 1 - 개요작성
이 부분은 수직 시스템의 개요를 알려드릴것입니다.
이 강의는 당신의 맵의 뼈대가 잡혔을때 보는것을 추천합니다 - 즉 당신의 맵이 거의 완성 단계에 가까워 졌을때 말입니다.
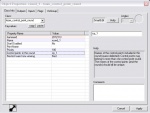
Step 2 - 점령 지점
이 단계는 team_control_point_master 와 team_control_point_round 엔티티의 사용법을 알려줍니다.
team_control_point_master를 당신이 원하는 곳에 냅두고 설정에 들어가주세요.
team_control_point_round 엔티티가 게임플레이를 지배하는 것부터요 - 마치 민주적인 의회처럼 : 국민은 그들의 국가가 있지만, 통치하는 것은 의회인것 처럼요.- Switch teams on map win? 설정을
Yes로 맞춰주세요. - 다음 단계는
team_control_point_round엔티티를 당신의 맵에 각 라운드 마다 배치해주는 것입니다. 이 엔티티들의 설정은team_control_point_master과 흡사합니다. 당신이round_1과 같은 식별하기 쉬운 이름을 지었는지 확인하세요. 우선 설정 항목들은 게임이 수직적인지 확인해야합니다: 첫 라운드는 100이고 다음 라운드는 99 그렇게 쭉. 당신은 또한 방어 팀의 승리를 제한할수도 잇습니다 - Restrict team from winning 항목을 RED로 정해주세요. 마지막으로, Control points in this round 항목은, 각 라운드마다 점령 지점의 이름 을 쓰시면 됩니다, 여백에 따라 구분합니다.
<br˛/>
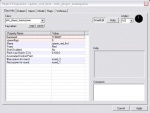
Step 3 - 리스폰 지점
이제 당신은 당신의 맵에 라운드가 있습니다, 이제 당신은 각 팀에 입장 지점을 설정할때가 왔습니다.
- 당신의 리스폰 방의 info_player_teamspawn 엔티티들의 설정을 채워넣어 봅시다, Team 항목에는 아무 팀이나 설정해주세요, 아무거나 상관없습니다. 진정 상관 있는건 Associated Control Point 이기 떄문입니다: 만약 당신이 어느 팀이 점령 지점을 차지하면 그와 가까운 지점에서 태어나게 하기 위해, name 칸에 점령 지점에 이름을 써주세요. 중요한것은 Blue 그리고 Red spawn for round 입니다. 이 지점에서 스폰 시키고 싶은 팀을 선택해주세요.
Step 4 - 시간과 라운드
모든 맵들은 이것이 필요합니다, 이것이 없으면 : 아무팀도 이기지 못합니다. 이것을 만들기 위해, 이 단계가 추가적인 기능이 있는 기본적 시계 설계의 방법을 설명합니다.
team_round_timer엔티티를 추가해주세요. 아래를 따라서 주요 값들을 넣어주세요.
설정 이름 설명 값 Name 엔티티의 이름 start_timer Timer Length 시작하기 위한 시간 (초 단위) 180-300 Max Timer Length 시간의 한계 (0 = 끝 없음) 0 Setup Timer Length 문이 열리기 까지 준비시간 (초 단위) 45-60 Reset Time on Round Restart 자명 No Use Countdown Seconds 자명 Yes Show Timer in Hud 자명 Yes
문 조종하기
- 이 엔티티들 공격 팀들의 스폰 방의 문들을 열수 있습니다. 이것을 하기 위해, logic_relay 엔티티들을 만들어주세요, 그리고 이름은
relay_spawn_1,relay_spawn_2, 등등 으로 지어주시고, 첫번째의 엔티티 빼곤 전부다 사용 불가능 처리 해주세요.team_round_timer에 아래 설정을 넣어주세요:
계속 따라와 주세요.
- 각각의 relay 마다, output 을 따라주세요:
추가 시간
- 3 라운드 동안 하기에는 시간이 조금 부족한 감이 있습니다, 이것이 이 추가 시간 제도가 있어야 하는 이유입니다. trigger_capture_area 마다 다음의 output을 따라주세요:
이것은 이제 한팀이 점령 지점이 점령 됬을때 추가시간이 부여됩니다.
Step 5 - 팀 승리
당신은 팀의 승리를 설정할 때가 왔습니다.
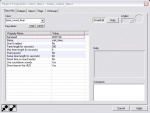
방어
- 당신은 game_round_win 에 다음과 같은 설정을 추가할 필요가 있습니다:
Property Name Value Name end_of_game Team Red Force map reset Yes Switch teams on map win? Yes
- 이제,
team_round_timer로 돌아가 다음의 output 을 추가해주세요:
공격 팀
- 다른
game_round_win엔티티를 추가하여 다음 설정을 따라주세요:
Property Name Value Name blue_win Team Blue Force map reset Yes Switch teams on map win? Yes
- 모든
trigger_capture_area마다, 이 output을 추가해주세요:
개요
이제 강의의 끝입니다. 당신은 라운드 기반 맵의 기능을 완전히 갖추었습니다. 만약 당신이 질문이 있다면, 질문 방으로 오시기 바랍니다.
