Making Icons and Integrating: Difference between revisions
m (Nesciuse moved page Making Icons and Integrating/en to Making Icons and Integrating without leaving a redirect: Move en subpage to basepage) |
|||
| (15 intermediate revisions by 8 users not shown) | |||
| Line 1: | Line 1: | ||
{{LanguageBar}} | |||
{{toc-right}} | |||
{{cleanup}} | {{cleanup}} | ||
'''icon''' tells Steam where the icon can be found; In this case, in the resource folder: ''resource\game'' It should default to looking for icon.tga | |||
== | == Making an icon for your mod == | ||
[[File:steamlibraryico.jpg|Steam Library|thumb|256px]] | |||
[[File:Desktopico-tut.jpg|Desktop and Enlarged|thumb|256px]] | |||
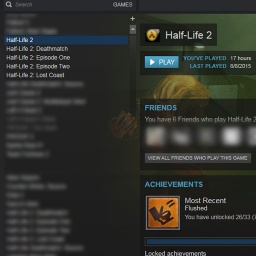
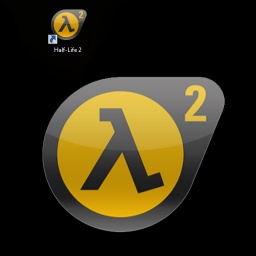
For the icon of your mod to show, there are two places it can be displayed: In your steam library and on your desktop. (right) | |||
[http:// | To make your icon you will need either: | ||
*[http://www.adobe.com/products/photoshop.html Adobe Photoshop] | |||
*[http://www.gimp.org/ GIMP] | |||
*[https://www.getpaint.net/ Paint.NET] | |||
== Making the Steam Library Icon == | |||
To start open an image editor and create a new file with the dimensions 256x256 pixels. Then save your image as a .png in a folder (For example {{code|sourcemods/resource/icons_raw/}}) and name it ''icon_huge''. | |||
Copy the ''icon_huge'' and rename it to ''icon_big'' and scale it down to 32x32 and do it again but name it ''icon'' and scale it to 16x16. | |||
After creating the icons, Open the ''icon'' file and save it as a targa file (.tga) in the {{code|sourcemods/YourMod/resource}} folder, do the same with ''icon_big'' and '''NOT''' with ''icon_huge''. | |||
Now once you have done all of that, the next step is to show the icon in the steam library. Go to your mods folder and open ''gameinfo.txt''. | |||
Below ''game, title, title2, and/or type'', type ''icon "resource/icon"'', example: | |||
<pre> | <pre> | ||
"GameInfo" | "GameInfo" | ||
{ | { | ||
game "My First HL2MP Mod" | |||
title "HALF+LIFE'" | |||
title2 "deathmatch mod" | |||
type multiplayer_only | |||
icon "resource/icon" | |||
nomodels 0 | |||
nohimodel 1 | |||
nocrosshair | |||
... | |||
</pre> | </pre> | ||
Now save and restart Steam and your icon should appear in the library. | |||
{{note| | == Making the hl2.exe Icon == | ||
{{note|You may need to restart your computer to be able to make the icon visible on your desktop.}} | |||
*Take your 256px icon and save it as an interlaced .png. | |||
*Find a .ico converting website and make convert the .png to .ico. | |||
*Download and save the .ico in {{code|\steamapps\sourcemods\''MODNAME''\resource}} as "game.ico". | |||
Now you can {{key|RMB}} the mod in your steam library and create a desktop shortcut. | |||
== | == Editing the icon with XBLAH's Modding Tool == | ||
The mod icon can be edited with [[XBLAH's Modding Tool]] through a comprehensive UI without requiring the modder to mess with text files or resources. | |||
<br/><span style="color: #FFFFFF; font-weight: bold">Where to find it</span><br/> | |||
This can be accessed within the tool through '''Mod > Game info'''. | |||
<br/><span style="color: #FFFFFF; font-weight: bold">How to use it</span><br/> | |||
Right click the picture box next to the Icon label and click Load. Select the file path and extension and the tool will generate the icons at the correct sizes, add them to the resource path and update the gameinfo. | |||
[ | [[File:XBLAH's Modding Tool - Gameinfo Icon.png]] | ||
Latest revision as of 07:16, 12 July 2024
For help, see the VDC Editing Help and Wikipedia cleanup process. Also, remember to check for any notes left by the tagger at this article's talk page.
icon tells Steam where the icon can be found; In this case, in the resource folder: resource\game It should default to looking for icon.tga
Making an icon for your mod
For the icon of your mod to show, there are two places it can be displayed: In your steam library and on your desktop. (right)
To make your icon you will need either:
Making the Steam Library Icon
To start open an image editor and create a new file with the dimensions 256x256 pixels. Then save your image as a .png in a folder (For example sourcemods/resource/icons_raw/) and name it icon_huge.
Copy the icon_huge and rename it to icon_big and scale it down to 32x32 and do it again but name it icon and scale it to 16x16.
After creating the icons, Open the icon file and save it as a targa file (.tga) in the sourcemods/YourMod/resource folder, do the same with icon_big and NOT with icon_huge.
Now once you have done all of that, the next step is to show the icon in the steam library. Go to your mods folder and open gameinfo.txt.
Below game, title, title2, and/or type, type icon "resource/icon", example:
"GameInfo"
{
	game		"My First HL2MP Mod"
	title		"HALF+LIFE'"
	title2		"deathmatch mod"
	type 		multiplayer_only
	icon		"resource/icon"
	nomodels 	0
	nohimodel 	1
	nocrosshair
	...
Now save and restart Steam and your icon should appear in the library.
Making the hl2.exe Icon
- Take your 256px icon and save it as an interlaced .png.
- Find a .ico converting website and make convert the .png to .ico.
- Download and save the .ico in
\steamapps\sourcemods\MODNAME\resourceas "game.ico".
Now you can ![]() the mod in your steam library and create a desktop shortcut.
the mod in your steam library and create a desktop shortcut.
Editing the icon with XBLAH's Modding Tool
The mod icon can be edited with XBLAH's Modding Tool through a comprehensive UI without requiring the modder to mess with text files or resources.
Where to find it
This can be accessed within the tool through Mod > Game info.
How to use it
Right click the picture box next to the Icon label and click Load. Select the file path and extension and the tool will generate the icons at the correct sizes, add them to the resource path and update the gameinfo.

