XSI Prop Creation
Getting Started
Start up XSI. First we're going to change some of the preferences to make XSI a bit easier to use. Click on the Select tab in the toolbar on the right and:
- Deactivate "Select single object in region"
- Deactivate "Expand component selection"
Here are also some useful shortcut keys. Learn to use them. It makes working with XSI so much easier. These can be used in "supra" or "sticky" mode. This means that if you tap the key once, XSI switches to that tool, whereas when you keep the key pressed, the tool will only be active until you release the key again. This saves you a lot of switching between tools.
- u - Select Polygon raycast mode
- i - Select Edge raycast mode
- t - Select Point mode
- SPACE - Select object
- m - Move Point tool
- x - Scale Tool
- c - Rotate Tool
- v - Translate tool
- Alt-7 - Texture editor
I am going to create this prop for HL2 Deathmatch. Depending on the mod or game for which you're making the prop you'll have to substitute the hl2mp and change it to the game/mod your using.
Building your model
In order to keep this tutorial clear and to-the-point, we'll be modeling a simple fence post. This will basically be a skinned cylinder.
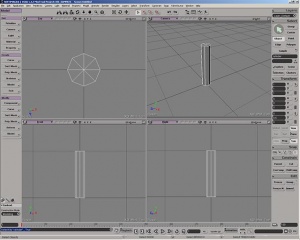
Start off by Selecting Get > Primitive > Polygon Mesh > Cylinder from the left toolbar. Set the Height to 1 and Radius to 0.1. Set the Subdivisions to U = 8, V = 1 and Base = 1 and then close the window.
Go to the right toolbar. Click on the t for translate in the Transform tab and make sure that Global is selected. Then enter 0.5 in the Translate Y field and hit enter. The cylinder should now be standing vertically on the reference plane in the 3D View.
Make sure your cylinder object is selected and hit Freeze to freeze the transformations.Don't worry about units and sizes at this point. Try to work at a scale that comes natural to you, like 1 unit equals 1 meter or foot. We are going to scale the model to HL2 units afterwards when we compile it.
Texturing
Now we will apply a texture to the model. This is done by a process called UV Mapping. Our model is made up of lots of polygons, which are defined by their corner points or vertices. To get a 2D texture on a 3D model we have to tell XSI what part of the texture corresponds to what polygon by mapping the vertices on the texture. Each vertex gets a UV coordinate assigned to it, which basically is a relative position on the texture image.
I suggest using a generic checkerboard or grid texture first, so you can see if the texture is properly mapped and that there are no distortions. I'll skip this though.
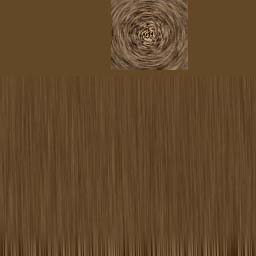
Now, there are a couple of ways to texture your model. Either you draw the texture first and then do the UV-Mapping, or you can unwrap the model first und draw the texture to fit the UVs. I'll do it the first way. I've made a simple texture in Photoshop consisting of a basic wood texture for the sides and ends of the fencepost. Save this texture as fencepost.tga in
.../My Computer/Hard drive C/Softimage/XSI_6_Mod_Tool/Addons/ModTool_Database/Render_Pictures/
- Note: The image must be saved in a minimum image resolution of 512x512 for XSI to read it.
Now for applying the texture:
- Click on the Model button in the upper left corner and switch the toolbar layout to Render
- Select your object in the 3D or 2D views
- In the left toolbar, select Get > Material > Blinn. A property window will pop up which you can close.
- Change to the Render toolbar by pressing "3" and in the left toolbar, use Get > Texture > Image. A property window with XSI's standard texture will appear. Next, go to the first drop down menu, where it says "noIcon.pic", click on New > New from file... and select the fencepost.tga texture. Then, look down towards the Texture Projection tab and select New > UV. Close the window.
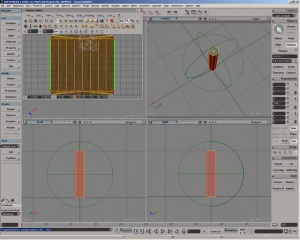
If you hit Alt-7 now you will open the texture editor and see your texture and the current UV map. At the moment it doesn't look very nice. In order to clean this up, go back to the 3D view and select all the polygons which make up the sides of the post with the raycast polygon select tool (Hotkey u).
Now if you go back to the texture Editor you will see that these vertices are now selected.
In order for us to have a better view, go into the menu bar in the Texture Editor and select View > Show Selected. All unselected polygons are now hidden. We are going to unwrap these polygons cylindrically because this best emulates their shape in space. (You may notice that these polygons are already unwrapped cylindrically, but we'll do it anyway for practice).
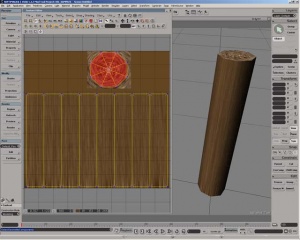
In the texture editor tool bar, click on the orange cylinder and then select XY object aligned. Now we have all the side polygons next to each other. Use the scale and translate tools to fit them onto the corresponding part of the texture. After you've got the polygons where you want them, select View > Show All from the menu.
Now (in the 3D view) select the polygons which make up the bottom and top part of the cylinder and switch back to the Texture Editor. This time use the Planar Sub projection button (the orange plane) and then select XZ World Aligned. This will map these polygons into an even octagon.
Move these polygons to where you want them to be and then have a look at the result in the 3D View. If you're happy with the result then move on to exporting. Freeze the model first, though, and save it. You can export your UV map as a bitmap in the Texture Editor by clicking Edit > Stamp UV Mesh in the menu, in case you want to unwrap your model first and then fill in the textures.
Setting up for compiling
To compile this model, we need three .SMD files. One for the model, one for the animations (even though it has none) and one for the physics box (clipping/hitboxes). These SMD files need to be put together in the same directory. For this example, use .../SteamApps/your@username.com/sourcesdk_content/hl2mp/modelsrc/your model name/. Select your model, then in the menu bar select ValveSource > Export SMD...
In the dialog box, set the filename for the model SMD to fencepost.smd and click OK. Open the Export SMD... dialog again and this time select Physbox from the dropdown box and export this as fencepost_phys.smd by clicking OK. Lastly, select Skeletal Animation from the dropdown box and export this as fencepost_idle.smd.
Next, I suggest making shortcuts to studiomdl.exe and vtex.exe on your desktop. These files are located in .../SteamApps/your@username.com/sourcesdk/bin. This allows you to compile models and textures by dragging them onto the shortcut icon.
To begin compiling, make sure your fencepost.tga texture is located in .../SteamApps/your@username.com/sourcesdk_content/hl2mp/materialsrc/models/your model name/. Likewise, your SMD models should be in .../SteamApps/your@username.com/sourcesdk_content/hl2mp/modelsrc/your model name/.
Now, go to where your SMDs are and create a text file in the same directory called fencepost.qc. Using a text editor, copy the following lines into this file and save it:
// Output .MDL
$modelname yourname/fencepost.mdl

// Directory of materials that the model uses
$cdmaterials models/yourname

// Model properties

// model is a static prop
$staticprop

// Material properties
$surfaceprop "wood"

// Scale all units by a factor of 40
$scale 40.0

// Base or Reference .SMD
$body studio "./fencepost"

// sequences: all sequences are in $cd
$sequence idle "fencepost_idle" loop fps 15

// Physics data
$collisionmodel "fencepost_phys.smd" {
$Mass 5
$concave}
Compiling and finishing
Now drag the .qc file onto your studiomdl shortcut and watch it compile (provided Steam is running). The output will be placed in .../SteamApps/your@username.com/half-life 2 deathmatch/hl2mp/models/your model name/
Next, we have to compile the textures. Drag fencepost.tga onto your vtex shortcut. The texture will compile and create fencepost.vtf in .../SteamApps/your@username.com/hl2mp/materials/models/your model name/. Go to this directory and create a text file named fencepost.vmt and copy the following lines in it:
"VertexLitGeneric"
{
"$baseTexture" "models/fencepost"
"$surfaceprop" "Wood_Solid"
}
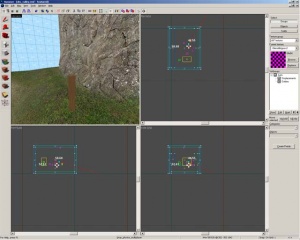
And that's it! Now load up Hammer and add a prop_static model to the map. Open the entity properties, click Browse... and select ./yourname/fencepost. Having gone through the workflow of creating your first prop, you can now try to do more complex models. I recommend reading tutorials and the XSI documentation on UV mapping and geometry creation and taking small steps.
Well, I hope this tutorial helped you finding your way around the prop creation process and wish you good luck with your work!
