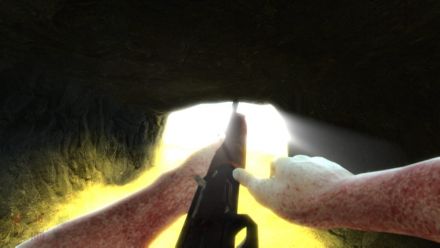
Viewmodel Blood Splatter Overlay
Introduction
In this tutorial, we'll be setting up a simple material proxy system that we can use to overlay a blood detail texture onto our viewmodel based on close-quarters combat.
The final results that can be made from this are, for example, hands and weapons covered in goo, acid, blood, water, animated raindrop water normals, and many more visual design elements.
Requirements
- A Source 2013 engine branch mod.
- Beginner/Intermediate knowledge of C++.
- Knowledge and familiarity with textures and materials.
What You Will Learn
- Creating a new material proxy system using the $detail parameter.
- Creating an overlay of blood onto a viewmodel after shooting flesh or blood materials (NPCs included, of course) at close quarters.
The Implementation
Before starting, we'll need this file:
Which you'll put into ![]()
<src code directory>/src/game/client/
c_baseplayer.h
In ![]()
src/game/client/c_baseplayer.h, inside the public: section, add the following line:
bool m_bShouldDrawBloodOverlay;
c_baseplayer.cpp
In ![]()
src/game/client/c_baseplayer.cpp, below RecvPropString( RECVINFO(m_szLastPlaceName) ), add:
RecvPropBool( RECVINFO( m_bShouldDrawBloodOverlay ) ),
Then in the constructor, below ListenForGameEvent( "base_player_teleported" );, add:
m_bShouldDrawBloodOverlay = false;
player.h
In ![]()
src/game/server/player.h, inside the public: section, add the following line:
CNetworkVar( bool, m_bShouldDrawBloodOverlay ); // Have we been hit or have blood splatted on us?
player.cpp
In ![]()
src/game/server/player.cpp, somewhere inside of BEGIN_DATADESC( CBasePlayer ), add:
DEFINE_FIELD( m_bShouldDrawBloodOverlay, FIELD_BOOLEAN ),
Inside the constructor and below m_bitsDamageType = 0;, add:
m_bShouldDrawBloodOverlay = false;
Then inside IMPLEMENT_SERVERCLASS_ST( CBasePlayer, DT_BasePlayer ), below SendPropString (SENDINFO(m_szLastPlaceName) ),, add:
SendPropBool( SENDINFO(m_bShouldDrawBloodOverlay) ),
basecombatcharacter.cpp
In ![]()
src/game/server/basecombatcharacter.cpp, inside the OnTakeDamage_Alive( const CTakeDamageInfo &info ) function above return 1;, add:
	// Handle the viewmodel blood splatter overlay effect here:
	if ( ( info.GetDamageType() & ( DMG_BULLET | DMG_SLASH | DMG_BLAST | DMG_CLUB | DMG_BUCKSHOT ) ) )
	{
		CBasePlayer *pPlayer = UTIL_GetLocalPlayer();
		if ( pPlayer == this )
			pPlayer->m_bShouldDrawBloodOverlay = true;

		pPlayer = ToBasePlayer( info.GetAttacker() );
		if ( pPlayer && ( this->BloodColor() != BLOOD_COLOR_MECH ) )
		{
			if ( pPlayer->GetAbsOrigin().DistTo( this->GetAbsOrigin() ) < 200.0f )
				pPlayer->m_bShouldDrawBloodOverlay = true;
		}
	}
The Materials
Viewmodel VMTs
Now you'll have to edit every single viewmodel .vmt to include the following snippet of code:
"VertexLitGeneric"
{
	...

	"$detail" "detail/blood_detail"
	"$detailblendmode" "2"
	"$detailblendfactor" "0.0"
	"$detailscale" "1.0"

	"Proxies"
	{
		"BloodyTexture"
		{
		}
	}
}
Notice how we're calling for ![]()
materials/detail/blood_detail.vtf, this is the blood detail texture that gets placed on top of our viewmodel.
Conclusion
Now all that remains is making your blood detail texture for this. Still, for convenience/testing sake, you can download the included placeholder texture found in the "External links" section below.
And that's all there is to it. If set up correctly, you should now be able to see the blood splatter texture on your viewmodel based on the snippet of code we placed into ![]()
basecombatcharacter.cpp.
Additional Functionality (Optional)
If you want to be able to clean off the blood by going into water, head over to ![]()
player.cpp and find the WaterMove() function.
Inside it, at the bottom, but before UpdateUnderwaterState(); add this:
	if ( GetWaterLevel() > WL_Waist )
		m_bShouldDrawBloodOverlay = false;
And if you want to be able to clean off the blood when consuming a health kit, find the TakeHealth( float flHealth, int bitsDamageType ) function and add this inside of it:
m_bShouldDrawBloodOverlay = false;
External links
Download BloodDetailTexture.rar - A placeholder blood detail texture by Ian B.
