Using S&box
January 2024
You can help by
January 2024
For help, see the VDC Editing Help and Wikipedia cleanup process. Also, remember to check for any notes left by the tagger at this article's talk page.
Getting Started
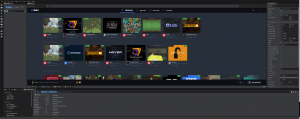
When you first boot into the developer tools in S&Box you will see the main window, this has all the tools you need to make a Source 2 Project. From the top left going down are (in order) Hammer, The Material Editor, ModelDoc, The Animgraph Editor, The Particle Editor, The Hotspot Editor, The Postprocessing Editor, S2FM, and FacePoser. As well as The Shader Graph, Widget Gallery, and Launch Config.
Right next to the toolbar is the Explorer, which is used to make and publish gamemodes, maps, tools, content, add-ons, and libraries. In the top right corner of the explorer window is a plus sign. When you click it, you can choose the copy an existing project off of asset.party, load a S&Box project that you have on your drive, or create a new project.
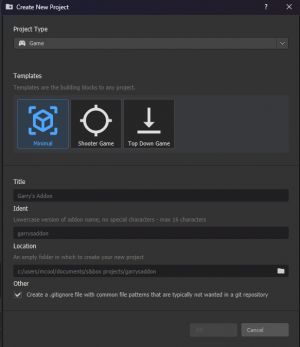
 If you choose to create a new project you will be presented with a menu that looks like this.
you can choose what type of project you want to create and choose a template to build off of. Upon hitting create it will appear in your explorer window.
Make sure that it's selected in the left corner of the game window.
Project layout and prebuilt scripts
Upon creating your project it will compile. You can then right-click on it in the Explorer and go to the location on your computer it is stored on. When you do this it will bring up a windows explorer window that has the files to your project.
Unlike Half-Life:Alyx's tools there is only one folder so everything will be stored in here. (In an empty project) you should see a folder named code, a .addon file, a .editorcofig and a .gitingore (you can mostly ignore the last two.) In the code folder there are a few scripts to help you get started with your project.
The Game script it's a serverside script that then sends directions to the client. This is used for spawning players, creating huds, and declaring player classes.
Next is the Pawn script. This controls your player. Including movement, what's in their inventory as well as controlling how to handle deaths. (respawns handled in game.cs) and animations.
Using Hammer
Hammer is launched with the toolbar mentioned in getting started. (In the top left corner of the main window). It's used the same as Half-Life:Alyx's Hammer for the most part, but with a different asset browser. (Found at the bottom of the hammer window, It's hard to miss it) here you can search for anything on asset.party or in any of your S&Box Projects and use it in Hammer. Once you build your map and run it, it will be run in the game window on the main window. (The instance of S&Box in the dev tools). See Half-Life:Alyx Hammer
Publishing to asset.party
Once you have developed your project like you would any other source mod, you can publish it to asset.party. Just right click on your project and click "Upload to Asset.party" then follow the on-screen prompts
