The Ship Justice System
January 2024
Overview
The following describes how to set up the various entities in Hammer to get Security working in maps for ![]() The Ship: Murder Party.
The Ship: Murder Party.
Security Booth
All maps that have Security must have one ship_security_booth entity:
- Create a brush entity anywhere in the map and apply the NODRAW material to all faces.
- Tie the ship_security_booth entity to this brush and name it (e.g. "security_booth").
- Leave all default attributes as is, we'll set the security rooms later.
Security Cameras
Security cameras can be of 3 types (static, rotating and rotating with FOV). Common settings for all cameras are:
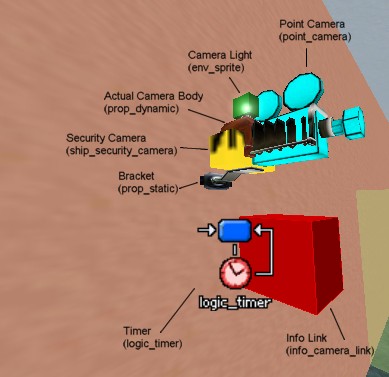
Bracket
- Create a prop_static entity for the bracket and use the model:
models/env/misc/camera/camera_bracket.mdl
Position the bracket so it's touching the wall at right angles.
Actual Camera Body
- For the main body of the camera, create a prop_dynamic entity and use the model:
models/Env/Misc/Camera/Camera.mdl
Position the body of the camera so the indentation in the bottom aligns with the ball on top of the bracket.
Note: Make sure that the body is high enough to allow the camera to pitch and rotate without intersecting with the bracket!
- Name this camera prop (e.g. acutal_camera)
- Leave all default attributes as is, we'll set the parent to be the ship_security_camera entity below.
Ship Security Camera Entity
- Create a brush entity and asign the NODRAW material to all faces (adjust the size so it is roughly the same size as the bracket but wider so you can select is more easily).
- Tie the ship_security_camera entity to this brush and name it (e.g. "security_cam").
- Position this brush entity so it is exactly aligned with the center of the ball on top of the bracket.
(This is because rotations to the camera body are made relative to the centre of this entity)
- Set the Camera Prop attribute to be the name of the actual camera body entity you created above.
- Set the Security Booth attribute to be the name of the security booth entity you created above.
- The camera attribute is set to the point camera entity if one is needed, this is set below.
- The Area Volumes attribute is set to the name of one or more room entities that this camera covers, this is set below.
- You can leave all the other attributes as their default settings and you'll get a good functioning camera, however you can change them if you need to have a camera that performs differently.
Static Cameras
Static security cameras don't rotate so you can point the actual camera body to point in any direction you wish in Hammer and it will stay in this position.
Static cameras will detect targets in the whole room (or rooms) that have the same name as their Area Volumes attribute, they do not check against their Field Of View!
Rotating
Rotating security cameras behave like static cameras in that they detect targets in the whole room (or rooms) but in addition you can set them to rotate. To do this you can do the following:
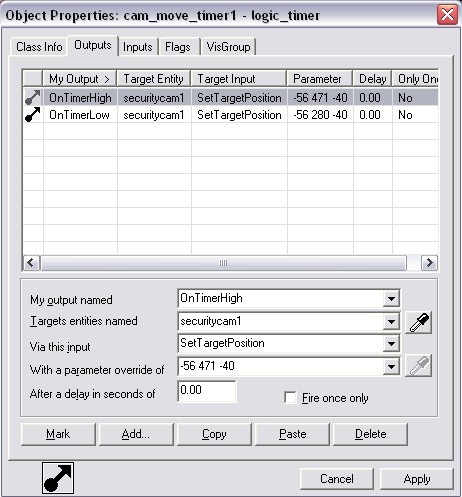
- Create a logic_timer entity and create 2 outputs:
- My output named: "OnTimerHigh".
- Target entities named: your ship_security_camera entity (e.g. "security_cam").
- Via this input: "SetTargetPosition".
- With a paramater override of: X Y Z (rotate the camera to point at this position when OnTimerHigh is triggered.
- After a delay in seconds of: "0.00".
- Set the same values for another output named "OnTimerLow".
- Set the position attribute - With a paramater override of: X Y2 Z (usually you only need to change the Y-value of this position to get the camera to rotate left-to-right between the 2 points).
- Set Start Disabled to "No" to start rotating the camera from the point the map loads.
- Set the Refire Interval to the number of seconds the camera needs to rotate between the low and high positions (e.g. "5" seconds is a good value here).
- Check the Flags attribute Oscillator to turn it on.
In the ship_security_camera entity set the Start target position attribute to something similar to the values used in the above logic timer (e.g. X Y3 Z) so that the camera initially rotates to the correct position when the map loads. Also, make sure you parent the Actual Camera Body (dynamic_prop) to the Security Camera (ship_security_camera) so that it rotate with it giving you the rotating camera model.
Rotating with FOV
This type of camera is set up in the same way as the above rotating camera but the targets in the associated rooms are only detected when they are in the Field Of View (FOV) of this camera.
The size of the FOV is managed using the following attributs for the ship_security_camera entity:
- Yaw range - the width of the view cone.
- Pitch range - the height of the view cone.
- Minimum range - the minimum distance targets have to be from the camera to be detected.
- Maximum range - the maximum distance targets can be from the camera to be detected.
To see the debug visualisation of the view cone in the game you can use the following console command:
cl_ship_security_cameras_view 1 (0: Off, 1: On)
Monitors and Point Camera Entities
If you want to show what the camera is looking at on a func_monitor entity you can use a point_camera entity in the following manner:
- Create a point_camera entity and position it in line with the actual camera body entity but make sure the lens of the point camera in Hammer is in-front of it (as you can see in the picture above).
- Name the entity (e.g. "point_cam")
- Parent it to the security camera so that it rotates with it.
- Set the FOV to match that used for the security camera (about 45 degrees).
- In the security camera entity set the Point Camera entity to the name of the point camera entity created.
You will also need to create a info_camera_link entity to link the camera with the monitor:
- Set the Entity Whose Material Uses _rt_camera attribute to be the name of the monitor (e.g. "monitor").
- Set the Camera Name attribute to be the name of the Point Camera entity (e.g. "point_cam").
Light for Camera Bulb
To create a light for the bulb on top of the camera:
- Create an env_sprite entity and position it to the same position as the bulb on top of the camera model.
- Set it's parent to be the Security Camera entity so that it moves with it as it rotates.
- Check the Start on flag so that it is on from the start.
- Set the following attributes for the sprite:
- Render Mode: "World Space Glow"
- FX Color (R G B): "145 239 75" (Green)
- Sprite Name: "materials/sprites/light_glow03.vmt"
- Scale: "0.08"
Security Guards
As well as Security Cameras, Security Guards can detect players comitting crimes. To set up a Security Guard for ![]() The Ship: Murder Party you can do the following:
The Ship: Murder Party you can do the following:
- Create a ship_security_guard entity.
- Set the World Model to:
models/char/npc_guard.mdl
- Set the Security Booth attribute to the name of the security booth entity (e.g. "security_booth")
- Set the Area Volumes attribute to the name of the room (or rooms) you want the guard to check for crimes in.
- Set the Time for the guard to stay bribed to the number of seconds you want to have the game wait until he is no longer bribed by someone (default 10 secs).
Any guard who can be bribed has to have this property enabled, to do this you need to send an event to the guard with the input EnableBribe. (see the input of the guards in the example map).
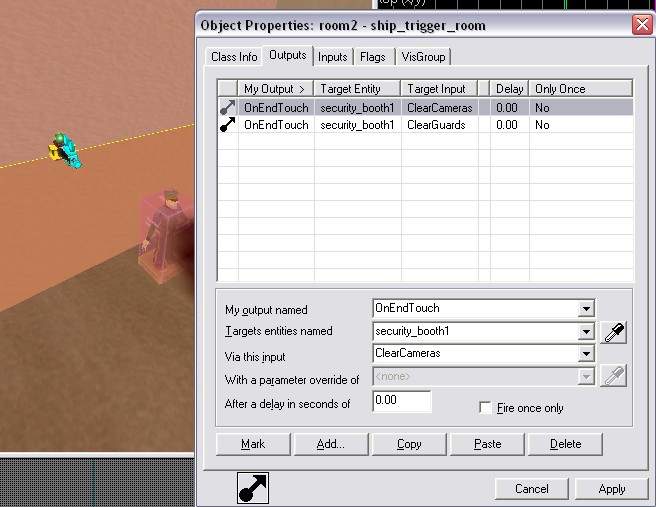
Any ship_trigger_rooms that are used with Security Cameras or Security Guards must have a corresponding output event sent to the Security Booth to clear the list of cameras or guards when a player leaves the room trigger. An example of this is shown below:
Security Rooms
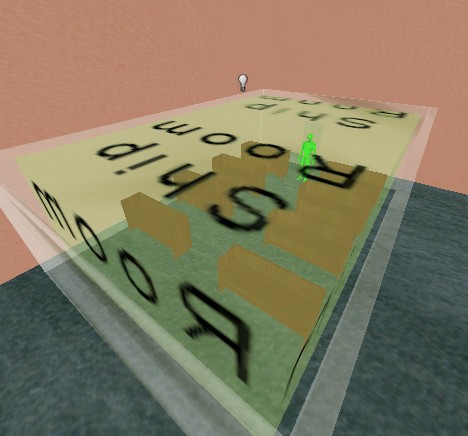
When players are arrested for committing crimes they are teleported to a series of locations in the map during the justice process:
Holding Room
The first is the holding room which is used as an area to hold the player in-case the court room is busy sentencing another player. The Holding Room should have enough teleport destination entities to allow for multiple players being arrested.
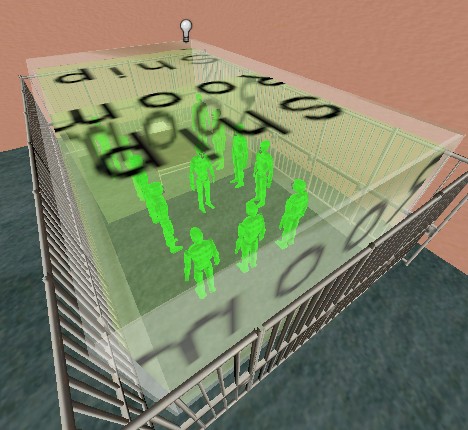
Court Room
The second is the court room where the player is sentenced. The court room should have only one teleport destination entity since only one player can be sentenced at once.
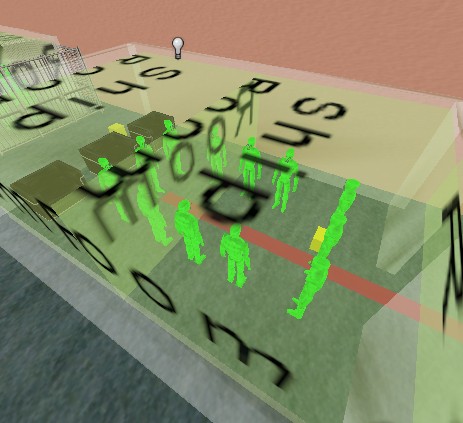
Brig Room
After being sentenced, if the player has any remaining sentence to serve they are teleported to the Brig room until the sentence is finished. The Brig should have enough teleport destination entities to allow for players entering the Brig while others are there.
Release Room
When the sentence is over the player is teleported to the release room where the justice process concludes. The Release Room should have enough teleport destination entities to allow for multiple people being released.
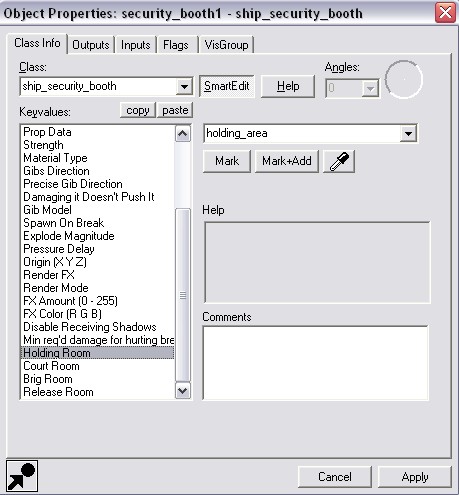
Linking rooms with Security Booth
To link the above rooms to the security system you need to name each room and set the names of each in the Security Booth entity:
Teleport Destination Entities
To define where the players will teleport to in the above rooms you must place info_teleport_destination entities within them. The code will get pick the first available position.
Multiple Areas for a Security Room
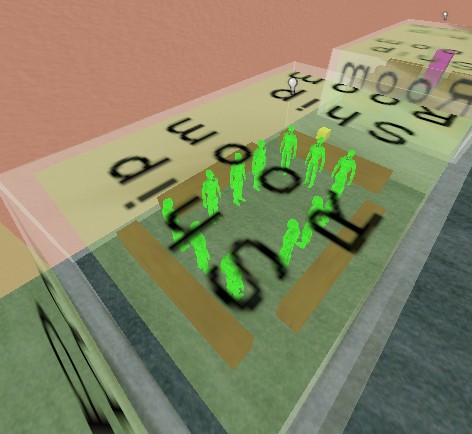
You can use multiple ship_trigger_room entities to define more than one area to choose from to teleport to. To do this just use the same name for these entities. The code will pick one of these randomly and pick the first available position within it.
Trespassing
Trespassing is controlled via ship_trigger_room entities. There is a script file - ship/scripts/rooms/RoomData.txt?ac=64 RoomData.txt - that has all the default values for all the room names in The Ship, e.g. for the "Bridge" room:
"#Ship_Bridge"
{
        "TrespassFine" "10"
        "TrespassSentence" "20"
}
If a room has a value for "TrespassFine" other than zero and there is a Security Camera or Security Guard watching the room then it will be used as a trespass zone. If any player walks into this room they will be fined and eventually arrested for trespassing.
The ship_trigger_room entity has two attributes: "Trespass Fine" and "Trespass Sentence" that can be used to override the default values in the RoomData file for that particular instance of the room.
