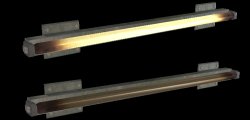
Multiple Skins for a Single Model
In some cases, it can be helpful for a mapper to be able to choose between different skins for the model. It's easy to add more variety to your custom models with multiple skins without creating a totally new model.
The advantage of having several skins in one model instead of compiling several new models are:
- Easier to find because the model overview isn't cluttered
- Less disk space and in-game model load time
- Faster than compiling a new model for each skin
- Skins can be changed dynamically via the
Skininput
Basic example with one skin replaced
The example here is a lamp that is either on or off, a different skin for each situation will make the model look a lot better.
$modelname mymodelfolder/mylamp.mdl
$cdmaterials modeltextures/mytexturefolder
$surfaceprop metal
$staticprop
$body studio "mylamp.smd"
$texturegroup skinfamilies
{
	{ "lampon"  }
	{ "lampoff" }
}
$sequence idle "mylamp.smd" fps 1
$collisionmodel "mylamp_phys.smd"
$texturegroup needs to follow $body.You define your different textures between $texturegroup skinfamilies { and }. The name of the first texture (in this case "lampon") needs to be similar to the texturename you used in your model (If you are not sure, open the .smd with a text editor, in the triangles block you'll find the name). Otherwise studiomdl.exe doesn't know which one to replace.
In the following lines, you can define the new textures between { and } that will be rendered instead of the original one.
Creating Multiple Skin Combinations
In some circumstances, you may choose to divide your model texture into more than one material. This allows for multiple combinations that otherwise would require a larger amount of individual models. If, for example, you wanted to create a light that had two housing styles but three bulb colors, you could create these combinations under the $texturegroup.
$texturegroup skinfamilies
{
	{ "lampnew"    "lightbulbred"   }
	{ "lampnew"    "lightbulbgreen" }
	{ "lampnew"    "lightbulbblue"  }
	{ "lamprusty"  "lightbulbred"   }
	{ "lamprusty"  "lightbulbgreen" }
	{ "lamprusty"  "lightbulbblue"  }
}
Once again, you must ensure that your model uses the material names in the first line.
As you can see, creating a matrix of skin combinations has distinct advantages, however, using multiple materials on the same model creates a significant performance hit, so this technique should be used sparingly!
General definition
Here's a general definition for reference if you have to use several skins:
$texturegroup skinfamilies
{
	{ "original1"   "original2"   ...  "originalX"  }
	{ "replace1_1"  "replace1_2"  ...  "replace1_X" }
	{ ...           ...           ...  ...          }
	{ "replaceX_1"  "replaceX_2"  ...  "replaceX_X" }
}

