Modifying a Source Model in Maya
In this tutorial, we will go step-by-step through the process of getting Dr. Kleiner into Maya.
Things Needed
Maya version 4.5 and 2009 (There is no longer a free PLE edition, and plugins only work for pre-2010 versions)
MDLDecompiler - To turn compiled MDL files back into SMD format.
VTFEdit - Tool for opening and extracting Textures in Source.
Extracting
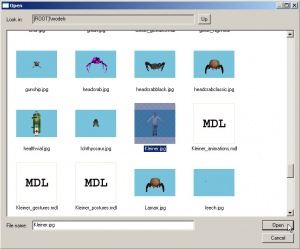
First, decompile the model. Use MDLDecompiler for this which, once you've downloaded it, should be in ...\SteamApps\<account name>\sourcesdk\bin. When you launch mdldecompiler.exe, make sure that Steam is running and that "Use Steam File Access" is checked. Click the ellipsis button next to the "Choose Model File" field and locate the Kleiner model (see Fig 1).
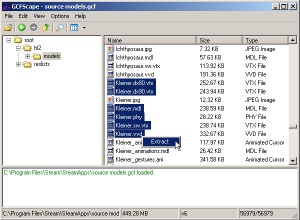
If you have trouble accessing the GCF file, use GCFScape to extract Kleiner.dx80.vtx, Kleiner.dx90.vtx, Kleiner.mdl, Kleiner.phy, Kleiner.sw.vtx and Kleiner.vvd from source models.gcf (see Fig 2). Then uncheck "Use Steam File Access" in MDLDecompiler and locate the extracted Kleiner.mdl file for the "Choose Model File" field.
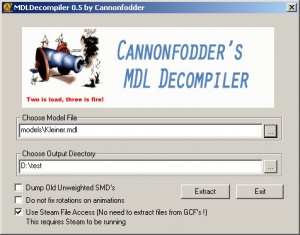
When the model file is selected, extract it to a directory (see Fig 3). For this tutorial, D:\test\ will be used.
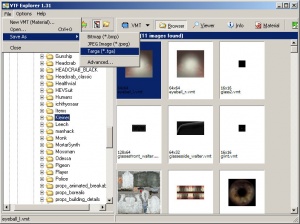
Now extract the textures in TGA format. Using VTF Explorer, navigate to source materials.gcf\hl2\materials\Models\Kleiner. Select the first texture and choose File > Save As > Targa (*.tga) (see Fig 4). Repeat this step for each of the eleven textures. Save them wherever you like, but for ease, put them in D:\test\.
Using VTFcmd to extract them all at once is suggested when there is a large quantity of files to be eztracted, for example:
vtfcmd.exe -folder d:\test\textures\*.vtf -output d:\test\textures\out -exportformat "tga"
Now that everything is extracted, it's possible to start importing the model into Maya.
Importing into Maya
The Source SDK comes with scripts that allow Maya to import and export SMD files. In order to use them, They must be placed in the correct Maya scripts folder. Copy the contents of the ...\SteamApps\<account name>\sourcesdk\maya\4.5\scripts\ to the \maya\7.0PLE\scripts\ folder in My Documents. It is needed to tweak two of the script files to avoid version compatibility problems. Go into \maya\7.0PLE\scripts\smd\ , select both smdRead.mel and smdMakeShader.mel, right-click, select Properties, and uncheck "Read-only." Now open smdMakeShader.mel with Notepad and change the line
connectAttr -f ($place + ".mirror") ($fileTex + ".mirror");
to
//connectAttr -f ($place + ".mirror") ($fileTex + ".mirror");
Save and close. Now open smdRead.mel with Notepad and change the line
print `system "time"`;
to
//print `system "time"`;
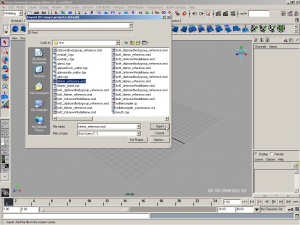
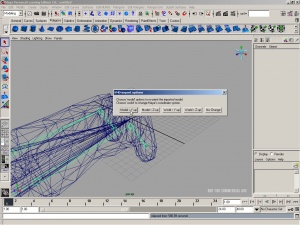
Save and close. Now open Maya. From the file menu, choose Import SMD... and locate the file kleiner_reference.smd from among the many that were decompiled (see Fig 5). Click Import. Maya will then prompt you to find "mouth." It is looking for the mouth texture that was extracted earlier. Navigate to the textures (if you follow this tutorial's directory nomenclature, they will be in D:\test\) and select mouth.tga and press Find. Maya will then import the model. NOTE: THIS WILL TAKE A LONG TIME It takes about 9 minutes and 25 seconds to complete this operation on a good system. While you wait, Maya will appear to be unresponsive. Just give it time. When the ordeal is over, the model should come in sideways and a orientation prompt will appear (see Fig 6). The model thinks Z is up but Maya, by default, thinks Y is up. It's possible to choose to change one or the other. It's recommended to choose "Model > Y-up."
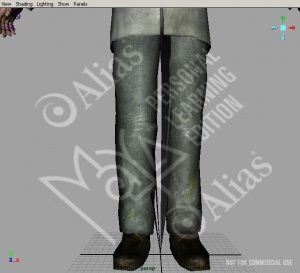
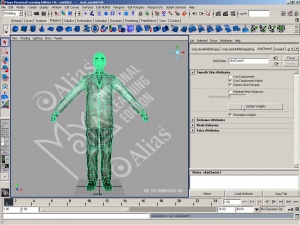
Press 6 to enter ShadedAndTextured mode. Looking at the model, you will notice some odd spike (see Fig 7). This is an issue with skin weights. It is easily resolved. Select the polymesh (click anywhere on the model) and press Ctrl+A to open the Attribute Editor. Go to the skinCluster1 tab in the attribute editor and click the "Update Weights" button (see Fig 8).
You now have a properly textured and rigged model in Maya ready for re-skinning, animation, and other editing!
Known Fixes and Tips
If you are running a version of Maya that is older than 7.0, the "Update Weights" button located in the attribute editor for Fig. 8 is not available. This is fairly easy to fix, by creating a custom MEL script that acts as the "Update Weights" button would. Within Fig. 8 you will notice at the bottom right corner of the image, the script command line shows "skinCluster -e -mi 3 skinCluster1;". This is the command of "Update Weights". Simply type this command in the script command line or in the script editor, highlite, and middle mouse drag to your custom script tray. Select polymesh and then click your new MEL script. This should clean up any spikes that may occur.
