L4D Glow Effect
Introduction
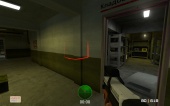
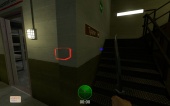
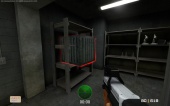
This article will show you how to implement the Left 4 Dead (L4D) entity glow effect that is used for players, zombies, and items you can grab. This effect is not a shader and does not require you to edit any rendering code. I have included a couple of tweaking options and possibility for future enhancement.
This code relied heavily upon the masterful work of Jinto with his Lua implementation of this effect in Garry's Mod. Garry himself was also a big help in getting this into fruition and the hlcoders listserve.
- Images
Requirements
- Strong C++ background
- Strong knowledge of the Source SDK
- Knowledge of general rendering process
The Breakdown
Rendering the glow effect requires three distinct steps. The first step is to draw the entity onto the engine's Stencil Buffer. The second step is to draw the entity with the color of the glow you want onto a render buffer. The third step is to blur the render buffer and draw it onto the screen while respecting the Stencil Buffer.
Buffers
Stencil Buffer: A grayscale buffer implemented by DirectX that can be written to and read from much like a mask in Photoshop. The Stencil Buffer is used in the Scratch Source SDK to read the ambient occlusion depth map and apply appropriate shading in areas. We will be using the Stencil Buffer to "cutout" the entities we want to glow so only the blurred image that extends beyond the entity will show giving the effect of a halo.
Render Target (Buffer): A Render Target is a special texture that is registered with the engine and can be written to by the renderer. We will declare two render targets (buffers). One will hold the cumulative images from the glowing entities and the other will be used to blur with.
Material vs. Texture
When dealing with the rendering engine it is important to understand the distinction between a material and a texture.
Material: A material encapsulates a particular shader and it's associated parameters. A material is what defines how the renderer should render.
Texture: A texture is pure image information. To set the texture of a material you typically use $basetexture and whenever the material is rendered that texture is used in the shader
Different Rendering Components
There are three distinct rendering components in the source engine.
- IMatRenderContext (pRenderContext)
- IVRenderView (render)
- IVModelRender (modelrender)
We will be using all three of these in order to achieve the desired effect. Each one does its part to draw our world, however the details are beyond the scope of this tutorial.
The Code
I am going to present the code in chunks to discuss what each does. You can download the code in it's entirety here:
ge_screeneffects.cpp
ge_screeneffects.h
Materials Required:
L4D Glow Effect Materials.zip
Header
class CEntGlowEffect : public IScreenSpaceEffect
{
public:
	CEntGlowEffect( void ) { };

	virtual void Init( void );
	virtual void Shutdown( void );
	virtual void SetParameters( KeyValues *params ) {};
	virtual void Enable( bool bEnable ) { m_bEnabled = bEnable; }
	virtual bool IsEnabled( ) { return m_bEnabled; }

	virtual void RegisterEnt( EHANDLE hEnt, Color glowColor = Color(255,255,255,64), float fGlowScale = 1.0f );
	virtual void DeregisterEnt( EHANDLE hEnt );

	virtual void SetEntColor( EHANDLE hEnt, Color glowColor );
	virtual void SetEntGlowScale( EHANDLE hEnt, float fGlowScale );

	virtual void Render( int x, int y, int w, int h );

protected:
	int FindGlowEnt( EHANDLE hEnt );
	void RenderToStencil( int idx, IMatRenderContext *pRenderContext );
	void RenderToGlowTexture( int idx, IMatRenderContext *pRenderContext );

private:
	bool			m_bEnabled;

	struct sGlowEnt
	{
		EHANDLE	m_hEnt;
		float	m_fColor[4];
		float	m_fGlowScale;
	};

	CUtlVector<sGlowEnt*>	m_vGlowEnts;

	CTextureReference	m_GlowBuff1;
	CTextureReference	m_GlowBuff2;

	CMaterialReference	m_WhiteMaterial;
	CMaterialReference	m_EffectMaterial;

	CMaterialReference	m_BlurX;
	CMaterialReference	m_BlurY;
};
The glow effect inherits from IScreenSpaceEffect which is part of the screen space effect manager that processes effects during the render sequence. The effects are processed after the Viewmodel is rendered, color correction is applied, and HDR is applied, but before the HUD is drawn. This means the glow effect will be unaffected by HDR and color correction (GOOD!) but will show through the viewmodel (Maybe BAD?). Unfortunately, there is no real good way to solve this problem without adversely affecting the rendering of the effect or the viewmodel.
Anyway, all the functions are implemented from the abstract class, but I added a couple (ie. RegisterEnt and DeregisterEnt) which allow us to easily add and remove entities to apply the glow effect on.
CEntGlowEffect::Init()
ADD_SCREENSPACE_EFFECT( CEntGlowEffect, ge_entglow );

void CEntGlowEffect::Init( void )
{
	// Initialize the white overlay material to render our model with
	KeyValues *pVMTKeyValues = new KeyValues( "VertexLitGeneric" );
	pVMTKeyValues->SetString( "$basetexture", "vgui/white" );
	pVMTKeyValues->SetInt( "$selfillum", 1 );
	pVMTKeyValues->SetString( "$selfillummask", "vgui/white" );
	pVMTKeyValues->SetInt( "$vertexalpha", 1 );
	pVMTKeyValues->SetInt( "$model", 1 );
	m_WhiteMaterial.Init( "__geglowwhite", TEXTURE_GROUP_CLIENT_EFFECTS, pVMTKeyValues );
	m_WhiteMaterial->Refresh();

	// Initialize the Effect material that will be blitted to the Frame Buffer
	KeyValues *pVMTKeyValues2 = new KeyValues( "UnlitGeneric" );
	pVMTKeyValues2->SetString( "$basetexture", "_rt_FullFrameFB" );
	pVMTKeyValues2->SetInt( "$additive", 1 );
	m_EffectMaterial.Init( "__geglowcomposite", TEXTURE_GROUP_CLIENT_EFFECTS, pVMTKeyValues2 );
	m_EffectMaterial->Refresh();

	// Initialize render targets for our blurring
	m_GlowBuff1.InitRenderTarget( ScreenWidth()/2, ScreenHeight()/2, RT_SIZE_DEFAULT, IMAGE_FORMAT_RGBA8888, MATERIAL_RT_DEPTH_SEPARATE, false, "_rt_geglowbuff1" );
	m_GlowBuff2.InitRenderTarget( ScreenWidth()/2, ScreenHeight()/2, RT_SIZE_DEFAULT, IMAGE_FORMAT_RGBA8888, MATERIAL_RT_DEPTH_SEPARATE, false, "_rt_geglowbuff2" );

	// Load the blur textures
	m_BlurX.Init( materials->FindMaterial("pp/ge_blurx", TEXTURE_GROUP_OTHER, true) );
	m_BlurY.Init( materials->FindMaterial("pp/ge_blury", TEXTURE_GROUP_OTHER, true) );
}
The first bit tells the effect manager about us and provides an interface to create the effect. More about that later in the Implementation stage.
The init function is called when the effect is created. This sets up all our materials and textures we will be using in order to render the effect. m_WhiteMaterial will be used to draw the model onto the stencil and the blur buffer in a constant shade of color. m_EffectMaterial is what the final result is going to be rendered from. m_GlowBuff1 and m_GlowBuff2 are our Render Targets for the glow effect and blurring. m_BlurX and m_BlurY are the blur shaders that will actually perform the blur.
CEntGlowEffect::Render()
This is the render function that is called every frame of the render process by the effect manager. This function builds the stencil with the entity cut-outs and the glow buffer with the entity images. It then blurs the glow buffer and renders the result to the screen while respecting the stencil.
// Grab the render context
CMatRenderContextPtr pRenderContext( materials );

// Apply our glow buffers as the base textures for our blurring operators
IMaterialVar *var;
// Set our effect material to have a base texture of our primary glow buffer
var = m_BlurX->FindVar( "$basetexture", NULL );
var->SetTextureValue( m_GlowBuff1 );
var = m_BlurY->FindVar( "$basetexture", NULL );
var->SetTextureValue( m_GlowBuff2 );
var = m_EffectMaterial->FindVar( "$basetexture", NULL );
var->SetTextureValue( m_GlowBuff1 );

var = m_BlurX->FindVar( "$bloomscale", NULL );
var->SetFloatValue( 10*cl_ge_glowscale.GetFloat() );
var = m_BlurY->FindVar( "$bloomamount", NULL );
var->SetFloatValue( 10*cl_ge_glowscale.GetFloat() );

// Clear the glow buffer from the previous iteration
pRenderContext->ClearColor4ub( 0, 0, 0, 255 );
pRenderContext->PushRenderTargetAndViewport( m_GlowBuff1 );
pRenderContext->ClearBuffers( true, true );
pRenderContext->PopRenderTargetAndViewport();

pRenderContext->PushRenderTargetAndViewport( m_GlowBuff2 );
pRenderContext->ClearBuffers( true, true );
pRenderContext->PopRenderTargetAndViewport();

// Clear the stencil buffer in case someone dirtied it this frame
pRenderContext->ClearStencilBufferRectangle( 0, 0, ScreenWidth(), ScreenHeight(), 0 );
This part takes the materials that we initiated above and assigns their base textures to be the glow buffers respectively. It also manages the global scaling of the blur effect. From there it clears the glow buffers by setting them to a uniform Black color. We set it to black since m_EffectMaterial is set to be additive and black will not apply any effect to the screen (desired). This is a very important step otherwise we would get smearing of the glow effect across the screen.
// Iterate over our registered entities and add them to the cut-out stencil and the glow buffer
for ( int i=0; i < m_vGlowEnts.Count(); i++ )
{
	if ( cl_ge_glowstencil.GetInt() )
		RenderToStencil( i, pRenderContext );
	RenderToGlowTexture( i, pRenderContext );
}
This code iterates over all our registered entities and puts them into our stencil and the glow buffer.
// Now we take the built up glow buffer (m_GlowBuff1) and blur it two ways
// the intermediate buffer (m_GlowBuff2) allows us to do this properly
pRenderContext->PushRenderTargetAndViewport( m_GlowBuff2 );
	pRenderContext->DrawScreenSpaceQuad( m_BlurX );
pRenderContext->PopRenderTargetAndViewport();

pRenderContext->PushRenderTargetAndViewport( m_GlowBuff1 );
	pRenderContext->DrawScreenSpaceQuad( m_BlurY );
pRenderContext->PopRenderTargetAndViewport();

if ( cl_ge_glowstencil.GetInt() )
{
	// Setup the renderer to only draw where the stencil is not 1
	pRenderContext->SetStencilEnable( true );
	pRenderContext->SetStencilReferenceValue( 0 );
	pRenderContext->SetStencilTestMask( 1 );
	pRenderContext->SetStencilCompareFunction( STENCILCOMPARISONFUNCTION_EQUAL );
	pRenderContext->SetStencilPassOperation( STENCILOPERATION_ZERO );
}

// Finally draw our blurred result onto the screen
pRenderContext->DrawScreenSpaceQuad( m_EffectMaterial );
//DrawScreenEffectMaterial( m_EffectMaterial, x, y, w, h ); //Uncomment me and comment the above line if you plan to use multiple screeneffects at once.

pRenderContext->SetStencilEnable( false );
Finally, we take our built up buffers and blur them. This is done in a two step process (industry standard) by first blurring m_GlowBuff1 in the X (Horizontal) direction and rendering it to m_GlowBuff2. Then m_GlowBuff2 is blurred in the Y (vertical) direction and rendered back onto m_GlowBuff1. The stencil buffer is then called upon again to ensure that the rendering is only performed where the entity is not.
CEntGlowEffect::RenderToStencil()
This function renders the entity to the stencil. I will take this in small chunks so you understand more about the stencil buffer.
pRenderContext->SetStencilEnable( true );
pRenderContext->SetStencilFailOperation( STENCILOPERATION_KEEP );
pRenderContext->SetStencilZFailOperation( STENCILOPERATION_KEEP );
pRenderContext->SetStencilPassOperation( STENCILOPERATION_REPLACE );
Here we enable the stencil, which automatically puts it as our Render Target. Modifying the render target while the stencil is active has disastrous results! We setup the stencil mask operations by saying that if we fail to match our reference value we keep the reference value, but if we pass the reference we replace it with the write mask value.
pRenderContext->SetStencilCompareFunction( STENCILCOMPARISONFUNCTION_ALWAYS );
pRenderContext->SetStencilWriteMask( 1 );
pRenderContext->SetStencilReferenceValue( 1 );
The compare function checks to see if we should even evaluate the pass/fail operation. The Write Mask is what will be written to the stencil if we pass.
pRenderContext->DepthRange( 0.0f, 0.01f );
render->SetBlend( 0 );

modelrender->ForcedMaterialOverride( m_WhiteMaterial );
	pEnt->DrawModel( STUDIO_RENDER );
modelrender->ForcedMaterialOverride( NULL );

render->SetBlend( 1 );
pRenderContext->DepthRange( 0.0f, 1.0f );
Here we do a couple of hacky things to make sure we write appropriately to the stencil buffer. We set the depth range to basically nil so that no shading occurs. We also set the blending to 0 to make sure we don't impart any color information. We draw the model overriding it's material to m_WhiteMaterial and then reset everything back to it's nominal values.
CEntGlowEffect::RenderToGlowTexture()
The final bit of information regarding the effect is rendering the color of the glow to m_GlowBuff1.
pRenderContext->PushRenderTargetAndViewport( m_GlowBuff1 );

modelrender->SuppressEngineLighting( true );

// Set the glow tint since selfillum trumps color modulation
IMaterialVar *var = m_WhiteMaterial->FindVar( "$selfillumtint", NULL, false );
var->SetVecValue( m_vGlowEnts[idx]->m_fColor, 4 ); // Fixed compilation error
var = m_WhiteMaterial->FindVar( "$alpha", NULL, false );
var->SetFloatValue( m_vGlowEnts[idx]->m_fColor[3] ); // Fixed compilation error

modelrender->ForcedMaterialOverride( m_WhiteMaterial );
	pEnt->DrawModel( STUDIO_RENDER );
modelrender->ForcedMaterialOverride( NULL );

modelrender->SuppressEngineLighting( false );

pRenderContext->PopRenderTargetAndViewport();
We start by pushing the m_GlowBuff1 as the top of the rendering stack then we supress the engine lighting so there are no variations in our glow. Then we set the color modulation for the material we are rendering (m_WhiteMaterial) to be the color the entity wanted when they registered with us. Finally, the entity is rendered onto the buffer and everything is reset back to the nominal values.
Implementation
To implement the effect is rather trivial. First you must include both files above into the Client project of the SDK code. Before proceeding, I suggest you do a test compile to make sure everything works out.
Code
Now, in order for the effect to be active at all times I add this to my clientmode implementation (ClientModeShared):
#include "ge_screeneffects.h"

...

void ClientModeNormal::LevelInit( const char* newmap )
{
	g_pScreenSpaceEffects->EnableScreenSpaceEffect( "ge_entglow" );
	BaseClass::LevelInit( newmap );
}

void ClientModeNormal::LevelShutdown( void )
{
	g_pScreenSpaceEffects->DisableScreenSpaceEffect( "ge_entglow" );
	BaseClass::LevelShutdown();
}
You might have to add these function declarations to your ClientModeShared implementation.
If you only want the effect to be active after some trigger or convar you can do it using the same functions as above (Enable/DisableScreenSpaceEffect(...)) but just put it in the appropriate place in your code.
Once the effect is enabled, we still have to get entities to register themselves with the effect so that they are drawn with it on. Since we are using the effect to highlight gameplay tokens I will show a method to active the effect from the server using Server/Client sendtable:
##########################
### IN THE HEADER FILE ###
##########################
class CGenericToken : public CGEWeaponMelee
{
public:
#ifdef GAME_DLL
	// Function call to set this entitie's glow
	virtual void SetGlow( bool state, Color glowColor = Color(255,255,255) );
#else
	// This is called after we receive and process a network data packet
	virtual void PostDataUpdate( DataUpdateType_t updateType );
#endif

private:
#ifdef CLIENT_DLL
	CEntGlowEffect *m_pEntGlowEffect;
	bool m_bClientGlow;
#endif
	CNetworkVar( bool, m_bEnableGlow );
	CNetworkVar( color32, m_GlowColor );
};


#######################
### IN THE CPP FILE ###
#######################
BEGIN_NETWORK_TABLE( CGenericToken, DT_GenericToken )
#ifdef CLIENT_DLL
	RecvPropBool( RECVINFO(m_bEnableGlow) ),
	RecvPropInt( RECVINFO(m_GlowColor), 0, RecvProxy_IntToColor32 ),
#else
	SendPropBool( SENDINFO(m_bEnableGlow) ),
	SendPropInt( SENDINFO(m_GlowColor), 32, SPROP_UNSIGNED, SendProxy_Color32ToInt ),
#endif
END_NETWORK_TABLE()

CGenericToken::CGenericToken( void )
{
#ifdef GAME_DLL
	color32 col32 = { 255, 255, 255, 100 };
	m_GlowColor.Set( col32 );
#else
	m_bClientGlow = false;
	m_pEntGlowEffect = (CEntGlowEffect*)g_pScreenSpaceEffects->GetScreenSpaceEffect("ge_entglow");
#endif

	m_bEnableGlow = false;
}


#ifdef GAME_DLL
void CGenericToken::SetGlow( bool state, Color glowColor /*=Color(255,255,255)*/ )
{
	m_bGlowSetting = state;
	color32 col32 = { glowColor.r(), glowColor.g(), glowColor.b(), glowColor.a() };

	m_GlowColor.Set( col32 );
	m_bEnableGlow.Set( state );
}
#else
void CGenericToken::PostDataUpdate( DataUpdateType_t updateType )
{
	BaseClass::PostDataUpdate( updateType );

	color32 col = m_GlowColor.Get();
	// Did we change glow states?
	if ( m_bClientGlow != m_bEnableGlow )
	{
		if ( m_bEnableGlow )
		{
			// Register us with the effect
			m_pEntGlowEffect->RegisterEnt( this, Color(col.r, col.g, col.b, col.a) );
		}
		else
		{
			// Stop glowing
			m_pEntGlowEffect->DeregisterEnt( this );
		}

		m_bClientGlow = m_bEnableGlow;
	}
	else
	{
		// Maybe we changed color? Set it anyway (not a costly function at all)
		m_pEntGlowEffect->SetEntColor( this, Color(col.r, col.g, col.b, col.a) );
	}
}
#endif
Alternatively, you can control the color and the state strictly from the client or even via Game Events. The choice is yours, by registering entities this way you don't have to worry about messing up the rendering of the effect since everything is already taken care of for you.
ConVars
I exposed a couple of tweaking parameters that you can remove or keep in. You can achieve a FULL ENTITY glow by setting cl_ge_glowstencil to 0. The effect is not perfect and is not meant to be, but it looks pretty cool if you want to glow an entire entity.
You can tweak the global scale of the glow effect with cl_ge_glowscale. It is defaulted to 0.4 with 1.0 being pretty darn intense and 0.2 to be faint.
Notes and Future Work
OK, this tutorial is a lot to stomach. It took a large effort on my part to get everything to work properly going from LUA and Garry's Mod to C++. I hope you guys are appreciative and use it gratuitously in your mods. Here are some hints and tricks I learned along the way:
The effect is only valid for entities that are in your PVS. That means if the entity leaves your vis leaf it won't be rendered anymore and the effect is nil. I am not sure of a way to correct this, but I think there is a flag that you can set to force an entity to be rendered even if it is outside of your PVS.
Valve's Blur Shaders (BlurFilterX and BlurFilterY) are completely messed up. They both take different parameters and BlurFilterY is disabled by default. BlurFilterX's strength does not seem to be editable via parameters. If someone can get a blur shader to work properly please let me know, as of right now BlurFilterY mainly drives the effect of this glow.
If you want to edit this code it is very important to keep scale in mind. If you modify the size of the glow buffers or add new ones make sure they use the same settings that these use.
I added a possible future feature to change the scale of blurring PER ENTITY while also having a global scale. This is useful for smaller entities where more blur is needed to get them to stand out. The only problem with this is you would have to add another glow buffer and blur the entity onto m_GlowBuff2 and the new glow buffer THEN write the blurred texture onto m_GlowBuff1. It might be easier to have two effects running, one for small entities and one for large entities and have scale offset for each. However, if you split the implementation and don't share the buffers, you might get bleeding between stencil applications.
Compatibility with other Screen Space Effects
Consider replacing the final DrawScreenSpaceQuad call with DrawScreenEffectMaterial, which, unlike DrawScreenSpaceQuad, updates the full frame buffer before rendering. Only do this if you plan to use multiple screen space effects at once time, because this method of rendering is a little bit more expensive. The reason this is needed is that if you've already rendered one screeneffect, and you go to render another that uses the framebuffer without updating the framebuffer (So that it contains the first effect), you'll lose the screeneffect you rendered initially.


