Blendmodulate
There are two varieties of masking available that can produce sharp edges from low res data.
The first technique was added between Dod and Episode 1, and is used to produce interesting blends on world materials. The first thing we used it for was the snow in dod_kalt.
The first option is "$lightwarptexture". This option allows you to specify a 1 dimensional texture which is used as a kind of per-material color correction which is applied in lighting space. The brightness of the lighting calculated in vrad will be used to index horizontally into this texture, and the texture pixel fetched will be used to modulate the lighting. In our particular usage here, the desired was to produce a subtle bluish tint in the darker regions of the snow, while keeping the brighter regions a pure white.
The second option added was the "$blendmodulatetexture" option. This option is intended for materials using the "WorldVertexTransition" shader. This option can greatly improve the visual quality of texture blends. In a perfect world, this option would be used for pretty much ALL terrain blends. It replaces the smooth gradient blend between the textures with complex patterns.
Examples
All of the following examples use the material "dod/materials/ground/blendcobblesnow01.vmt".
Option 1: $lightwarptexture
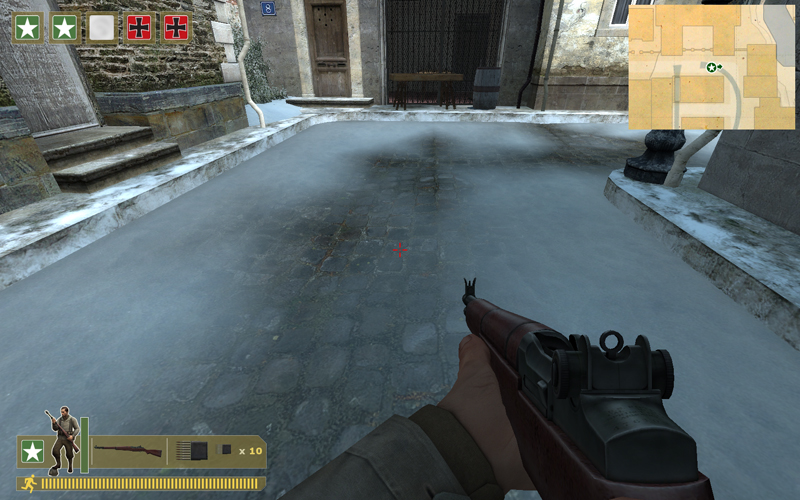
This example shows the scene without the $lightwarptexture option:
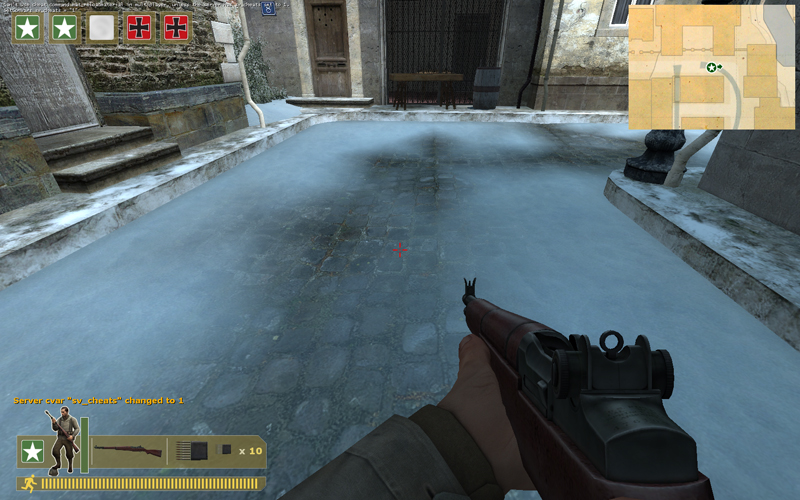
This is what happens when "$lightwarptexture" "ground\snow_warp" is added:
The effect is used subtly here. The lightwarptexture used looks like this:
It shifts from blueish on the left (this is used for the shadows) to a neutral gray at the right (for the highlights). Note that this texture only goes to a 50% gray. 50% gray in the warp texture leaves the lighting unmodified. The reason 50% is used instead of 100% is for overbright support. If you put 100% white in this texture, you will end up with your lighting DOUBLED in brightness. Having this overbright option allows you to use this texture not just for color shifting but also for contrast control.
Other possible uses of this option include toon shading, contrast enhancement, highlight softening, and more. While it was used in subtle manner for dod_kalt, more dramatic effects are possible. Generally only a fairly low resolution texture will be needed for this ramp.
On non-dx9 devices, this option is ignored (which will usually look OK).
Option 2: $blendmodulatetexture
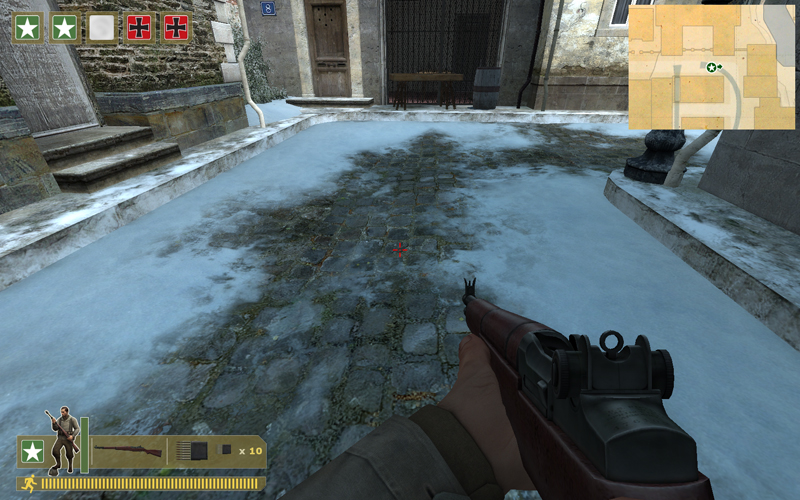
Compare this image to the one above:
The difference is the addition of the line: "$blendmodulatetexture" "ground/snowblendtexture" to the .vmt.
The blendmodulatetexture is a texture which is used to do 2 things on a per-texel basis:
- Control the sharpness of the blend. The color values in the red channel control the sharpness of the blend. A value of 255 will produce a very gradual blend, similar (but not identical) to what you get without using $blendmodulatetexture. A value of 0 will produce an "instantaneous" blend, with the transition between the two textures happening instantly (every pixel is one texture or the other with no in-betweens). Medium values will produce intermediate blend sharpness. This scene uses a value of "99" in the red component to produce a fairly sharp falloff. Note that although the dod_kalt snow/cobblestone blend uses a value of 99 for every texel of the red channel, using different values at different places in the texture has the potential to produce a more complex effect.
- Control the bias of the blend. The color values in the green channel control the center point of the blend (where the transition between the two textures happens). A value of 128 will produce the normal centered blend. texel values of less than or greater then 128 will bias the blend for that part of the image towards one texture or the other. The idea is to paint noise and patterns into this channel, so that the edge between the two textures becomes irregular, and to paint holes where the other texture shows through. For Dhabihs snow example, he has ragged edges between the two textures, and even has footprints punching holes through the snow. He also painted lines into his texture along the edges of the bricks to make them get snow along their edges.
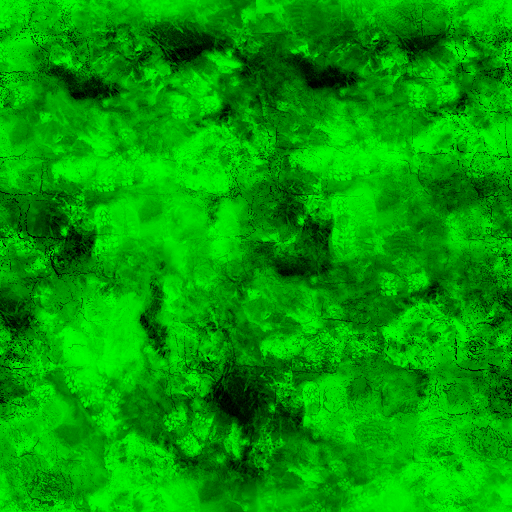
This is what the green channel in the blendmodulatetexture looks like:
Note: There is not always a need for this texture to be high resolution - high frequency blends can be produced even with low resolution modulation textures.
-Chris Green, Valve Software


