Igniting entities
Someone is currently in the process of editing this article. In order to prevent edit conflicts, please refrain from making edits until the other editor is done. This should not take more than 24 hours.
Igniting Entities
This tutorial uses an env_entity_igniter to light compatible entities on fire. First make a stick, (long, thin brush) tie it to a func_physbox (ctrl-t).
| Class: func_physbox | ||
| Keyvalues | Comments | |
| Name | physbox_pole | The name that other entities refer to this entity by. |
| Prop Data | None | If set, it will override this entity's health and damage taken from various weapons. |
The Prop Data was no set because it applies health, and we don't want our stick to break. You may also want to set the spawnflag "Only Break on Trigger", so that it will not break unless told to. You may also want to set the "preferred carry angles" so the the stick always points the same way while being carried, something like (-5, 0, 90) is a good place to start.
After you've created your physbox, you'll want to move the origin to end of the stick, because that's where the fire will sit once it is caught alight. The origin is a little circle in the 2D views, and a blue orb in the 3D views (only visible when the physbox is elected).
Next, make the env_entity_igniter, this can be placed anywhere on the map.
| Class: env_entity_igniter | ||
| Keyvalues | Comments | |
| Name | igniter | The name that other entities refer to this entity by. |
| Entity to ignite | !activator | Name of the entity to catch on fire. |
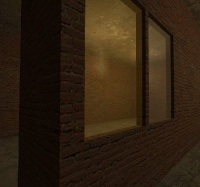
The first window is a typical One-way Glass.
- On one face it’s textured with glass/glasswindow070a
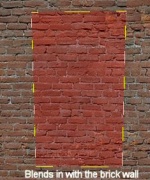
- On the opposite face it’s textured with the same brick texture I used on the walls: brick/brickwall003a
To browse for these textures:
- Click the Toggle Texture tool, or press Shift+A.
- Now click the Browse button.
- In the lower Filter area enter filter words like “glass”, “wall”, etc.
- Double-click on the texture you want to use.
- Now with the Face Edit tool still open Right-click on any brush face to texture it. (Left-Click selects)
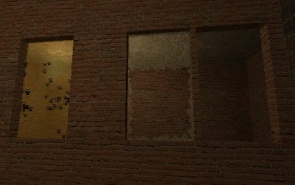
Starting from the left:
- Typical One-way Glass.
- Breakable Glass made with func_breakable_surf, more on that soon.
- Normal brush with nodraw on one face and a Glass texture on the opposite face.
- Layered textures created with func_illusionary entities.
One-way
The One-way Glass is created with a normal brush that has any opaque textured face opposite a Glass textured face. In this example I’ve used a brick texture and opposite that a glass texture.
Breakable
The Breakable glass is created by turning a normal brush into func_breakable_surf. Do that by selecting the brush and pressing Ctrl+T, choose func_breakable_surf, and finally click Apply.
The properties for our Breakable window are:
- Prop Data: Glass.Window
- Health: 80
- Material Type: Glass
- Fragility: 50
- Surface Type: Glass
- This Breakable glass is 1.0 units thick.
- Don’t make them thinner than 0.5 units thick and don’t make the too thick.
- Breakable glass gets textured on only one face, all other faces will be textured with nodraw, the easiest way to do that is create them entirely with nodraw and then use the Face Edit tool to apply the breakable glass texture.
The texture to use on that face is: glass/glasswindowbreak070a (Don’t use glass/glasswindowbreak070b)
Layered texture
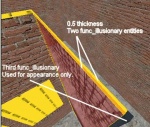
The last example is our layered texture, created with func_illusionary entities. The first brush is only textured on the outside face; metal/metalfence004a The next brush is textured on two faces;
- metal/metalgrate013a
- brick/brickwall003a
Conclusion
With the methods illustrated here you can create any type of One-way glass you need.
Keep in mind that while the nodraw texture doesn’t show it was invaluable in creating these effects.
Wrap up
There’s a lot more you can do, hopefully this article have stimulated your imagination.
Credits
- The tutorial was created by Bit Mage 14:37, 21 Mar 2008 (EST)
