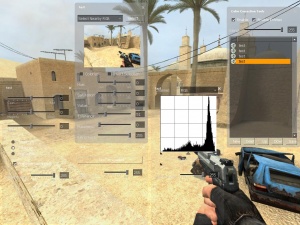
Color Correction Tools
Description of the tools in the Color Correction interface.
Layer Window
This window shows a list of all the layered operations that make up an effect. These layers can be created, destroyed and reordered from within this window.
Here are the functions of the basic controls:
Enable
Check this to enable the editable color correction effect.
Enable Entities
Check this to enable color correction from the entities in the scene. You may want to disable this during editing, or enable it to see how the new effect will interact with those in the level.
New
This button creates a new layer. You can also double-click in an empty section of the list as a shortcut.
Delete
Delete the selected layer.
Up/Down
Moves the selected layer up and down in the list.
Save
Save the effect to disk for use in an entity.
Other commands
- Clicking the icon next to a layer name will disable the layer. Click in the same space to re-enable.
- The Blend slider controls the blend factor of the selected layer.
- Double-click on a layer to open the edit dialog for that layer.
- <Alt>+double-click on a layer to make a duplicate of the layer.
Create Layer dialog
This dialog is spawned when you want to create a new layer. Select the type of operation, and optionally give the layer a name. If no name is given, the name of the operation will be used instead.
Curves dialog
Similar to curves control in standard image editing software. Click and drag points to adjust the shape of the curve. Click anywhere on the curve to create a new point.
Levels dialog
Similar to the levels and histogram control in standard image editing software. Use the handles at the bottom of the histogram to adjust the input levels. Use the handles below to adjust the output level.
Selected HSV dialog
This is the most complex of the operators. Behaves similarly to the Adjust > Replace Color dialog in Adobe Photoshop. There are several selection modes to choose from in the drop-down list. The preview window shows a small preview of the current scene. Selected areas are masked with a red color. Click in this window to select a color using the current selection mode. This selection will then be reflected in the mask. If you hold <Ctrl> while clicking it will add the color to a list of selected colors, enabling multiple selections.
The Hue, Saturation and Value sliders are used to adjust those parameters of the current selection. Fuzziness controls the softness of the selection, somewhat like feathering. Tolerance is only active in the "Select Nearby ..." modes, and is used to specify a range for the selection.
When the Colorize button is checked the operation will replace the hue of the selected pixels, rather than simply adjusting it. This is useful for apply tints over the frame.
Invert Selection simply inverts the current selection. Note that performing selections while Invert Selection is active may be somewhat unintuitive.
Lookup tool
The Lookup tool is used to load a lookup that has been previously saved to disk or output from an external package. Simple click on the button to bring up a file loading dialog.
Color Balance
The Color Balance operator is almost exactly the same as the equivalent functionality in standard image editing software.
