Steam Skins
Steam skins allowed Steam users to change the appearance of their clients. However, the Steam client has been revamped to use Chromium Embedded Framework.
With this change, the Steam client does not support skins, with various VGUI development tools for the client being removed.
History
Removal of skin support for the Friends List on July 24th 2018
Removal of skin support for the Library on February 1st 2023
Removal of skin support for the main window frame and all additional windows in Steam Beta on May 12th 2023
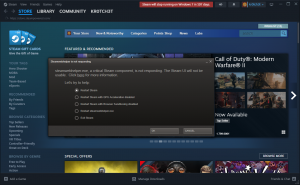
The above update was later pushed to all users since June 15, 2023, completely removing skin support for almost everything. However for users who have previously selected a custom Steam skins prior to this update, very few dialogs appears to be continue using the old VGUI, with custom skins still appears to be working on it, such as the dialogs that appear when a Steam executable is not responding, or when Steam is running in Windows compatibility mode. See image below.
As the official skin support (for VGUI) has been removed, with the new CEF-based UI doesn't providing any official way of changing skins, it was unofficially replaced by SFP (formerly SteamFriendsPatcher)
Setting Up
The first thing you need to do is make sure steam is not running, then navigate to your steam directory ![]()
C:\Program Files(x86)\Steam and copy the ![]()
resource folder and paste it into your skin folder in ![]()
...\Steam\skins\Your Skin Name folder. The resource folder contains all of the images and the assets needed to customize the Steam UI. Then go to your steam shortcut and go to it's properties and select the shortcut tab. In the target box type -dev after the directory. Now when you launch steam go to the settings and select the Interface tab, you can now select your skin.
Changing Colors
While in any Steam window you if you set up the -dev launch option correctly you should be able to press F6 and the "vgui layout debugger" should appear. While the debugger is open you cannot interact with anything in the Steam Client until you close the window. Using the debugger you can (like inspect element in web browsers) see what code and scripts are behind what you click and the colors and you can use it to identify which colors you can edit, and which file houses the code for text and images.
Further Documentation
More information for creating/editing skins can be found on the VGUI Editing page.
External Links
steamskins.org, a website with tons of skins for Steam
steamcustomizer.com, an easy to use skin generator
