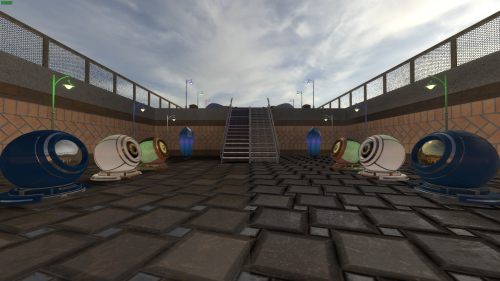
Adding PBR to Your Mod
Introduction
The goal of this article is to show you how to implement Thexa4's PBR shader into your own Source SDK 2013 mod.
Physically Based Rendering (PBR) is an approach in computer graphics that seeks to render graphics in a way that more accurately models the flow of light in the real world.
Many PBR pipelines have an accurate simulation of photorealism as their goal. Feasible and quick approximations of the bidirectional reflectance distribution function and rendering equation are of mathematical importance in this field. Photogrammetry may be used to help discover and encode accurate optical properties of materials. Shaders may be used to implement PBR principles.
Implementing this shader will allow you to use the metalness/roughness PBR workflow in materials.
Requirements
- Ability to compile shaders.
- Ability to compile the solution.
Implementation
Before doing anything, we need to download the files we need.
You can do this by going to the links below, clicking the "Raw" button and once the page has loaded right-click and select "Save As...".
Then all you have to do is save each one of the files to your Source mod's code directory under src/materialsystem/stdshaders/.
After you've finished saving the files, open the game_shader_dx9_*.vpc file appropriate for your situation (base/hl2mp/hl2/episodic), and add the PBR files within $Project "Shaders" like so:
$Project "Shaders"
{
	$Folder "fxc"
	{
		$File	"pbr_ps30.fxc"
		$File	"pbr_vs30.fxc"
	}

	$Folder "Source Files"
	{
		$File	"pbr_dx9.cpp"
	}
}
We do this so that when we refresh the solution they will appear in the solution explorer.
Shader Compilation
We need to compile the shaders that we have before we can use them. Create a file in src/materialsystem/stdshaders/ named mymod_dx9_30.txt and add this inside of it:
//
// vs 3.0   ps 3.0   shaders collection
//
//  These shaders are forced to compile as shader model 3.0
//  using the new compiler.
//	    _ps30.vcs
//	    _vs30.vcs
//

// There are no examples of such shaders in the SDK, but add yours here.

pbr_vs30.fxc
pbr_ps30.fxc
Adding a new text file for shader compilation will allow you to compile the PBR shaders without affecting the standard LightmappedGeneric shaders.
This will also reduce compile times significantly.
Now open the buildsdkshaders.bat file using Notepad and edit this part below from:
%BUILD_SHADER% stdshader_dx9_20b		-game %GAMEDIR% -source %SOURCEDIR%
%BUILD_SHADER% stdshader_dx9_30			-game %GAMEDIR% -source %SOURCEDIR% -dx9_30	-force30
To:
%BUILD_SHADER% mymod_dx9_20b		        -game %GAMEDIR% -source %SOURCEDIR%
%BUILD_SHADER% mymod_dx9_30			-game %GAMEDIR% -source %SOURCEDIR% -dx9_30	-force30
This will allow you to use the custom text file that we made earlier to compile our PBR shader.
After that, we can now start the shader compilation by running buildhl2mpshaders.bat, buildhl2shaders.bat or buildepisodicshaders.bat depending on your mod's base.
Make sure you've followed the Shader Authoring article to the point where the newly compiled shaders will be properly placed on your mod's shaders/fxc/ folder.
If the shaders compile without problems, go back to your source code directory /src/ and run createallprojects.bat.
Run the solution and build shaders in Release.
VMT Setup
Here is an example VMT, something you would use on a model:
PBR
{
        $basetexture  "models\props\pbr_asset_d"
        $bumpmap      "models\props\pbr_asset_n"
        $mraotexture  "models\props\pbr_asset_mrao"
        $emissive     "models\props\pbr_asset_e"

        $envmap       "env_cubemap"
        $model        "1"
}
- Will be the Base Color texture.
- Will be the Normal texture.
$mraotexture
- Will be the MRAO texture.
$emissive
- Will be for any glowing sections of the model.
env_cubemap.Fixes
Physics props turn black when used with the PBR shader after 2-3 seconds due to Prop Sleeping. After a set time, props "bake" their lighting for optimization.
You can bypass this by typing r_PhysPropStaticLighting 0 on the console or by hardcoding it in src/game/client/c_physicsprop.cpp.
Here is how you can hardcode it:
Above #include "tier0/memdbgon.h" add this:
#define PBR_CHANGE
Then find ConVar r_PhysPropStaticLighting("r_PhysPropStaticLighting", "1"); and turn it into this:
#ifdef PBR_CHANGE
	ConVar r_PhysPropStaticLighting( "r_PhysPropStaticLighting", "0" );
#else
	ConVar r_PhysPropStaticLighting( "r_PhysPropStaticLighting", "1" );
#endif
Conclusion
And that's it! You should now have PBR in your mod.
You can find a list of all the shader parameters you can use when creating materials here:
