Ru/Dota 2 Workshop Tools/Scripting/Debugging Lua scripts
< Ru | Dota 2 Workshop Tools | Scripting
Jump to navigation
Jump to search
Начало
Отладчик Lua использует сборку Eclipse LDT.
Настройка отладки содержит следующие шаги:
- Установка Eclipse LDT
- Создание и настройка нового проекта
- Настройка новой конфигурации отладчика
- Открытие окна отладки
- Подлкючение отладчика Eclipse LDT к игре
Установка Eclipse LDT
- Скачайте Eclipse LDT со страницы: https://eclipse.org/ldt/.
- Распакуйте содержимое архива в папку.
- Из распакованной папки запустите исполняемый файл LuaDevelopmentTools.exe. Выберете папку для workspace(рабочее пространство), где Eclipse LDT будет хранить информацию о проектах.
Настройка нового проекта LDT
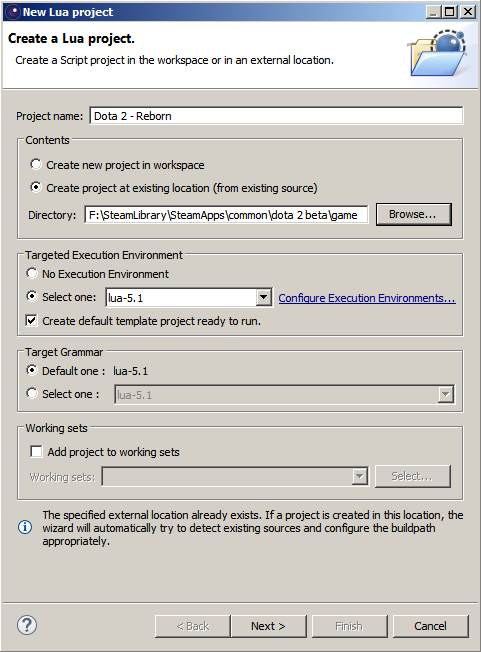
- Нажмите File->New->Lua Project, чтобы открыть меню создания нового проекта
- Задайте имя проекта
- Во вкладке Contents, выберете "Create project at existing location...," и выберете директорию вашей карты dota2, например \Steam\steamapps\common\dota 2 beta\game\dota_addons\holdout_example_1.
- Нажмите Next. Eclipse LDT просканирует содержимое директории, это может занять некоторое время. Когда сканирование завершится, игнорируйте предупреждение "Your project has no source folder defined," и нажмите Finish.
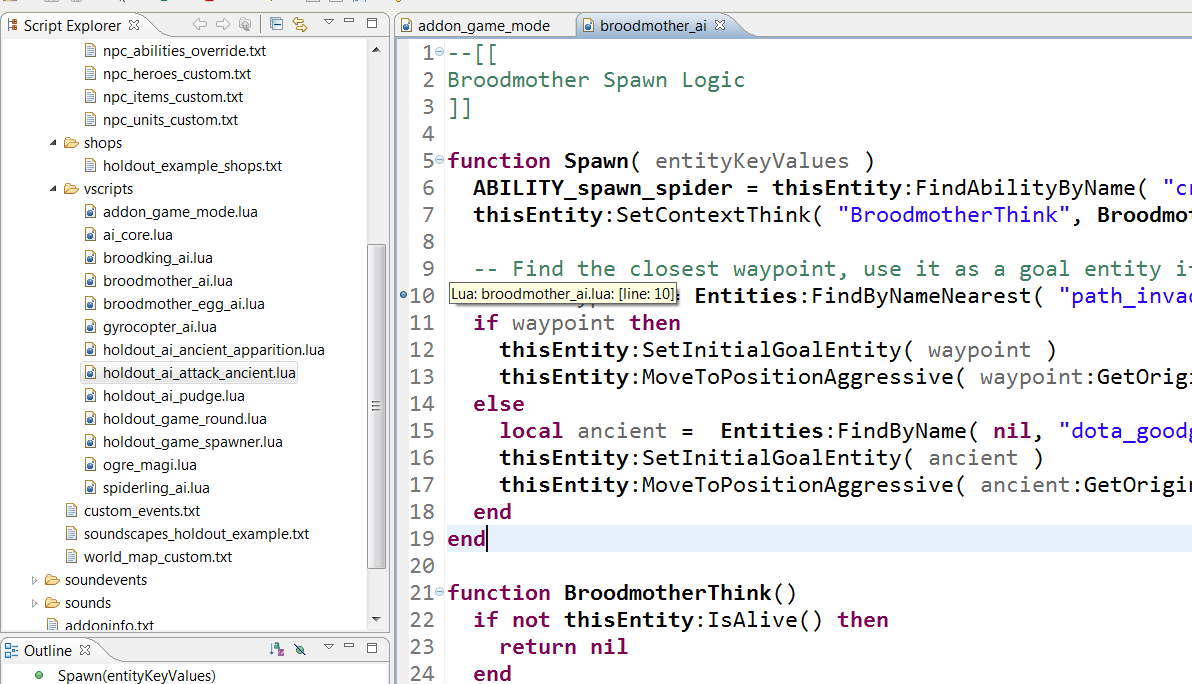
- Теперь в Script Explorerе можно открывать lua скрипты и ставить точки останова, два раза щелкнув на поле строки кода.
- Также рекомендуется включить показ номеров строк. Для этого нажмите Window->Preferences->General->Editors->Text Editors->Поставить галочку на строке Show line numbers.
Setting up a new LDT debug configuration for the project
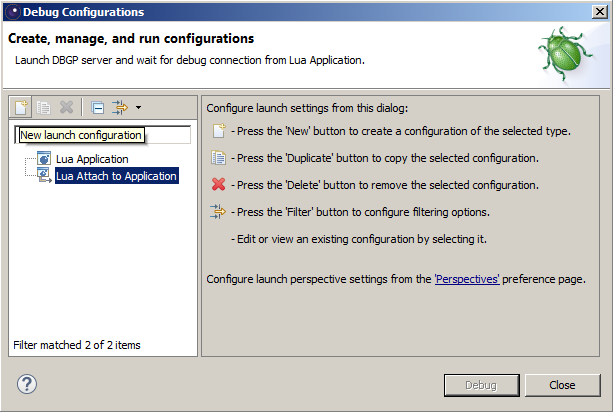
- Click Run->Debug Configurations, to bring up the Debug Configurations dialog
- Select "Lua Attach to Application"
- Click the "New launch configuration" button
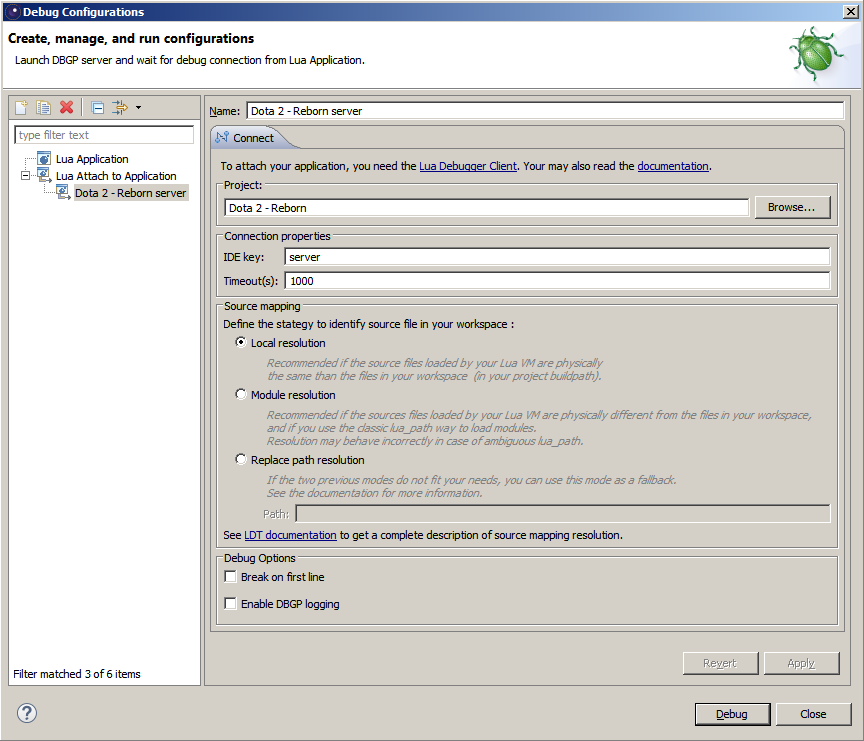
- Give the new configuration a name
- Set the "IDE key" to "server", or "client", to attach to the server or client script VM, respectively
- Set the Timeout(s) to a large value
- Hit "Apply". Close the Debug Configurations dialog.
Opening the Debug Perspective in LDT
Most debugging functionality is actually available via another window on LDT: the Debug perspective. Bring this up by clicking Window->Perspective->Open Perspective->Debug.
Connecting LDT to the game
- Start the game and wait till the frame loop starts. The in-game debugging server only gets to run during the frame loop, and LDT can time-out waiting for a response if this takes too long.
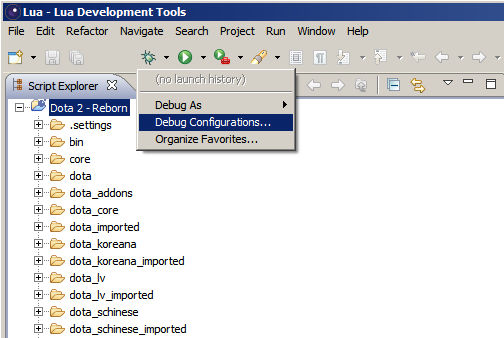
- Click the drop-down arrow next to the bug icon and select Debug Configurations.
- In the Debug Configurations dialog, select the configuration you just created, and hit Debug. Recently used configurations appear in the bug icon drop-down, for quick access.
- In VConsole2, type "script_attach_debugger" to debug the server VM, or "cl_script_attach_debugger" to debug the client VM. Note that for this to work, the Debug Configuration selected must have the IDE key set to "server" and "client" respectively.
