L4D2 Level Design/Scavenge Finale
This page will teach you how to make a scavenge finale. keep in mind of the amount of space needed to create a genuinely fun experience for the player.
The Map
This needs to be farely large not the size of a gauntlet finale but enough to where the cans are spread so the survivors have to run many different ways to reach their goal.
Essentials
- The Weapons:
Consider that the survivors need starting weapons for when they reach the finale. They still need to be able to stock up for the challenge ahead of them. There should also be weapons and items on the way so that survivors can hold out for a bit to heal or resupply. There will be many different ways someone playing your map will go, for example someone that likes to take their time compared to someone that sparatically runs through your map to try and quickly grab the cans to escape.
The Design:
It's totaly up to you how you want to make your map but these are just some ideas to bear in mind.
- Make branching paths so that the survivors can duck in and out of buildings for supplies or even gascans for the finale.
- always keep in mind players dont constantly want to have to go down narrow hallways make open areas for large combat scenarios where the survivors can go down a street for example but be attacked by infected spawning in nearby building or special infected attacking them from rooftops.
- make long areas so the survivors cant just walk ten feet and put the cans into whatever your using as the gas collector, they need a good and hard run, plus it has the added effect of making them feel accomplished.
The necessary entities
- Firstly you will need a trigger_finale so the survivors can start the finale. In that entity you will find various settings one of these is the finale type it's default is set to standard you will want to change this to scavenge. For now leave the use delay the same but change the first use delay to five seconds so the survivors know what their doing by making a sound play that tells them what to do. (this is not necessary but it does help)
- Second you want to place a game_scavenge_progress_display and inside it you can change the max value to whatever you want for the purpose of this tutorial We'll make it 8. Then change its name to something unique for ours it will be scav_progshower. Next you will need a math_counter change ts name property to scav_counter. then leave its initial value to 0 but make its max the max that you made so for this tutoial it was 8 and leave it's min value to 0.
- Third you will need to make the place where you will fill up. This can be anything that looks like a nozzle of some kind, in fact their is a model with this in mind. You will need to place a prop_dynamic then in its model field look up radio_generator_fillup or just generator and look for the model that looks like a nozzle. Place this within reachable distance from the player (player height is about 64 units so The best value will be 45 to 50 units) so not too high or not too low. Set its glow color to the color white or the values 255 255 255.
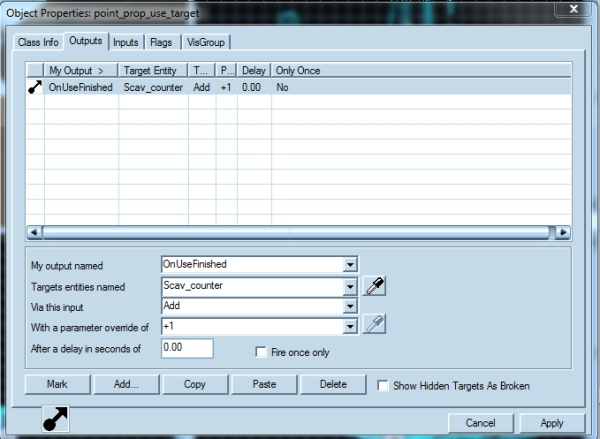
- Fourth you will need to place a point_prop_use_target on the nozzle.
Then open its properties menu and under the gas nozzle field set that to scav_nozzle. Go to your nozzle and open its properties and set its name field to scav_nozzle. Make sure you parent your nozzle to whatever you are putting it on because if its the escape vehicle itself when it leaves the nozzle will remain there and look farely awkward. Then go back to your point_prop_use_target and open up its output menu then click add
- My output named: OnUseFinished
- Targets entities named: Scav_counter
- Via this input: Add
- With a parameter override of: +1
The Cans
Its very simple now, in the entities tab look up weapon_scavenge_item_spawn place it down somewhere go into its properties and change its name to scav_gascans. Then go back to your finale trigger, go into its properties then outputs tab and click add
- My output named: UseStart
- Targets entities named: scav_gascans
- Via this input: TurnGlowsOn
- My output named: UseStart
- Targets entities named: scav_nozzle
- Via this input: StartGlowing
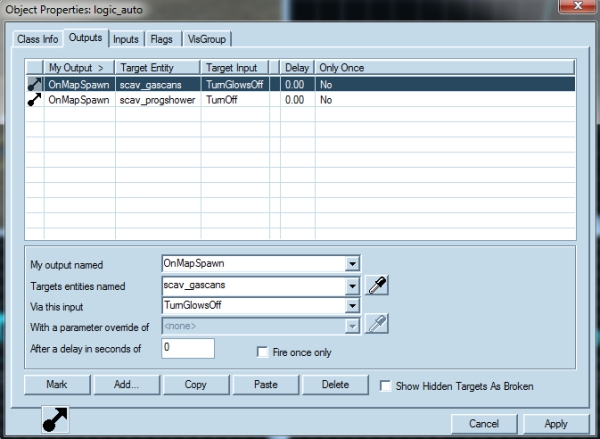
Also go to your entities tab and look up logic_auto go to its outputs tab and click add
- My output named: OnMapSpawn
- Targets entities named: scav_gascans
- Via this input: TurnGlowsOff
click add again and then put the following
- My output named: OnMapSpawn
- Targets entities named: scav_progshower
- Via this input: TurnOff
- My output named: OnMapSpawn
- Targets entities named: scav_nozzle
- Via this input: StopGlowing
The escape Vehicle
- This is usually a prop_dynamic with animations but it really can be anything.
For the purpose of this tutorial we'll just use the c130 for the prop_dynamic escape vehicle.
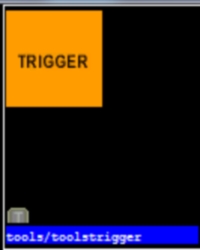
Go to the texture Browser and look up trigger it will look like this:
Make a brush the size of your escape vehicle for us this would be the inside of the c130 and hit enter to crete it then hit ctrl+t to tie to entity and under the class type put in trigger_multiple, give this the name escape_trigger and then set the entire team number to survivor and set start disabled to yes close out of its properties.
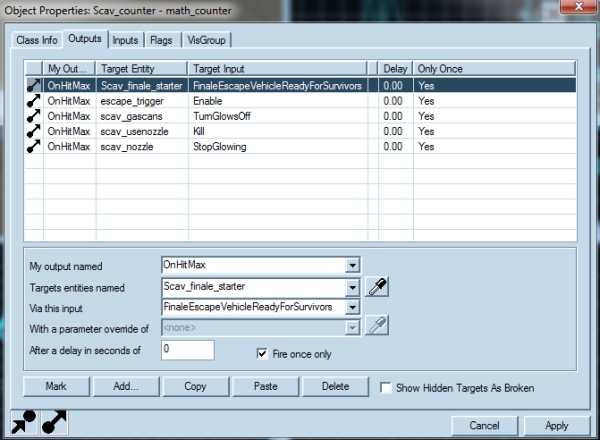
Go back to your math_counter and go to the outputs tab click add
- My output named: OnHitMax
- Targets entities named: Scav_finale_starter
- Via this input: FinaleEscapeVehicleReadyForSurvivors
- Fire Once Only: click the checkbox
- My output named: OnHitMax
- Targets entities named: escape_trigger
- Via this input: Enable
- Fire Once Only: click the checkbox
- My output named: OnHitMax
- Targets entities named: scav_gascans
- Via this input: TurnGlowsOff
- Fire Once Only: click the checkbox
- My output named: OnHitMax
- Targets entities named: scav_usenozzle
- Via this input: Kill
- Fire Once Only: click the checkbox
- My output named: OnHitMax
- Targets entities named: scav_nozzle
- Via this input: StopGlowing
- Fire Once Only: click the checkbox
Then go back to your finale_trigger and change its name field to Scav_finale_starter.
The Escape
You will need to make a box outside the reach of your map with 4 info_survivor_position change their orders to one is 1 the next is 2 and so on until you've reached 4. Then change their names to whatever order you put them in so survivor_pos1 survivor_pos2 etc.
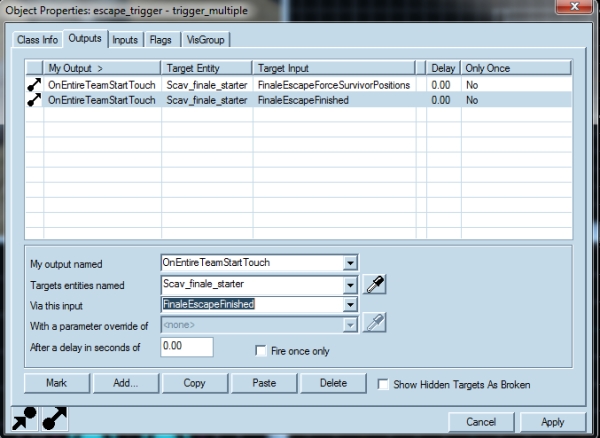
- Go to your trigger_escape (the trigger brush you made in the escape vehicle) and go to its outputs and click add
- My output named: OnEntireTeamStartTouch
- Targets entities named: Scav_finale_starter
- Via this input: FinaleEscapeForceSurvivorPositions
- My output named: OnEntireTeamStartTouch
- Targets entities named: Scav_finale_starter
- Via this input: FinaleEscapeFinished
Then go back to the texture browser look for clip it will look like this:
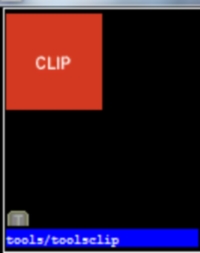 Surround the survivor positions outside the reach of your map with this brush and hit enter to crete it. Then click crtl+t to tie to entity and under class type in func_brush. Look for Solid BSP: set to yes then find Solidity: set to always solid and change its name to clip_scavend hit apply and close its properties menu.
- Go back to your trigger_multiple and in the properties field click add
- My output named: OnEntireTeamStartTouch
- Targets entities named: clip_scavend
- Via this input: Kill
Cover the floor of the escape vehicle with nodraw so you can walk on it and creatnavigation meshes within it.
Then in the entities tab look for point_veiwcontrol_multiplayer. Place this somewhere to view your escape vehicle leaving, then open up its properties and in its name field name it outro_cam. Then look for an env_fade entity place 2 of these. In the first one name it fade1 and in its hold time set that to 1 and in its fade out/in set that to .15.
- What this does is instead of seeing the player and then quickly switching to the camera it allows for a fade to happen the survivors will teleport to their positions and then the veiw will come back to the camera.
In the outputs tab of the first fade click add
- My output named: OnFade
- Target entities named: fade2
- Via this input: Fade
- After a delay of: 6
Then go back to the trigger_escape that is inside the escape vehicle and go to its outputs click add
- My output named: OnEntireTeamStartTouch
- Target entities named: outro_cam
- Via this input: Enable
Go to the fade2 entity and in its outputs tab click add
- My output named: OnFade
- Target entities named: outro_stats
- Via this input: RollCredits
Then in the intities tab look up env_outro_credits. In its properties set its name field as outro_stats.
Run your map, once you are in the level hit the tilde key {~} to open the developer console then type
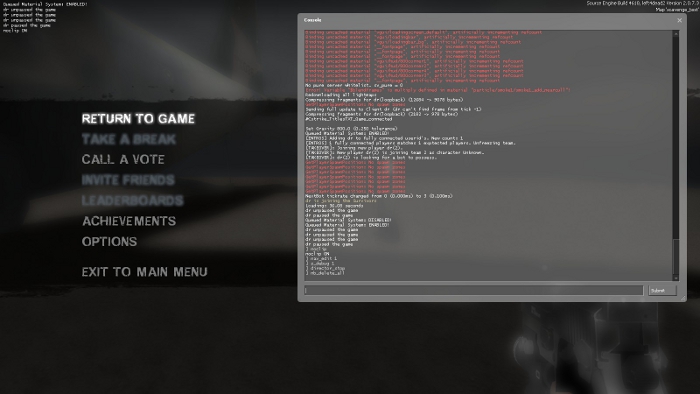
- sv_cheats 1- This allows cheats to be enabled in game
- noclip- Allows free movement around the map, you will not be blocked by anything
- nav_edit 1- Enables nav mesh editting
- z_debug 1- Allows you to see navigation attributes and all zombies on the map
- director_stop- Stops the director from spawning zombies
- nb_delete_all- Deletes all npc's on the map
Then go to you finale area and open the developer console and type in
- nav_mark_walkable- Marks a walkable point in the map marked by a purple pyramid that can be generated into nav meshes
- nav_generate_incremental- Generates the nav meshes to a certain distance from the nav_mark_walkable
Then make sure you have the areas selected that you want around the finale trigger and far out areas for the zombies to spawn from and type in the developer console
- mark Finale- This an attribute for nav meshes that is used in the final level of a campaign and is used in conjunction with a trigger_finale
Then go to your player start area and mark those areas with checkpoint and player start.
finally you need to go to your escape vehicle and mark those nav areas inside with rescue vehicle.
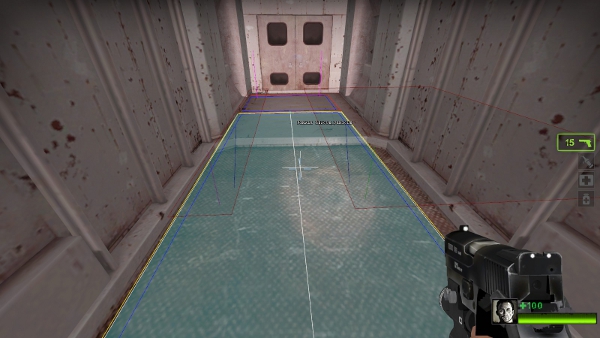 After that is done type in the developer console
- nav_analyze- this analyzes all the nav meshes and writes a file named "yourmapname".nav in the maps folder of your left4dead2 folder.
This is all you need to make a scavenge finale, I hope this works for all of you.
